

This documentation provides all the details you need to use the Dreams Rent theme, understand how Dreams Rent is structured, and perform the most common tasks. If you require further assistance on topics not covered in this documentation, please contact us via our support forum.
We assume that you already have WordPress installed and ready to use. If you do not, please see the WordPress Instructions section below to help you get started.
To use the Dreams Rent theme, you need WordPress 6.4 or higher, PHP 8.0 or higher, and MySQL 5.6 or higher. Apart from the necessary WordPress requirements, the following server configuration settings are recommended to ensure the theme works properly.
- WordPress Before Install – general info before you install WordPress.
- WordPress Requirements – general info for WordPress requirements.
- WordPress Installation – general info about WordPress and installation instructions.
- WordPress Lessons – general lessons for WordPress.
To use the Dreams Rent WP theme, you need WordPress 6.4 or higher, PHP 8.0 or higher, and MySQL 5.6 or higher. This theme has been tested on PHP 8.0, 8.1, and 8.2. PHP 7.x is not supported. In addition to the necessary WordPress requirements, the following server configuration settings are recommended to ensure the theme works properly.
- WordPress – Version 6.4 or higher (tested up to 6.7)
- PHP – Version 8.0 or higher (PHP 8.2 recommended)
- MySQL – Version 5.6 or higher ( OR MariaDB version 10.1 or higher)
- memory_limit – 512M or higher
- max_execution_time – 300 or higher
- upload_max_filesize – 256M or higher
If you are not sure about your current server configuration, you can use the following guide to adjust the settings as needed. Changing server requirements. We still recommend contacting your hosting provider for assistance with these changes.
We assume that your WordPress website is already set up. The next step is to install the theme. To get started, download the full package from your Envato / ThemeForest Downloads page and locate the Dreams Rent theme.
The downloaded package contains:
- dreamsrent.zip – the installable parent theme file
- dreamsrent-child.zip – the child theme (use this for all customisations)
- documentation/ – this documentation
The Dreams Rent Core and Dreams Rent Widgets plugins are
bundled inside the theme at
dreamsrent/inc/tgm-activation-plugin/. They are
registered and installed automatically via the TGM Plugin
Activation library. You do not need to
upload these plugins manually — WordPress will prompt you to install
them as required plugins immediately after you activate the theme.
There are two ways to install the theme in your WordPress environment:
FTP Client:
You can use an FTP client (e.g., FileZilla) to upload the theme and plugins directly to your server.
Through WordPress Admin:
You can install it directly using the WordPress theme upload interface (recommended for most users).
Step 1:
Log into your web server with FTP client software (e.g., FileZilla).
Step 2:
Unzip the downloaded package. Locate dreamsrent.zip inside the package and unzip it to get the Dreams Rent theme folder.
Step 3:
Upload the extracted Dreams Rent theme folder to
wp-content/themes/ on your server.
Step 4:
Activate the theme. Go to Appearance → Themes and click Activate on Dreams Rent.
Step 5 – Install bundled plugins via FTP:
The downloaded package includes a
/dreamsrent/inc/tgm-plugin-activation/ folder
containing the Dreams Rent Core and Dreams
Rent Widgets plugin ZIPs. Unzip each and upload the
extracted plugin folders to wp-content/plugins/. Then
activate each plugin via Plugins → Installed
Plugins in WordPress Admin.
Before you start importing the demo content, make sure you have installed all the required plugins so that the demo content imports properly. Install and activate each plugin one at a time in the order listed below.
Note: Install & Activate plugins one by one in the order shown.
| Plugin Name | Source | Version Tested | Free / Premium |
|---|---|---|---|
| DreamsRent Elementor | Bundled inside theme — auto-prompted via TGM
Plugin Activation
(inc/tgm-activation-plugin/) |
1.0 | Bundled with theme |
| DreamsRent Booking | Bundled inside theme — auto-prompted via TGM
Plugin Activation
(inc/tgm-activation-plugin/) |
1.0 | Bundled with theme |
| Redux Framework | WordPress.org | 4.4.x | Free |
| WooCommerce | WordPress.org | 8.x | Free |
| Elementor | WordPress.org | 3.x | Free |
| One Click Demo Import | WordPress.org | 3.x | Free |
| Taxonomy Images | WordPress.org | 5.x | Free |
| Recent posts widget | WordPress.org | 5.x | Free |
| Advanced Category and Custom Taxonomy Image | WordPress.org | 5.x | Free |
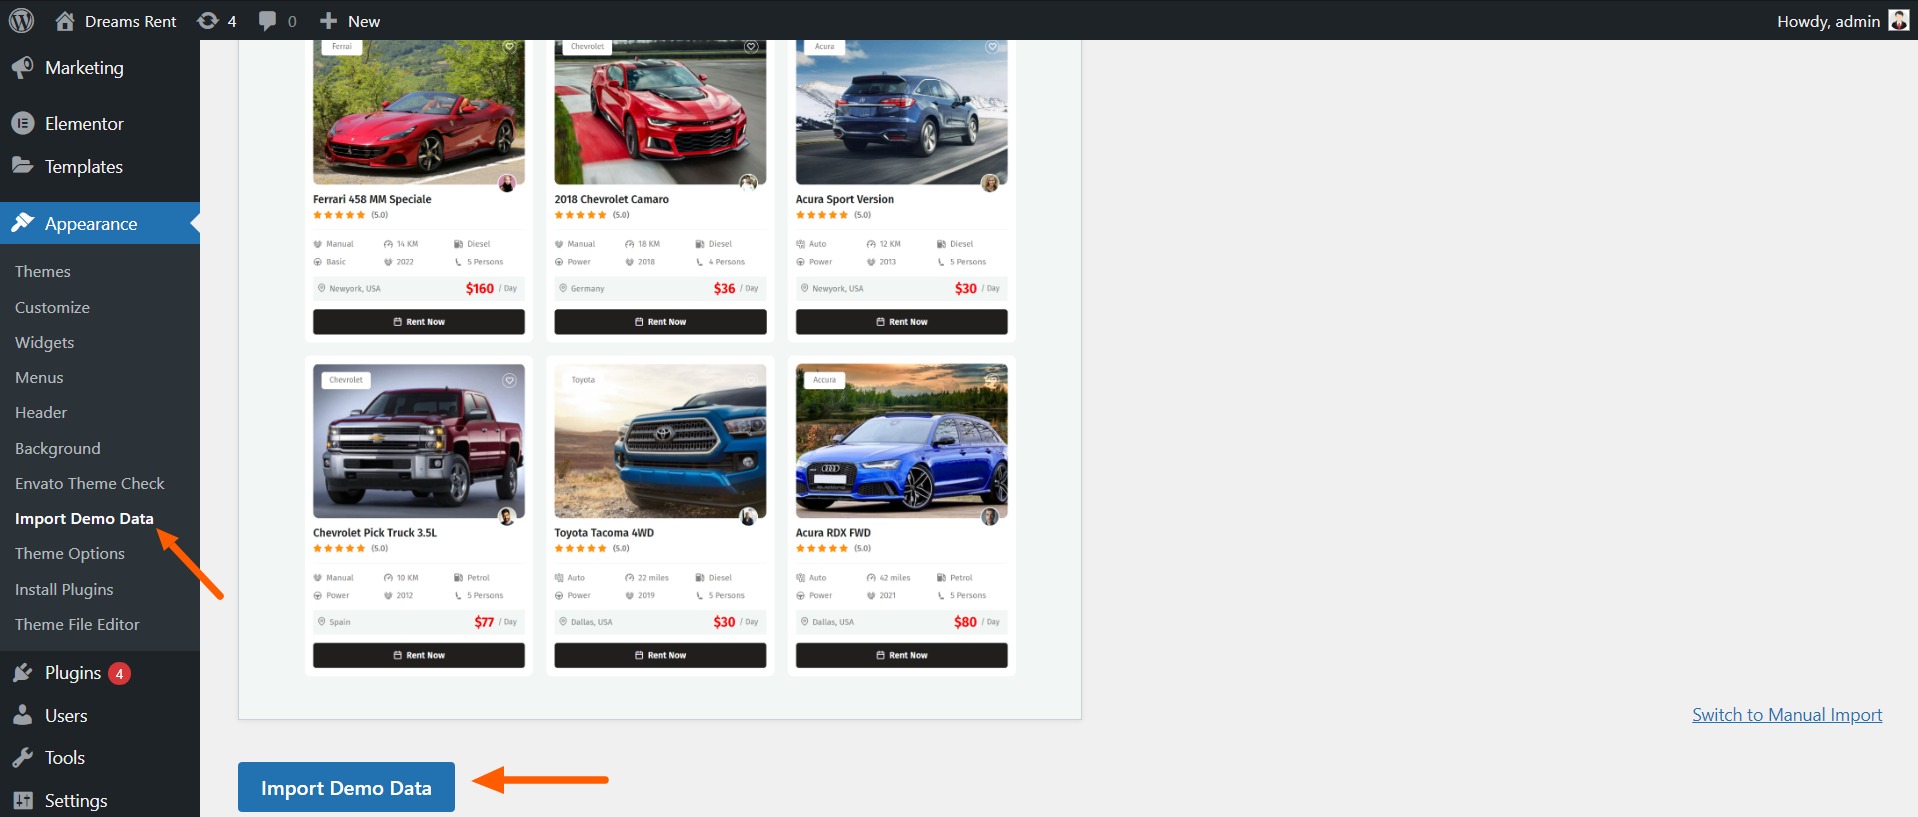
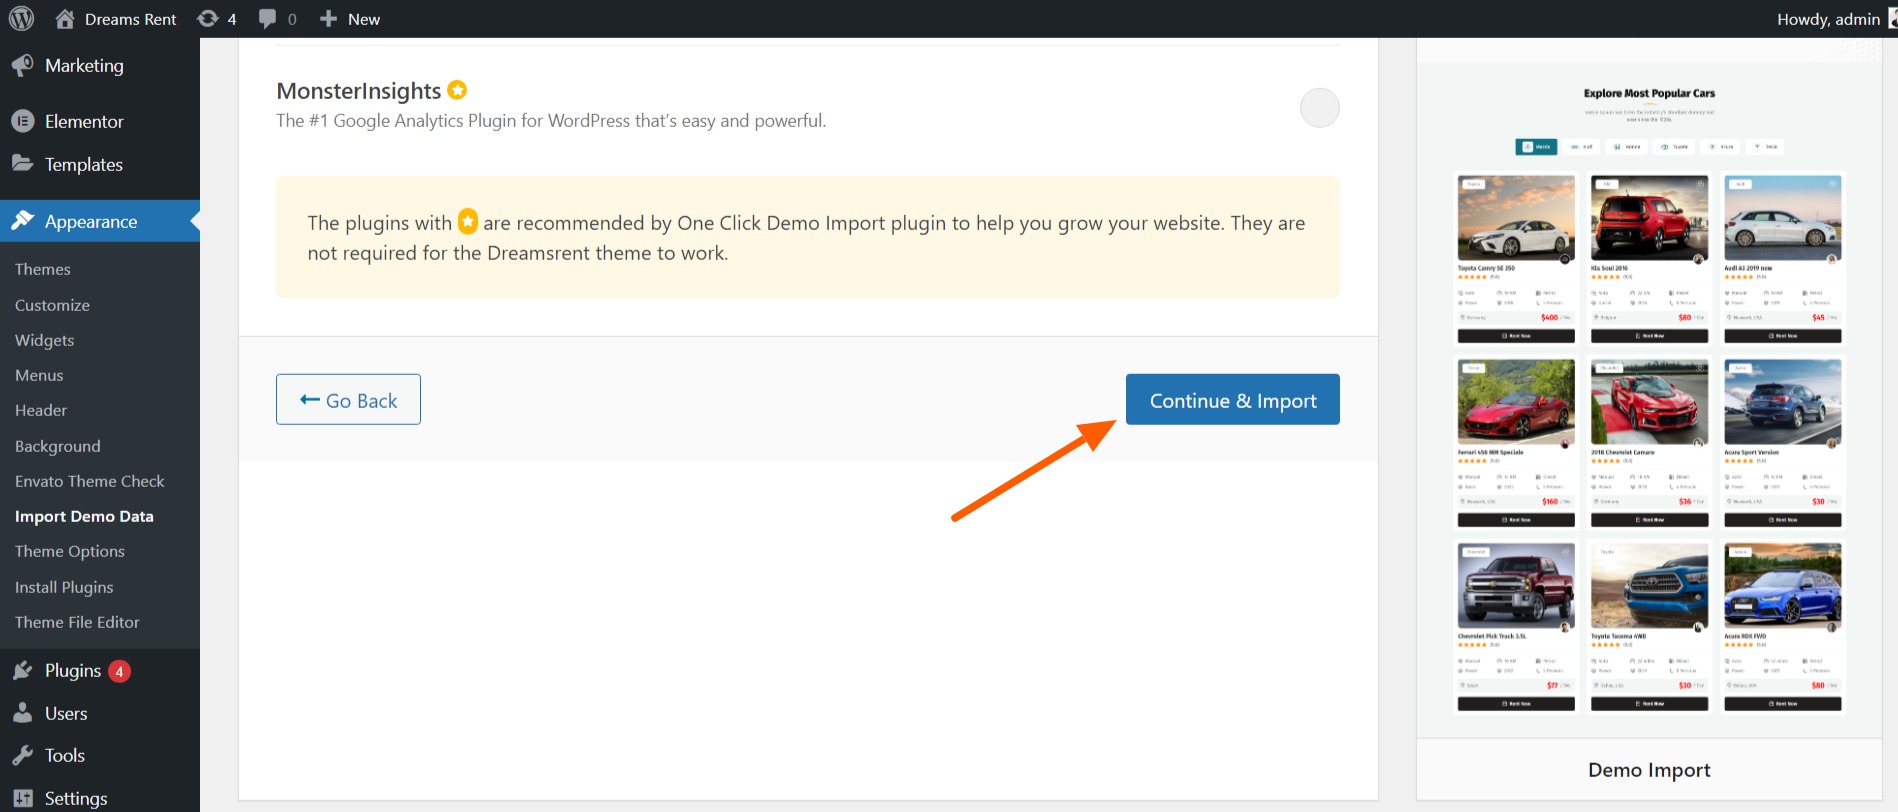
To import the demo, go to Appearance → Import Demo Data. Click Import Demo Data, then click the Import Demo button and wait a few minutes for the process to complete.
After importing the demo content, go to Elementor → Settings → Features Tab → Inline Font Icons and change the setting from DEFAULT to INACTIVE. This is required for icons to render correctly.
If the demo import times out or shows a white screen, try the following:
- Add
define( 'WP_MEMORY_LIMIT', '512M' );to yourwp-config.phpfile. - Ask your host to set
max_execution_timeto 300 or higher. - Re-run the import from Appearance → Import Demo Data.
- If images are missing after import, go to Tools → Import and re-run the media import.
The downloaded package is organised as follows. All custom modifications should be made in the Dreams Rent-child theme — never edit the parent theme files directly, as they will be overwritten on update.
Dreams Rent-package/
├── DreamsRent.zip            ← Installable parent theme
├── DreamsRent-child.zip      ← Installable child theme (use for all customisations)
└── documentation/ ← This documentationThe Dreams Rent Core and Dreams Rent
Widgets plugins are bundled inside the theme at
DreamsRent/inc/tgm-activation-plugin/. There is no separate
plugins folder in the download package. After you activate the theme,
WordPress will automatically display a prompt to install these required
plugins via the TGM Plugin Activation library.
Never modify files inside the DreamsRent/ parent
theme folder directly. Always use the DreamsRent-child
theme or WordPress hooks/filters for customisations.
A child theme is required for any customisations you want to survive theme updates. The download package includes a pre-built child theme — DreamsRent-child.zip — which you should install and activate instead of modifying the parent theme directly.
Installing the Child Theme
- Go to Appearance → Themes → Add New → Upload Theme.
- Upload
DreamsRent-child.zipand click Install Now. - Click Activate. The parent Dreams Rent theme must also be installed (but does not need to be active).
Child Theme functions.php — Minimum Setup
The child theme's functions.php correctly enqueues the parent theme
styles. The essential code is:
<?php
/**
 * Dreams Rent Child Theme functions.php
 */
add_action( 'wp_enqueue_scripts', 'DreamsRent_child_enqueue_styles' );
function DreamsRent_child_enqueue_styles() {
    wp_enqueue_style(
        'DreamsRent-parent-style',
        get_template_directory_uri() . '/style.css'
    );
    wp_enqueue_style(
        'DreamsRent-child-style',
        get_stylesheet_uri(),
        array( 'DreamsRent-parent-style' )
    );
}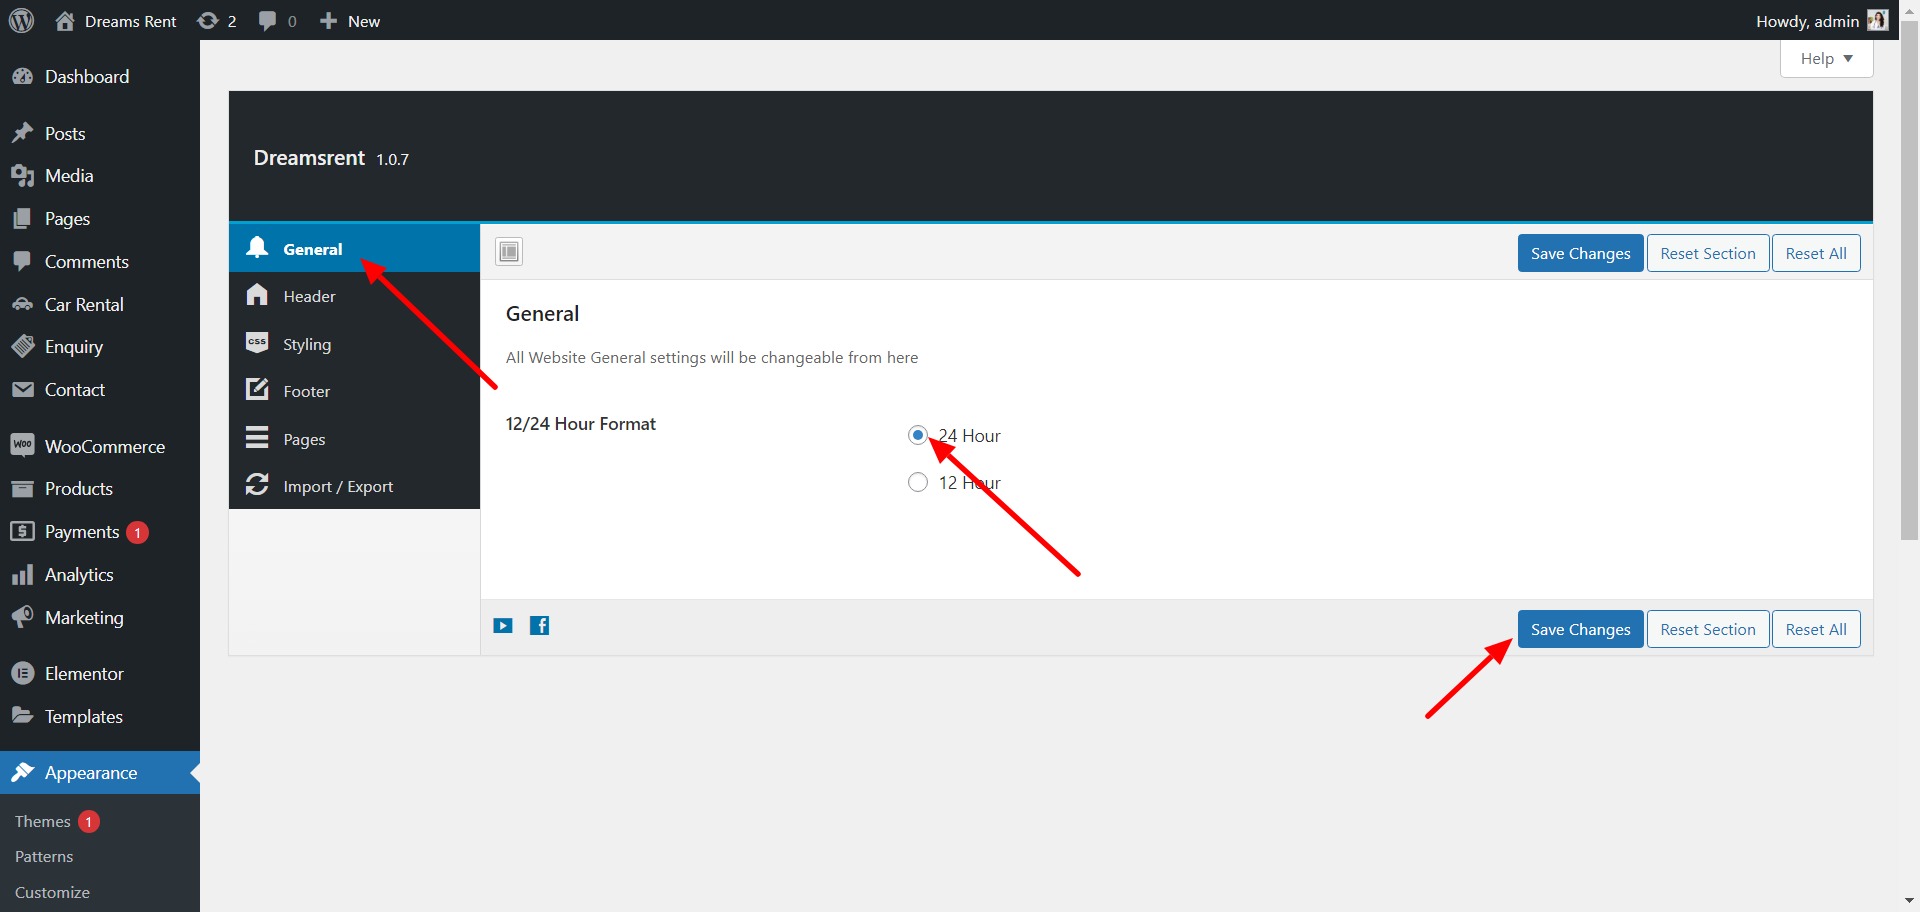
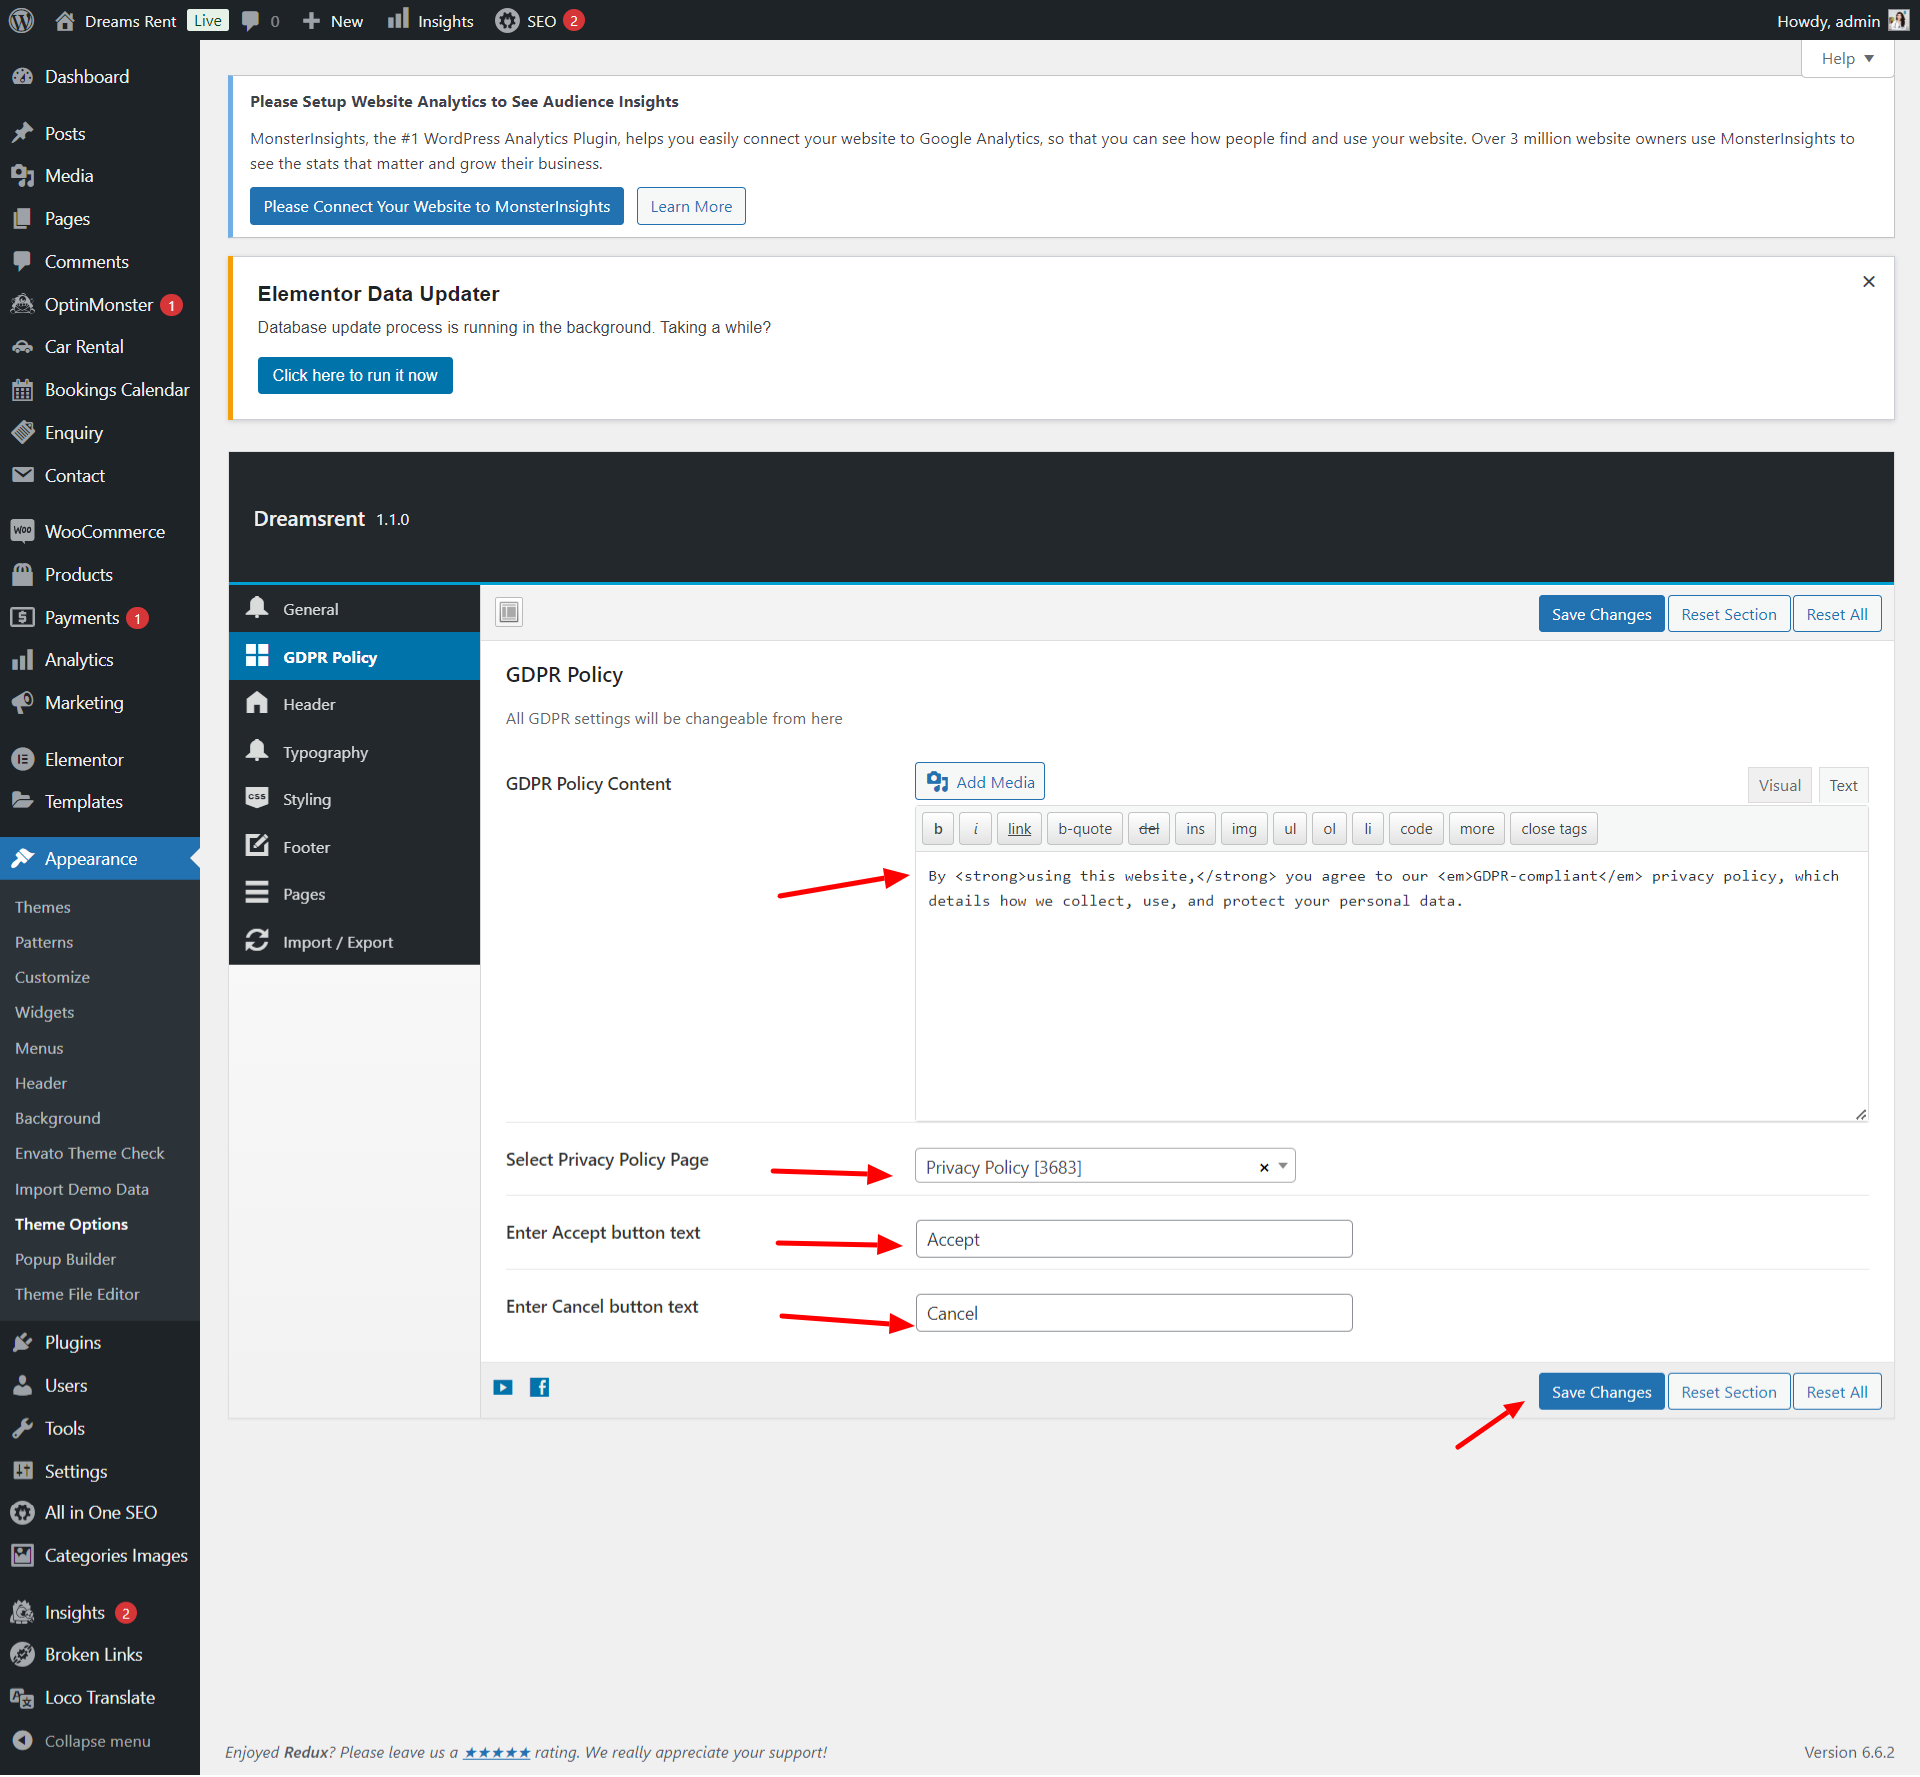
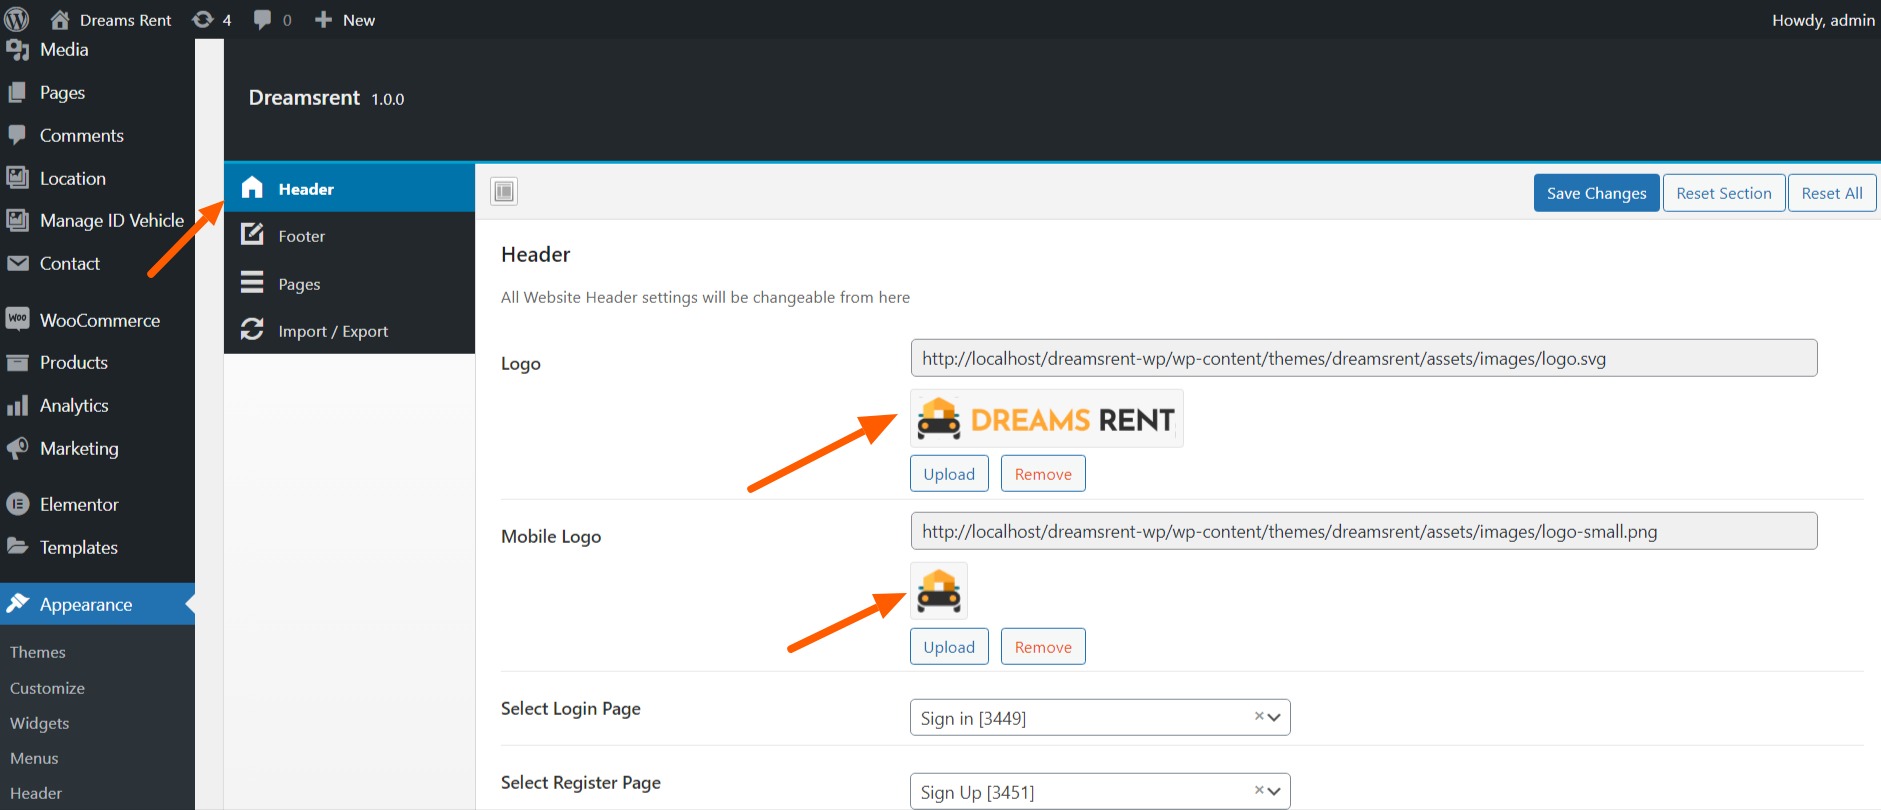
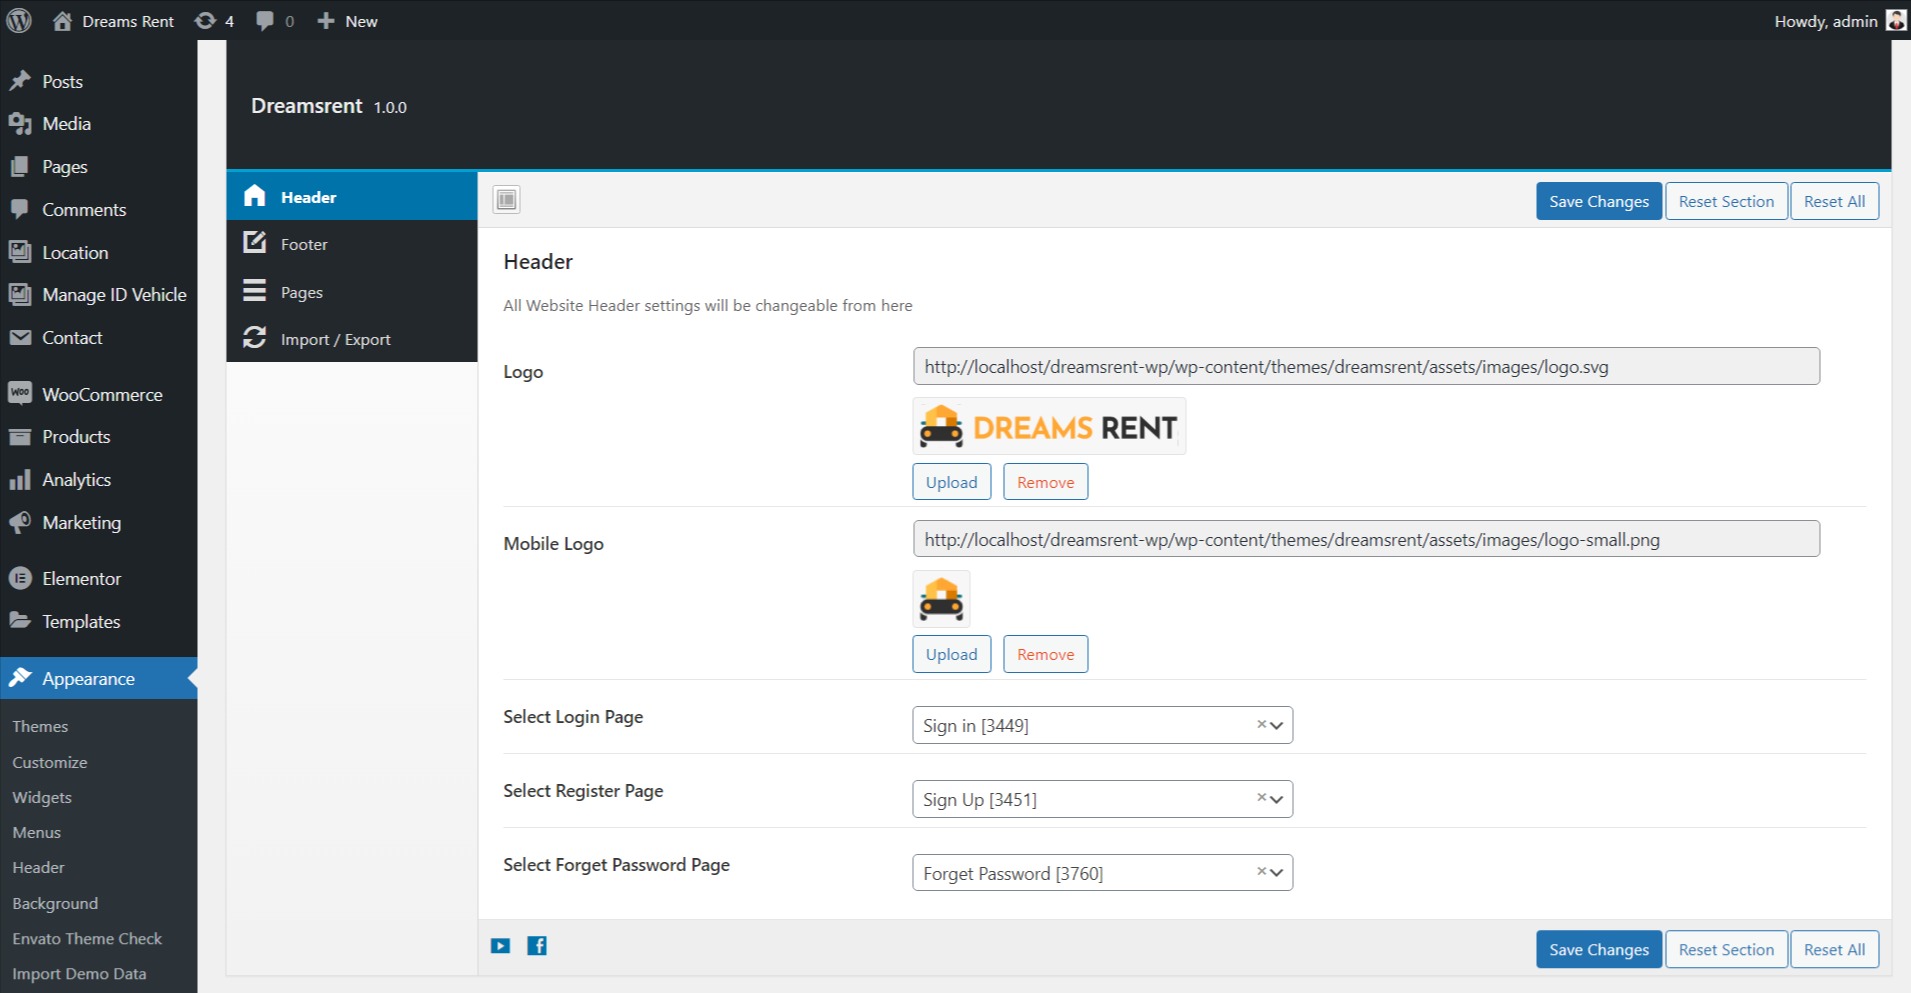
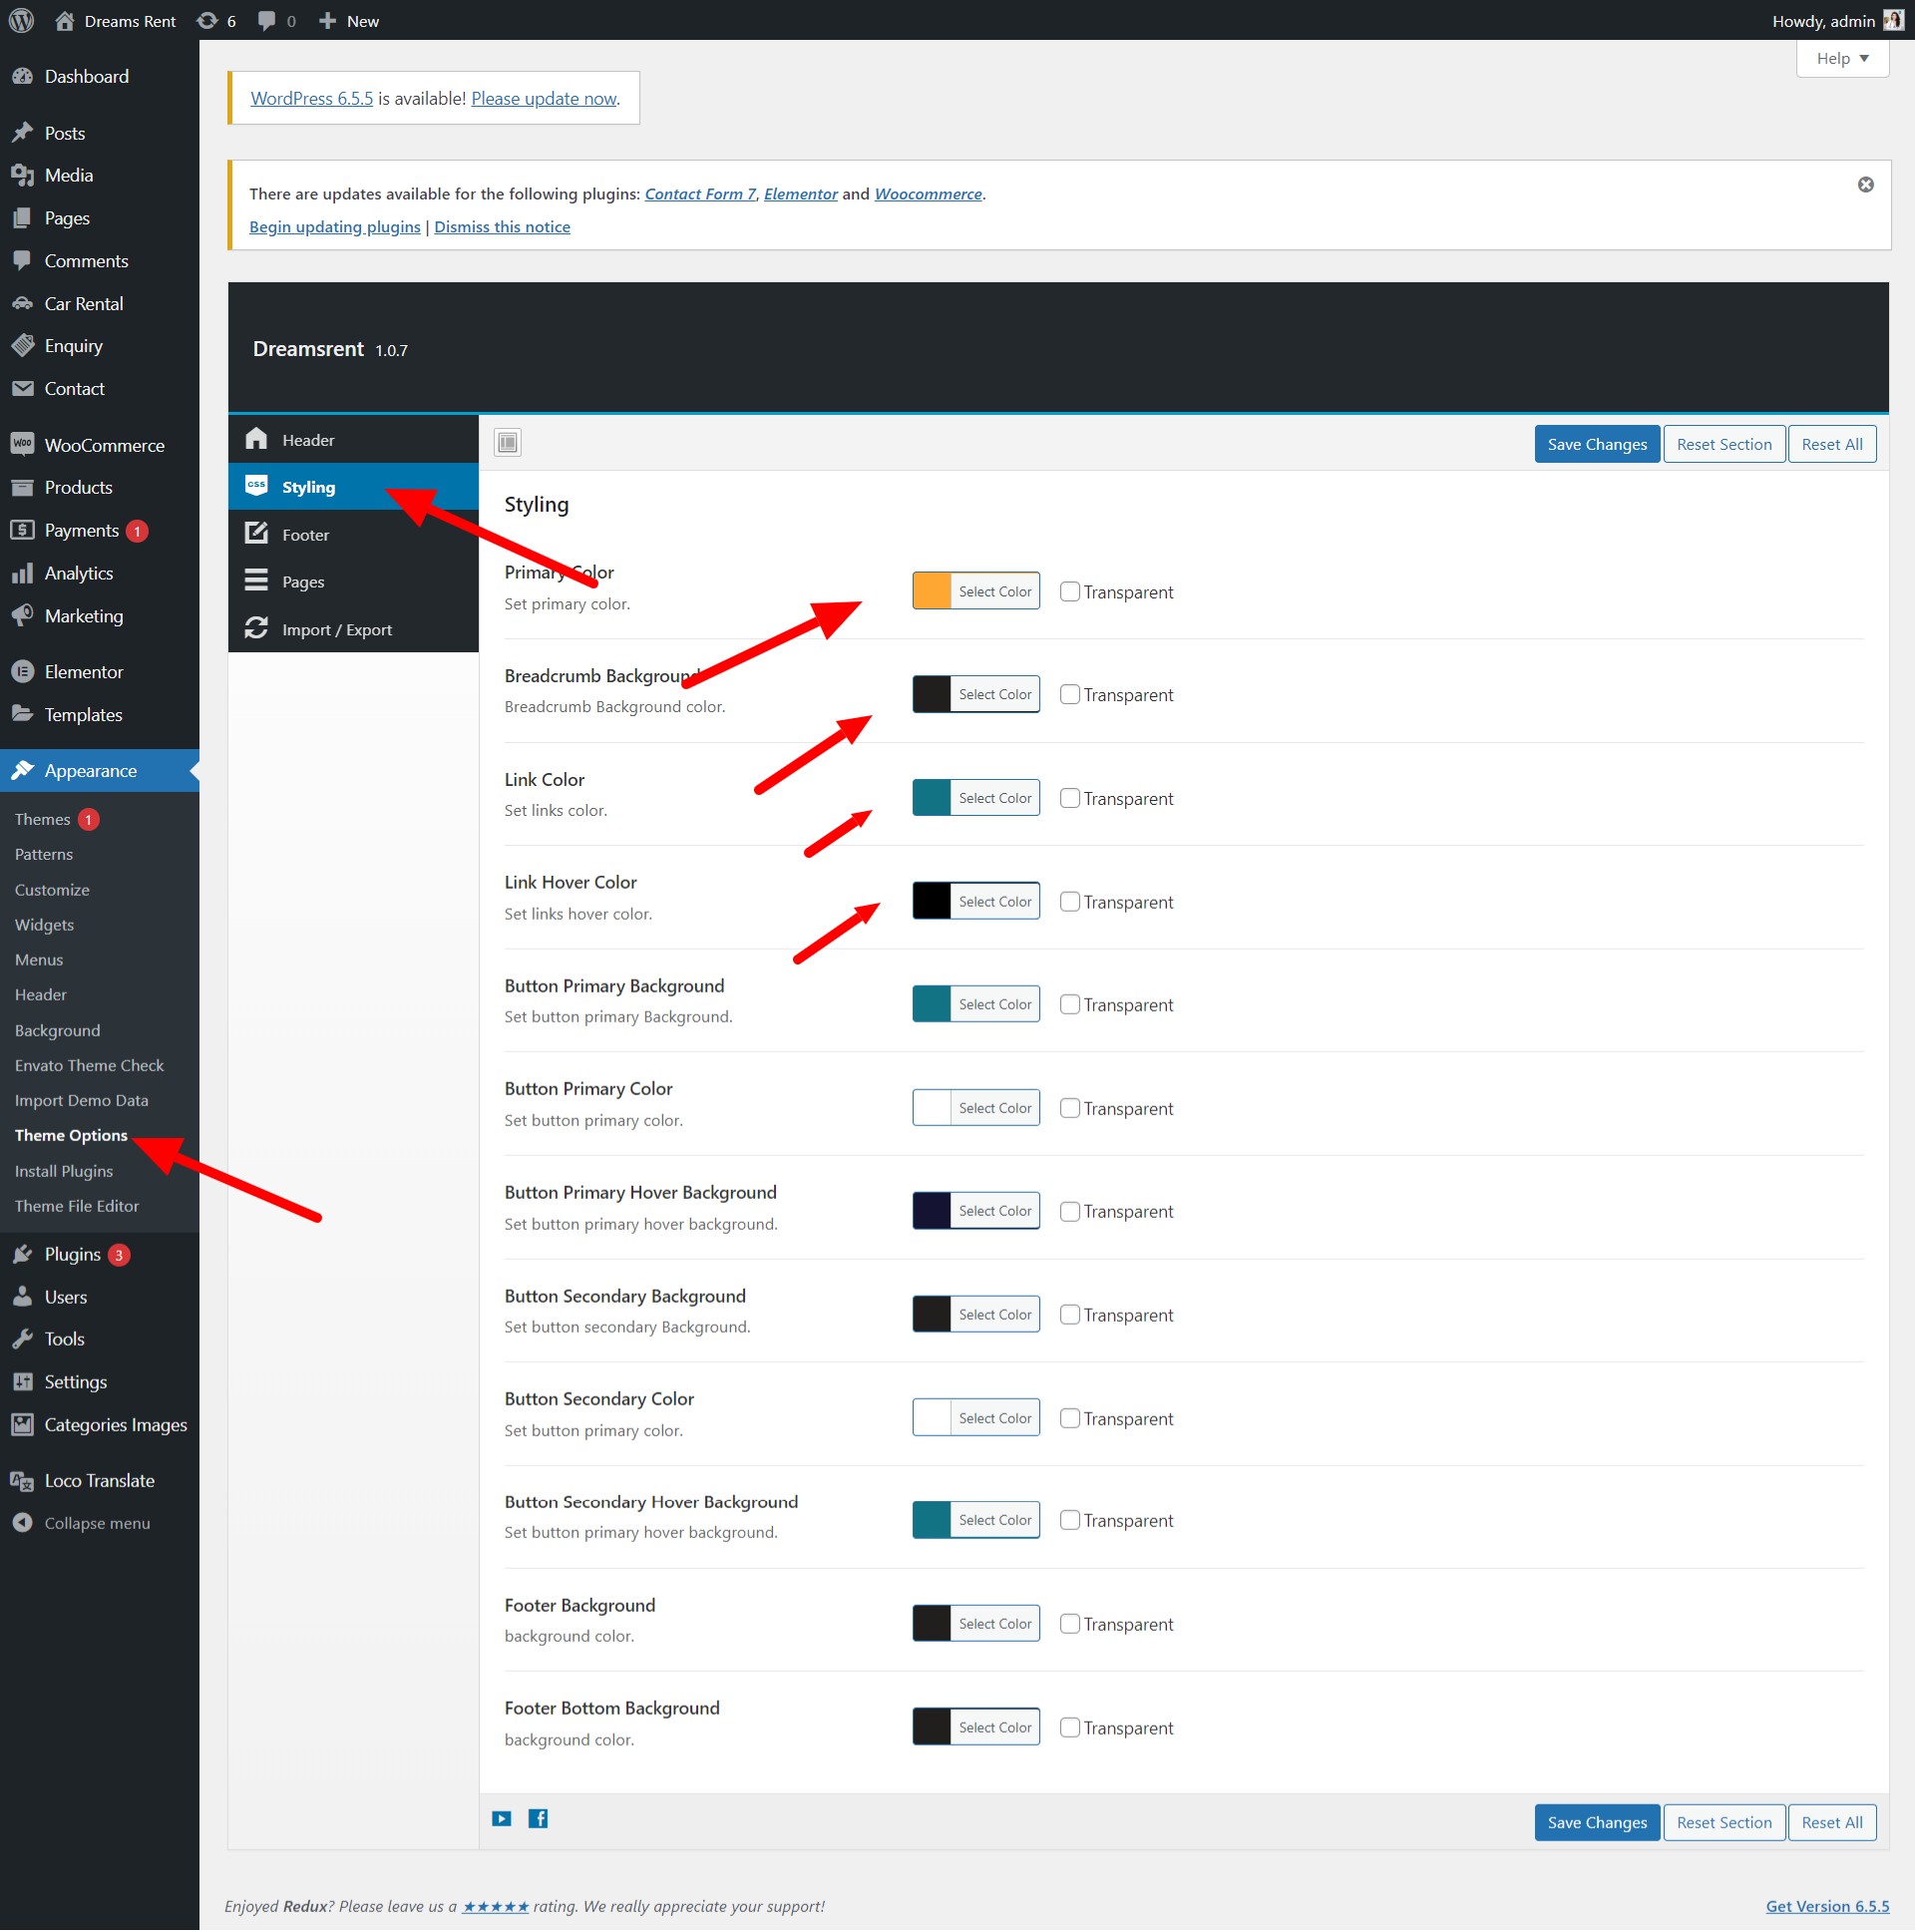
When you import the demo all the settings will be set automatically for the header. So you can see the change logo navigate under Appearance > Theme Options
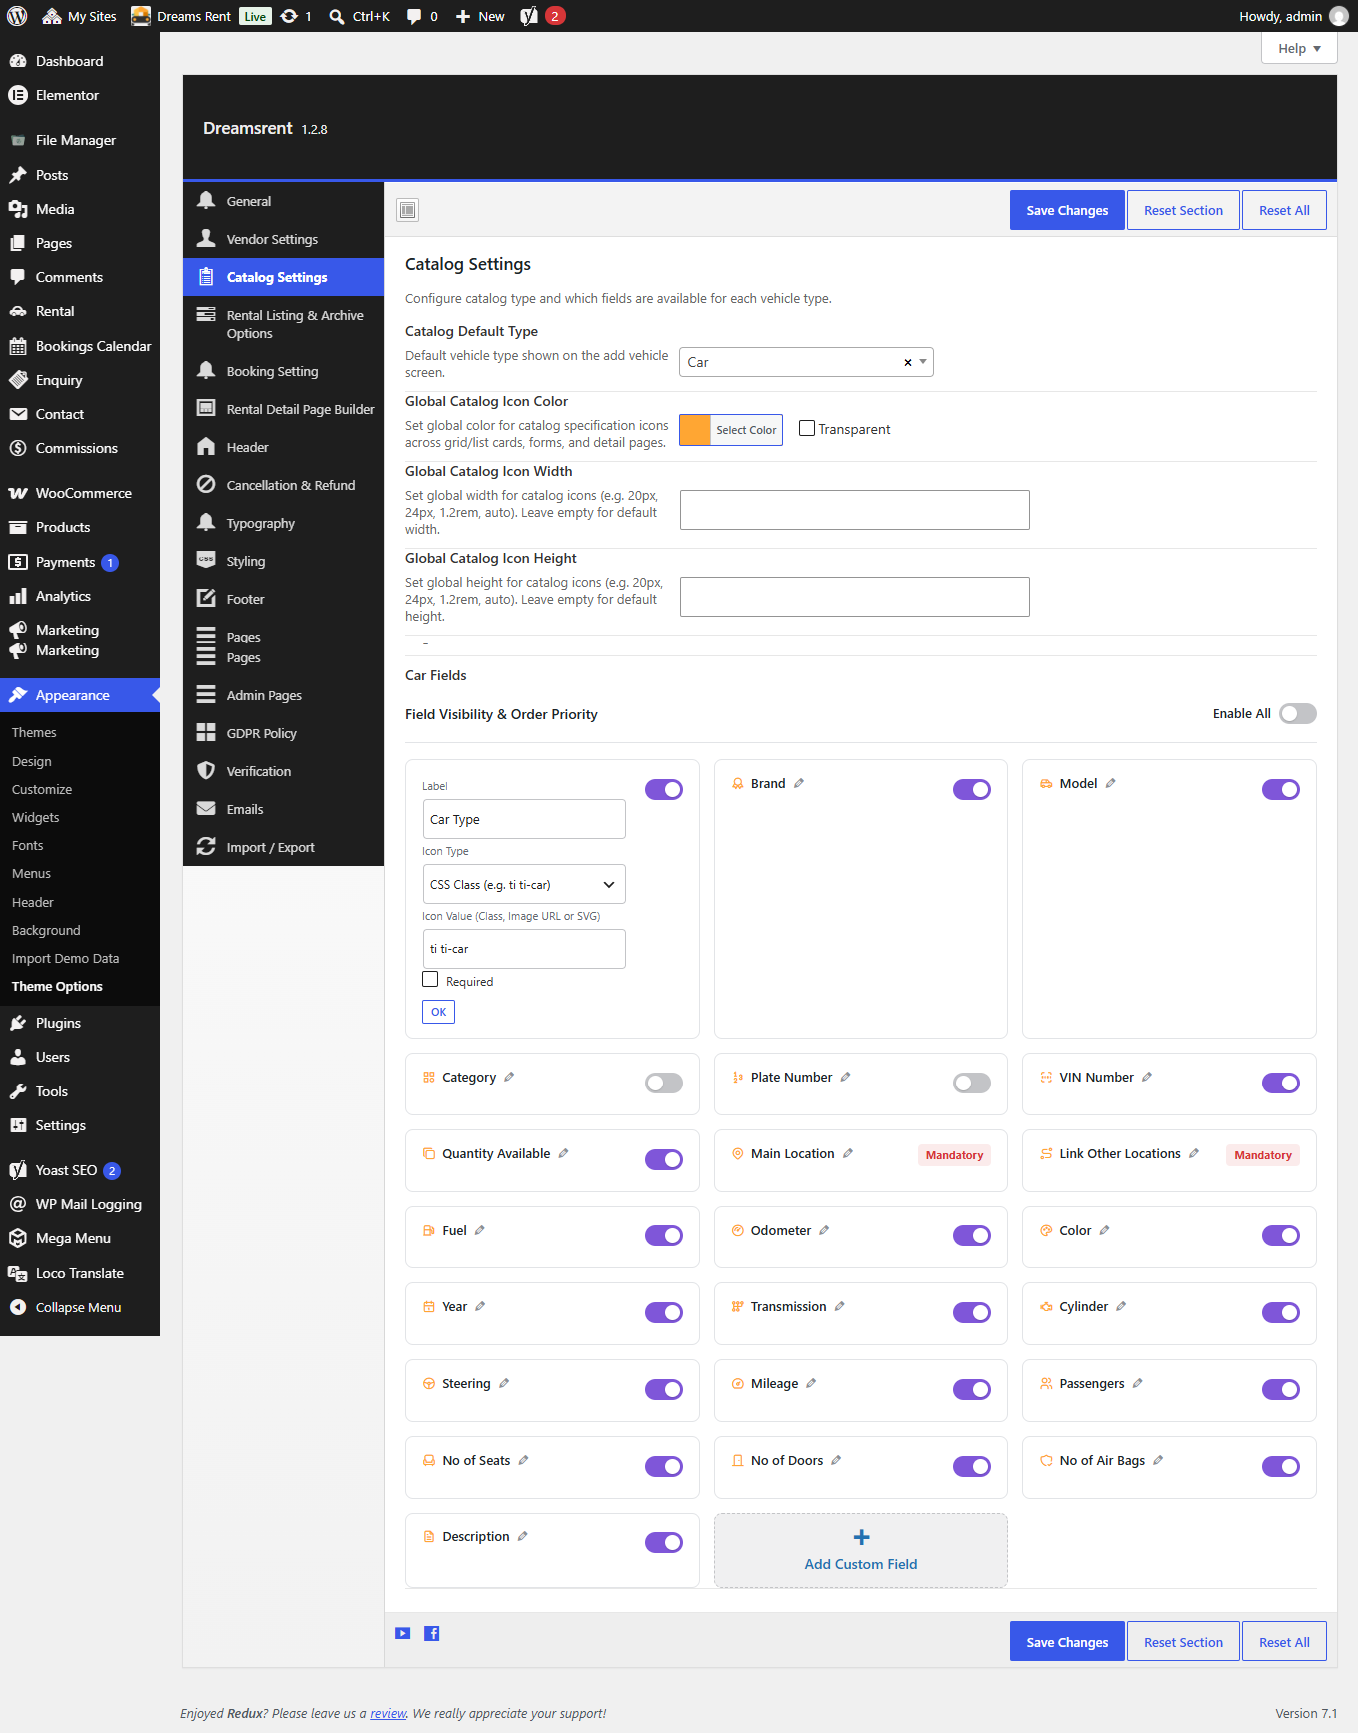
Catalog Settings
Configure the catalog type and choose which fields are shown for each vehicle type. Use the Catalog Default Type dropdown to select the vehicle type you want to configure — you can choose between Car, Bike, and Yacht. Each type has its own set of fields, so switching the dropdown will load the relevant field list below.
Global Catalog Icon Styling New
Control how the specification icons appear across grid/list cards, forms, and detail pages, without editing each field individually:
- Global Catalog Icon Color — pick a color with the swatch picker, or tick Transparent to remove the icon background fill.
- Global Catalog Icon Width / Height — accepts
any valid CSS size
(e.g.
20px,24px,1.2rem,auto). Leave empty to use the theme default size.
Under Field Visibility & Order Priority, toggle individual fields on or off (Type, Brand, Model, Category, Plate Number, VIN Number, Quantity Available, Main Location, Link Other Locations, Fuel, Odometer, Color, Year, Transmission, Cylinder, Steering, Mileage, Passengers, No of Seats, No of Doors, No of Air Bags, Description, and more) to control what appears on the add-vehicle screen and the front-end listing. Fields marked Mandatory (such as Main Location and Link Other Locations) cannot be disabled. Use Enable All to quickly turn every field on.
Click the edit icon next to a field label to configure its Icon Type (CSS Class, Image URL, or SVG), Icon Value, and whether the field is Required on the add-vehicle form, then click OK to apply. Use Add Custom Field to create your own field with its own icon, label, and requirement setting.
The Single Page Style option lets you choose how the vehicle's single page is displayed to visitors:
- Style 1 – Shows the full listing with the booking option included.
- Style 2 – Shows only the vehicle specifications, without the booking option.
- Style 3 – Shows the full page layout without the booking option.
Click on a style thumbnail to select it, then use Save Changes to apply your settings. Use Reset Section or Reset All to revert to defaults.
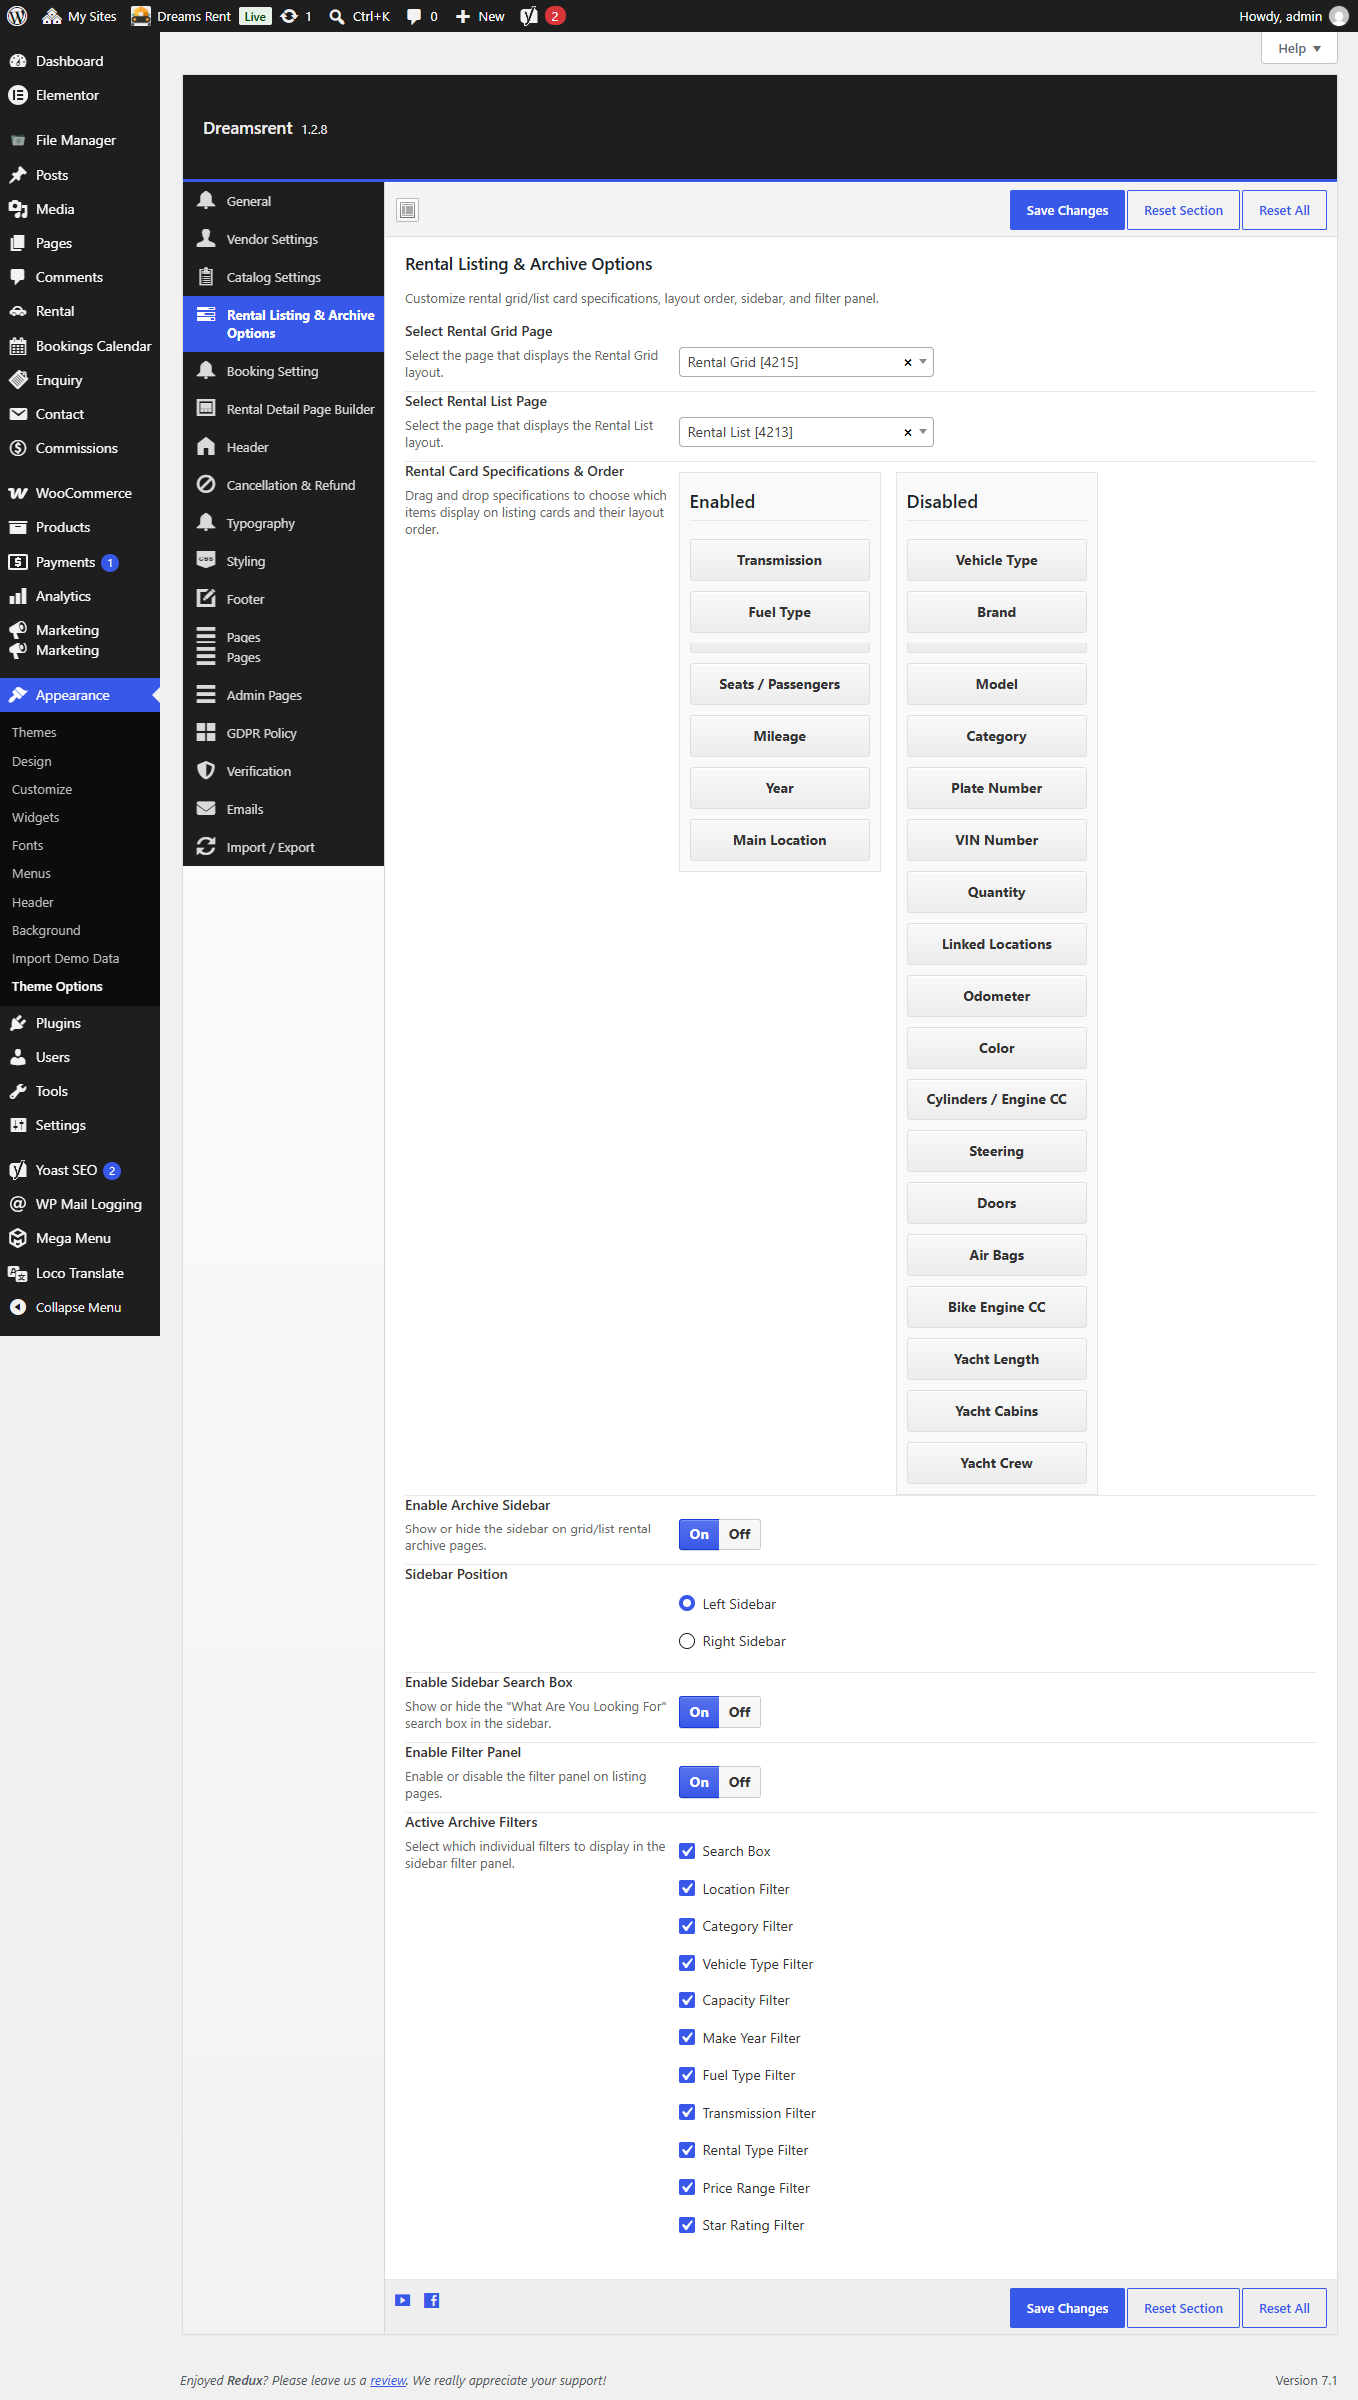
Customize the rental grid/list card specifications, their layout order, the archive sidebar, and the filter panel — all from one screen.
Page Assignment
- Select Rental Grid Page — the page that displays the Rental Grid layout.
- Select Rental List Page — the page that displays the Rental List layout.
Rental Card Specifications & Order
Drag and drop specification items between the Enabled and Disabled columns to choose which items display on listing cards, and their order within the Enabled column (e.g. Transmission, Fuel Type, Seats / Passengers, Mileage, Year, Main Location).
Sidebar & Filter Panel
- Enable Archive Sidebar — On/Off toggle to show or hide the sidebar on grid/list rental archive pages.
- Sidebar Position — choose Left Sidebar or Right Sidebar.
- Enable Sidebar Search Box — On/Off toggle for the "What Are You Looking For" search box in the sidebar.
- Enable Filter Panel — On/Off toggle for the filter panel on listing pages.
Active Archive Filters
Tick which individual filters appear in the sidebar filter panel: Search Box, Location Filter, Category Filter, Vehicle Type Filter, Capacity Filter, Make Year Filter, Fuel Type Filter, Transmission Filter, Rental Type Filter, Price Range Filter, and Star Rating Filter.
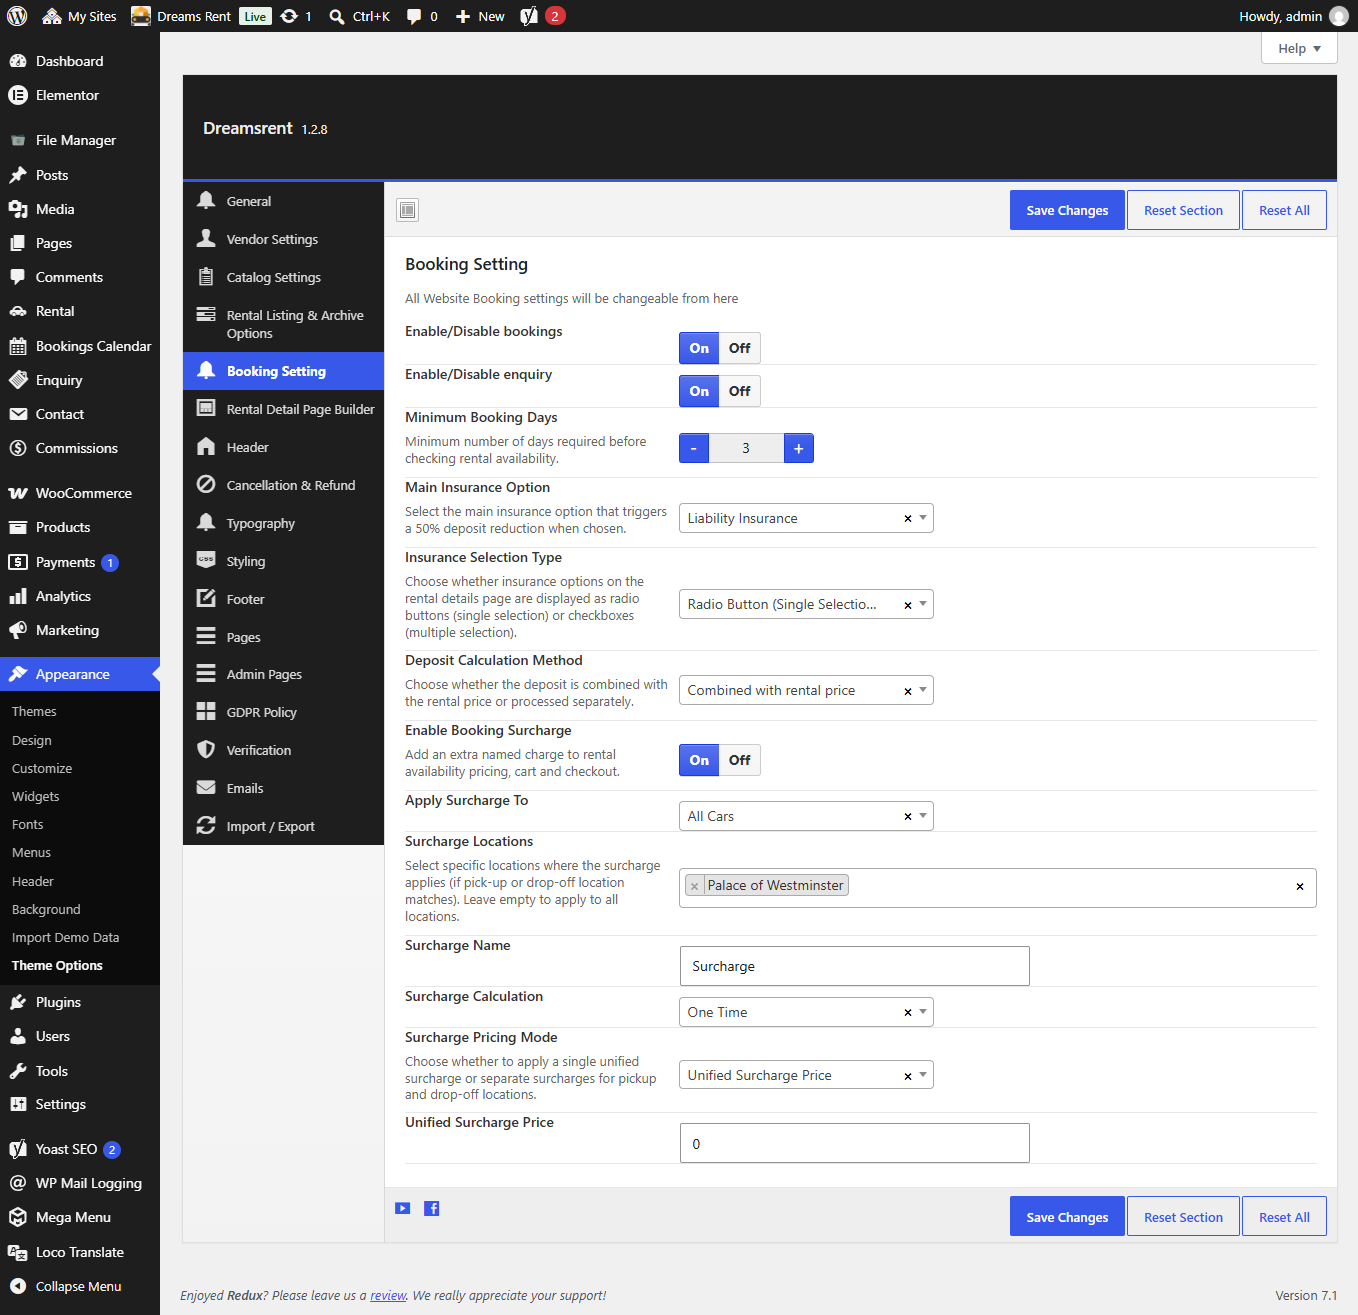
All website booking settings are configured here.
- Enable/Disable bookings — On/Off master switch for the booking flow site-wide.
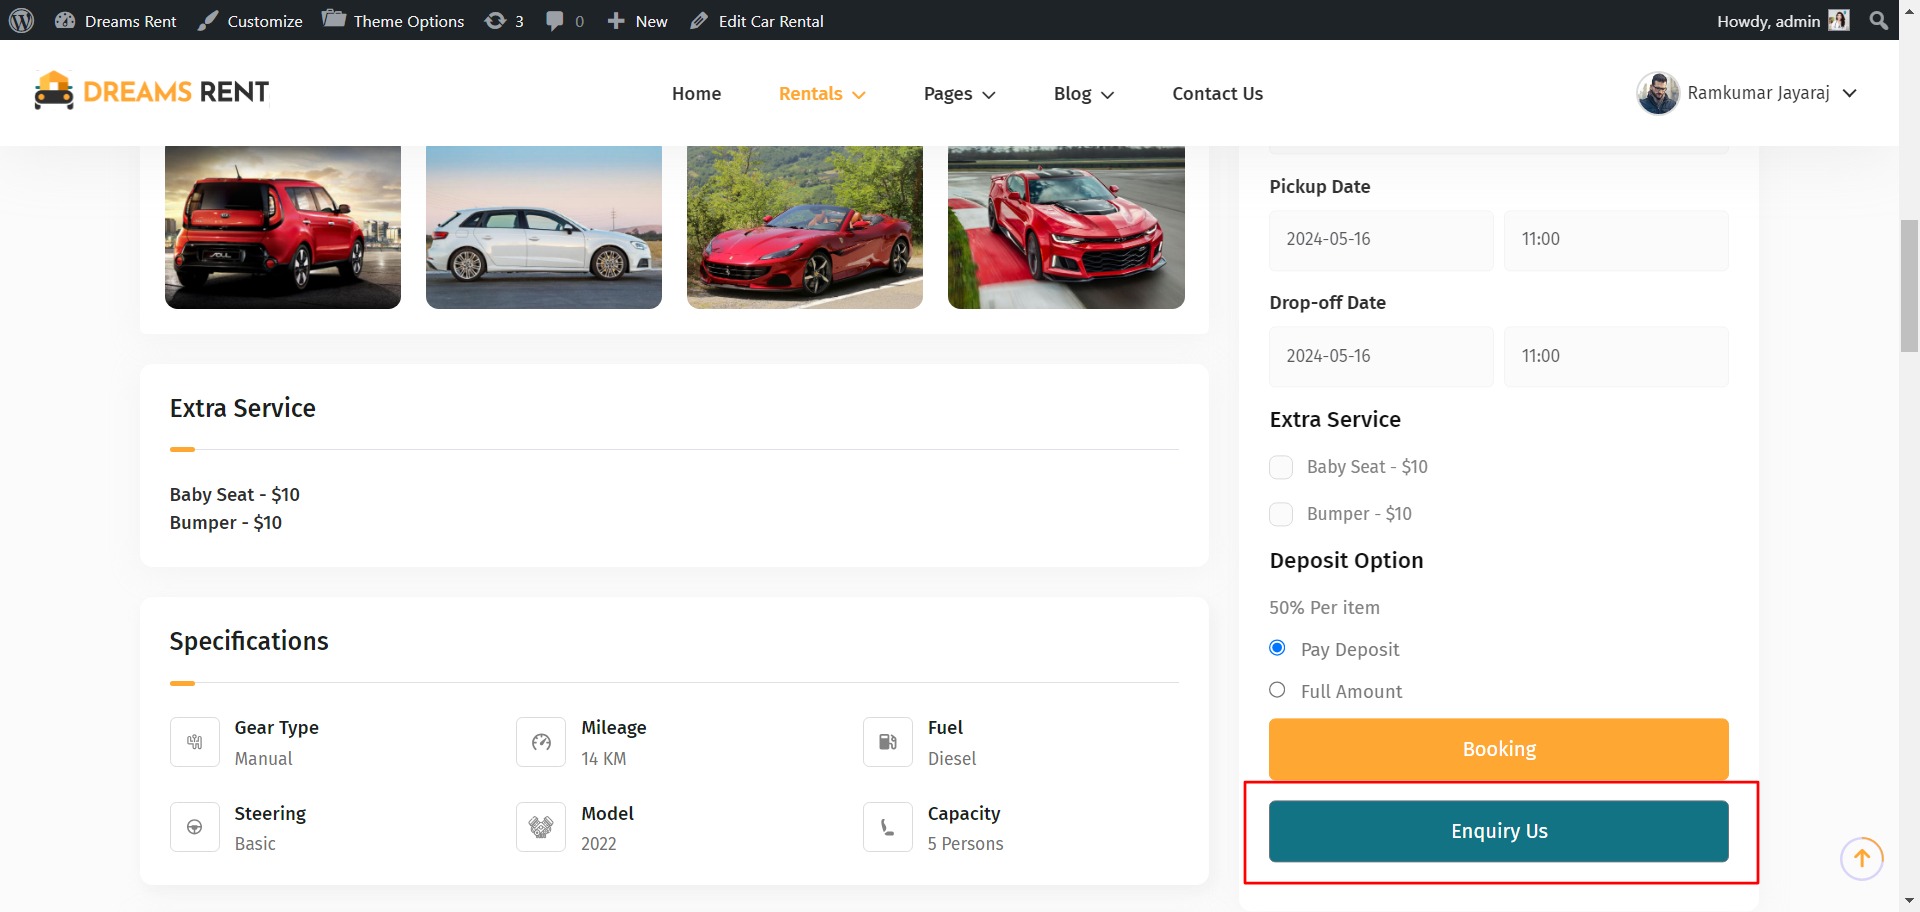
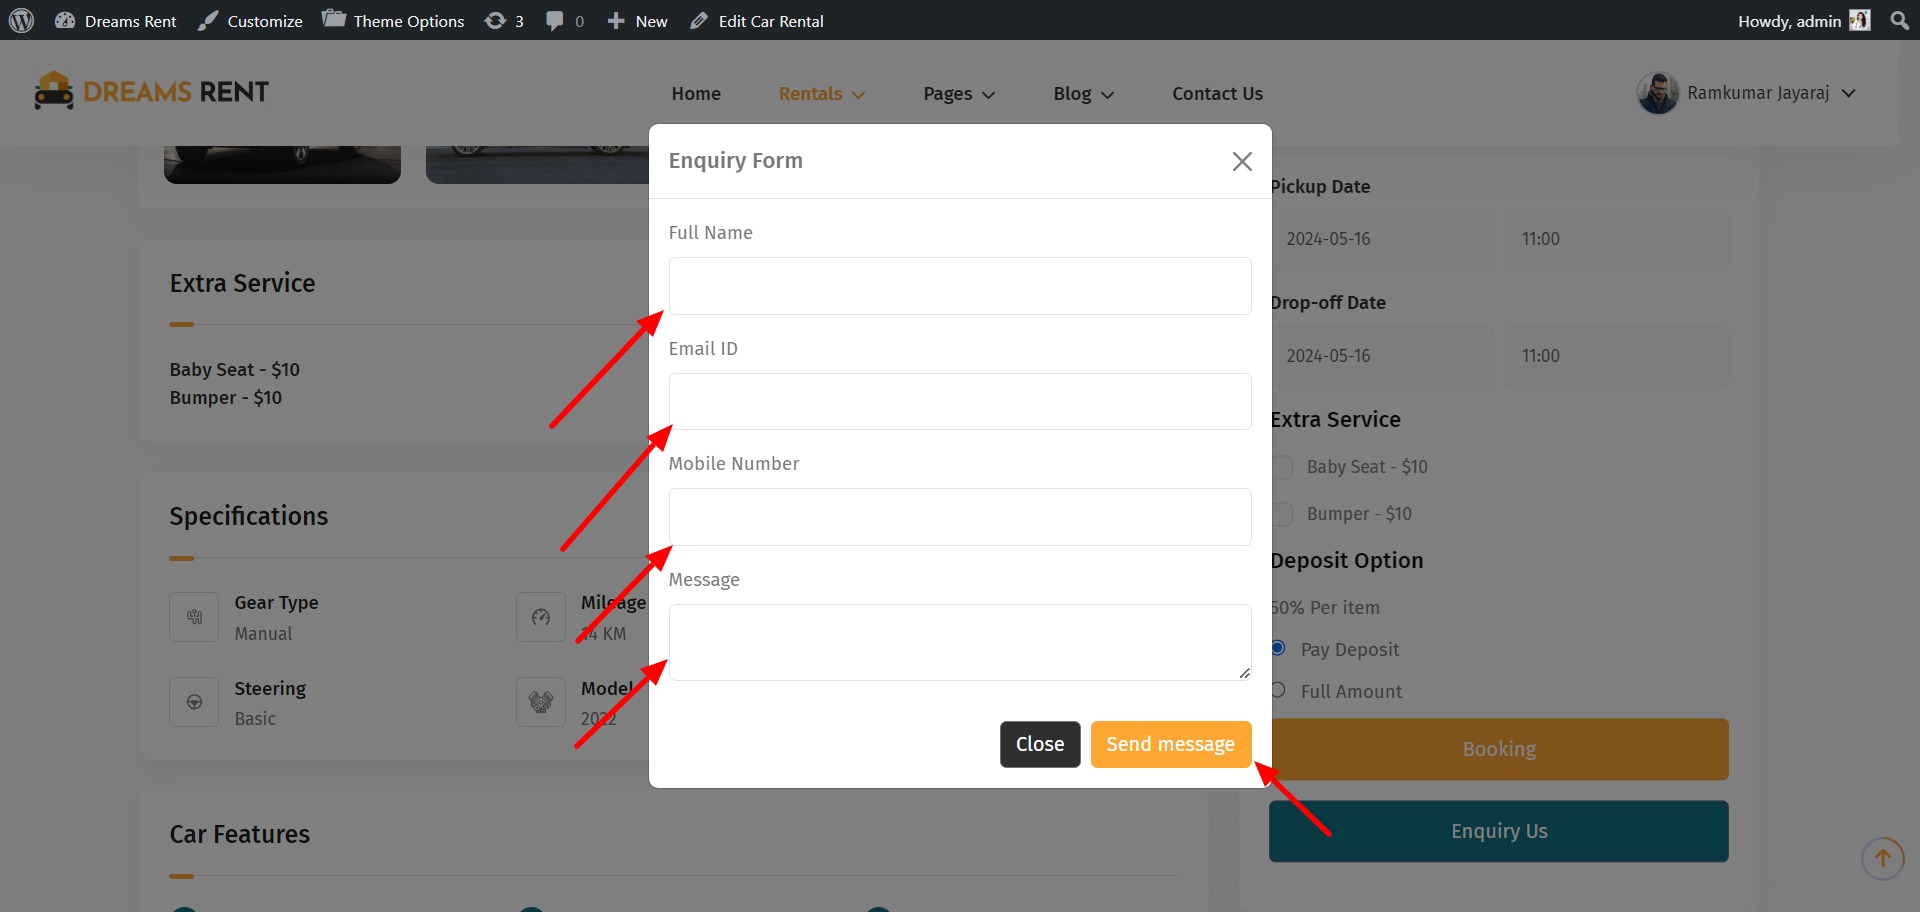
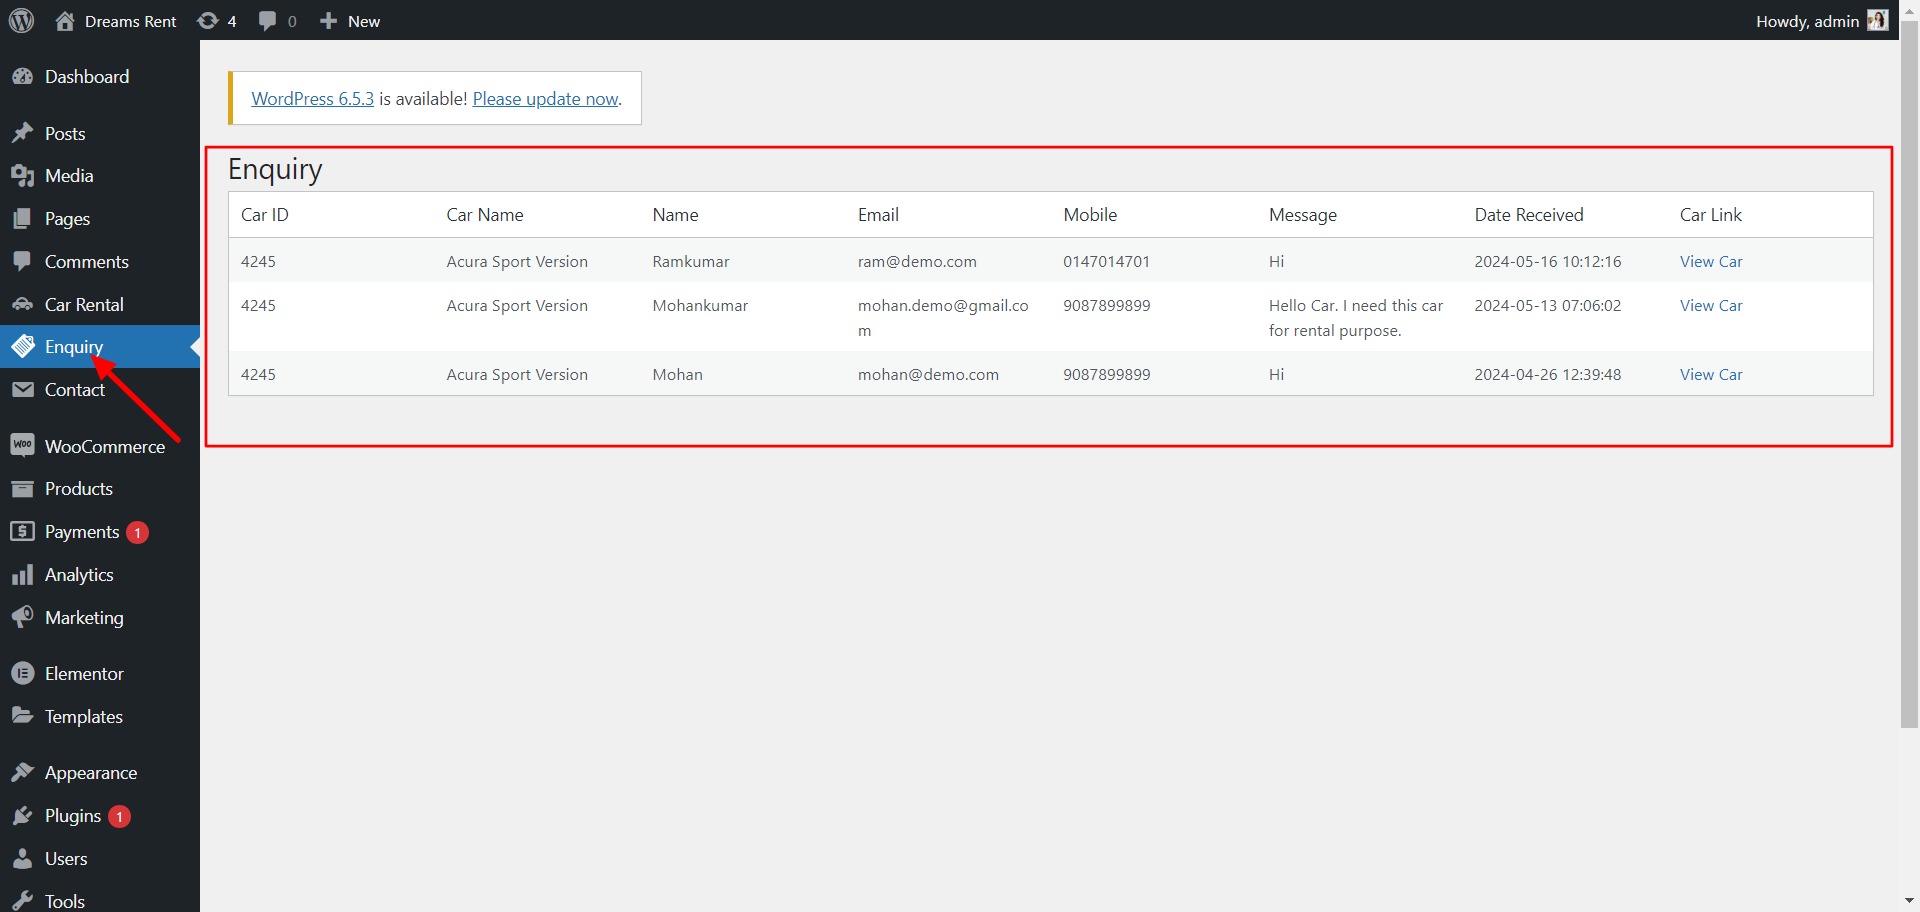
- Enable/Disable enquiry — On/Off switch for the "Enquiry Us" option.
- Minimum Booking Days New — the minimum number of days required before a rental availability can be checked and booked, adjustable with the +/- stepper.
- Main Insurance Option — select the insurance option that, when chosen by the customer, triggers a 50% deposit reduction.
- Insurance Selection Type — choose whether insurance options on the rental details page are shown as Radio Buttons (single selection) or Checkboxes (multiple selection).
- Deposit Calculation Method — choose whether the deposit is combined with the rental price or processed separately at checkout.
Booking Surcharge New
Add an extra named charge to rental availability pricing, cart, and checkout.
- Enable Booking Surcharge — On/Off master switch for the surcharge feature.
- Apply Surcharge To — choose which catalog type(s) the surcharge applies to (e.g. All Cars).
- Surcharge Locations — select specific pickup/drop-off locations the surcharge applies to. Leave empty to apply it to all locations.
- Surcharge Name — the label shown to customers in the cart and checkout (e.g. "Surcharge").
- Surcharge Calculation — choose whether the charge is applied One Time or per another calculation basis (e.g. per day).
- Surcharge Pricing Mode — choose between a single Unified Surcharge Price, or separate prices for pickup and drop-off locations.
- Unified Surcharge Price — the flat amount charged when Unified Surcharge Price mode is selected.
If Surcharge Pricing Mode is set to separate pickup/drop-off pricing instead of Unified, additional Pickup Price and Drop-off Price fields will appear in place of the single Unified Surcharge Price field.
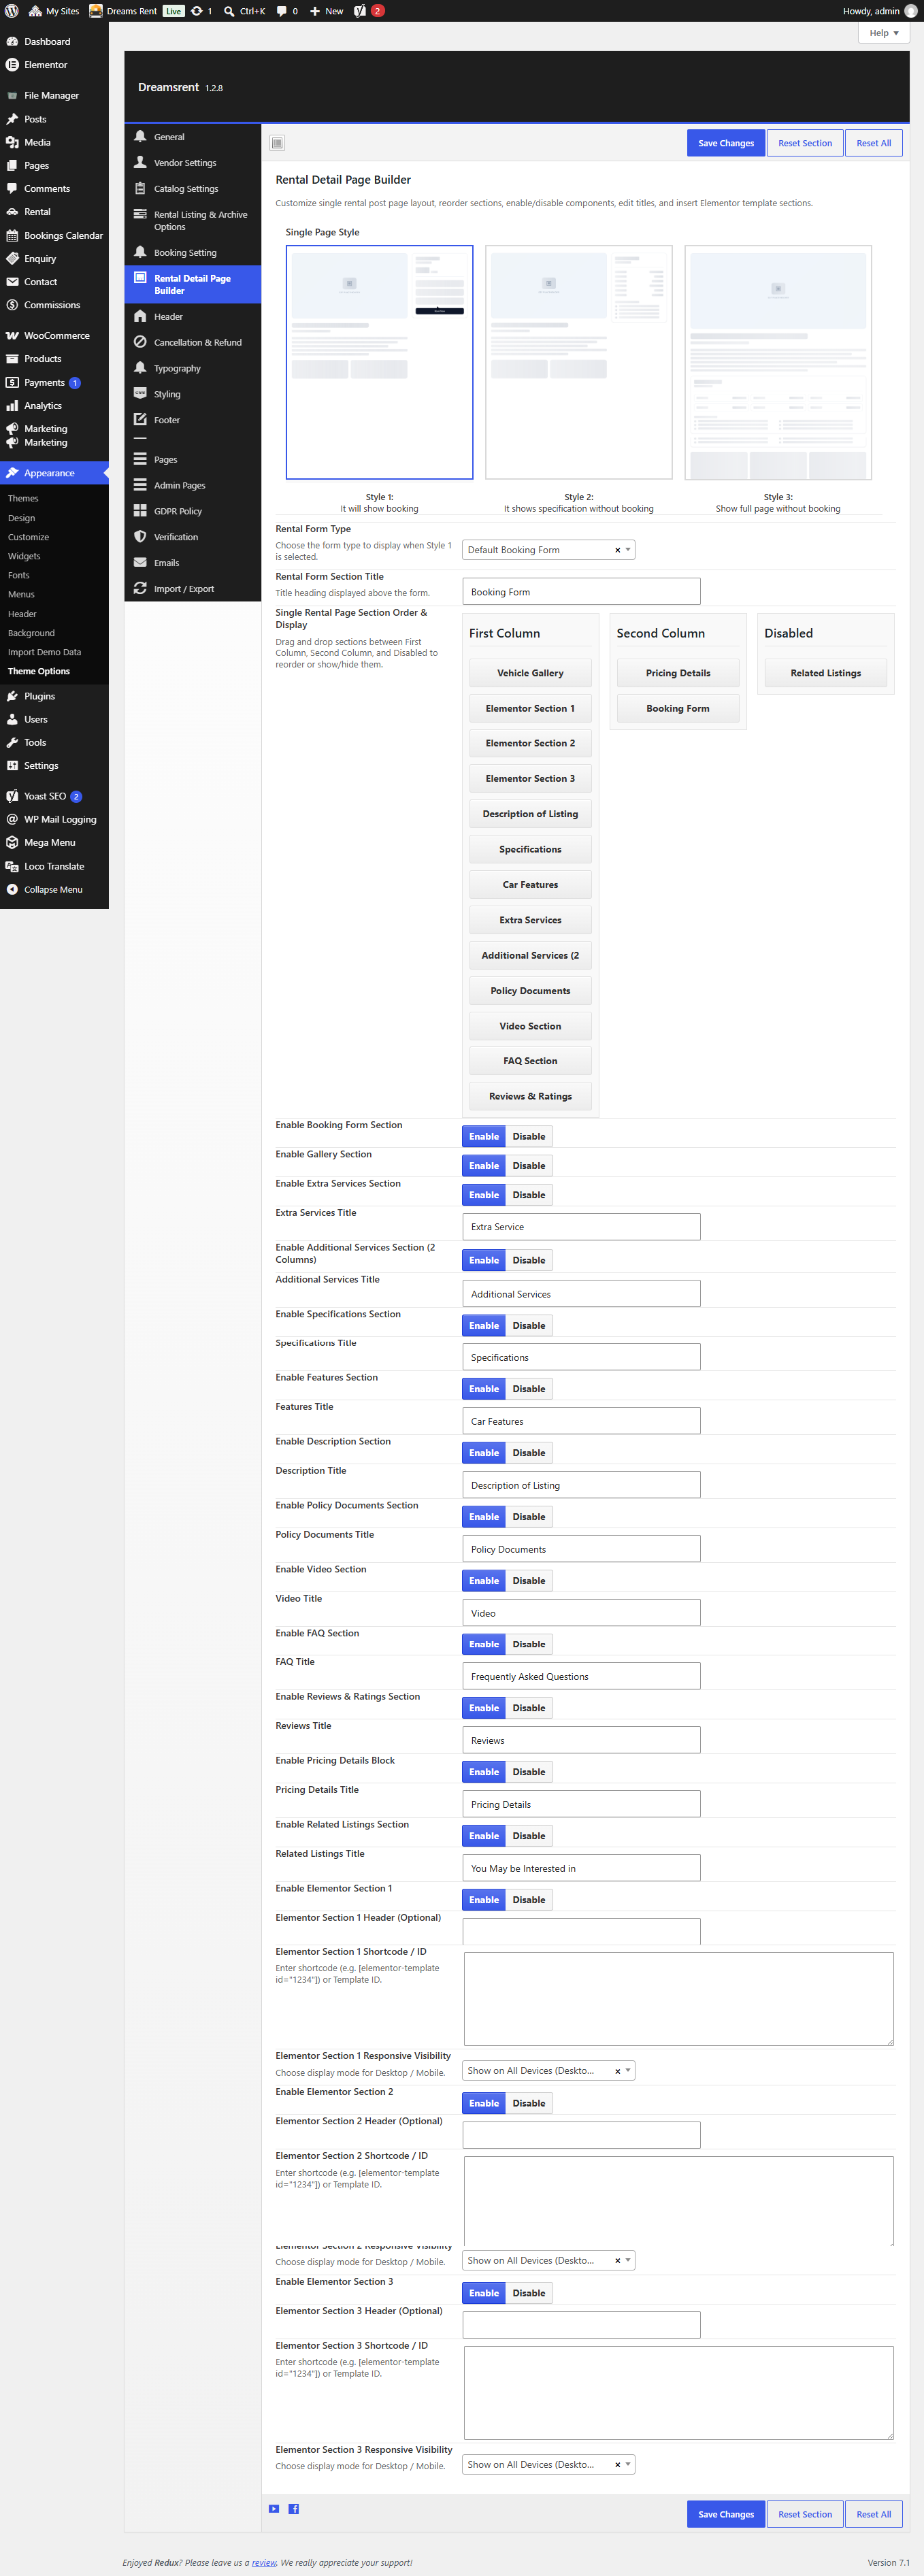
Customize the single rental post page layout, reorder sections, enable/disable components, edit titles, and insert Elementor template sections — without touching code.
Single Page Style
Choose one of three layout thumbnails:
- Style 1 – Shows booking alongside the listing.
- Style 2 – Shows specification without booking.
- Style 3 – Shows the full page without booking.
Rental Form Type & Section Title New
When Style 1 is selected, choose the Rental Form Type to display — Default Booking Form, a Custom Shortcode form, or Hidden — and set the Rental Form Section Title heading displayed above the form (e.g. "Booking Form").
Single Rental Page Section Order & Display New
Drag and drop sections between First Column, Second Column, and Disabled to reorder or show/hide them. Available sections include Vehicle Gallery, Elementor Section 1–3, Description of Listing, Specifications, Car Features, Extra Services, Additional Services (2 columns), Policy Documents, Video Section, FAQ Section, Reviews & Ratings, Pricing Details, Booking Form, and Related Listings.
Below the sorter, each section has its own Enable / Disable toggle and, where applicable, an editable title field (Extra Services Title, Additional Services Title, Specifications Title, Features Title, Description Title, Policy Documents Title, Video Title, FAQ Title, Reviews Title, Pricing Details Title, Related Listings Title).
Elementor Template Sections New
Up to three Elementor Section slots (Elementor Section 1, 2, and 3) can be inserted into the single rental page layout. For each slot, configure:
- Header (Optional) — an optional heading shown above the inserted section.
- Shortcode / ID — enter an Elementor shortcode
(e.g.
[elementor-template id="1234"]) or a raw Template ID. - Responsive Visibility — choose whether the section shows on all devices, or is restricted to Desktop only / Mobile only.
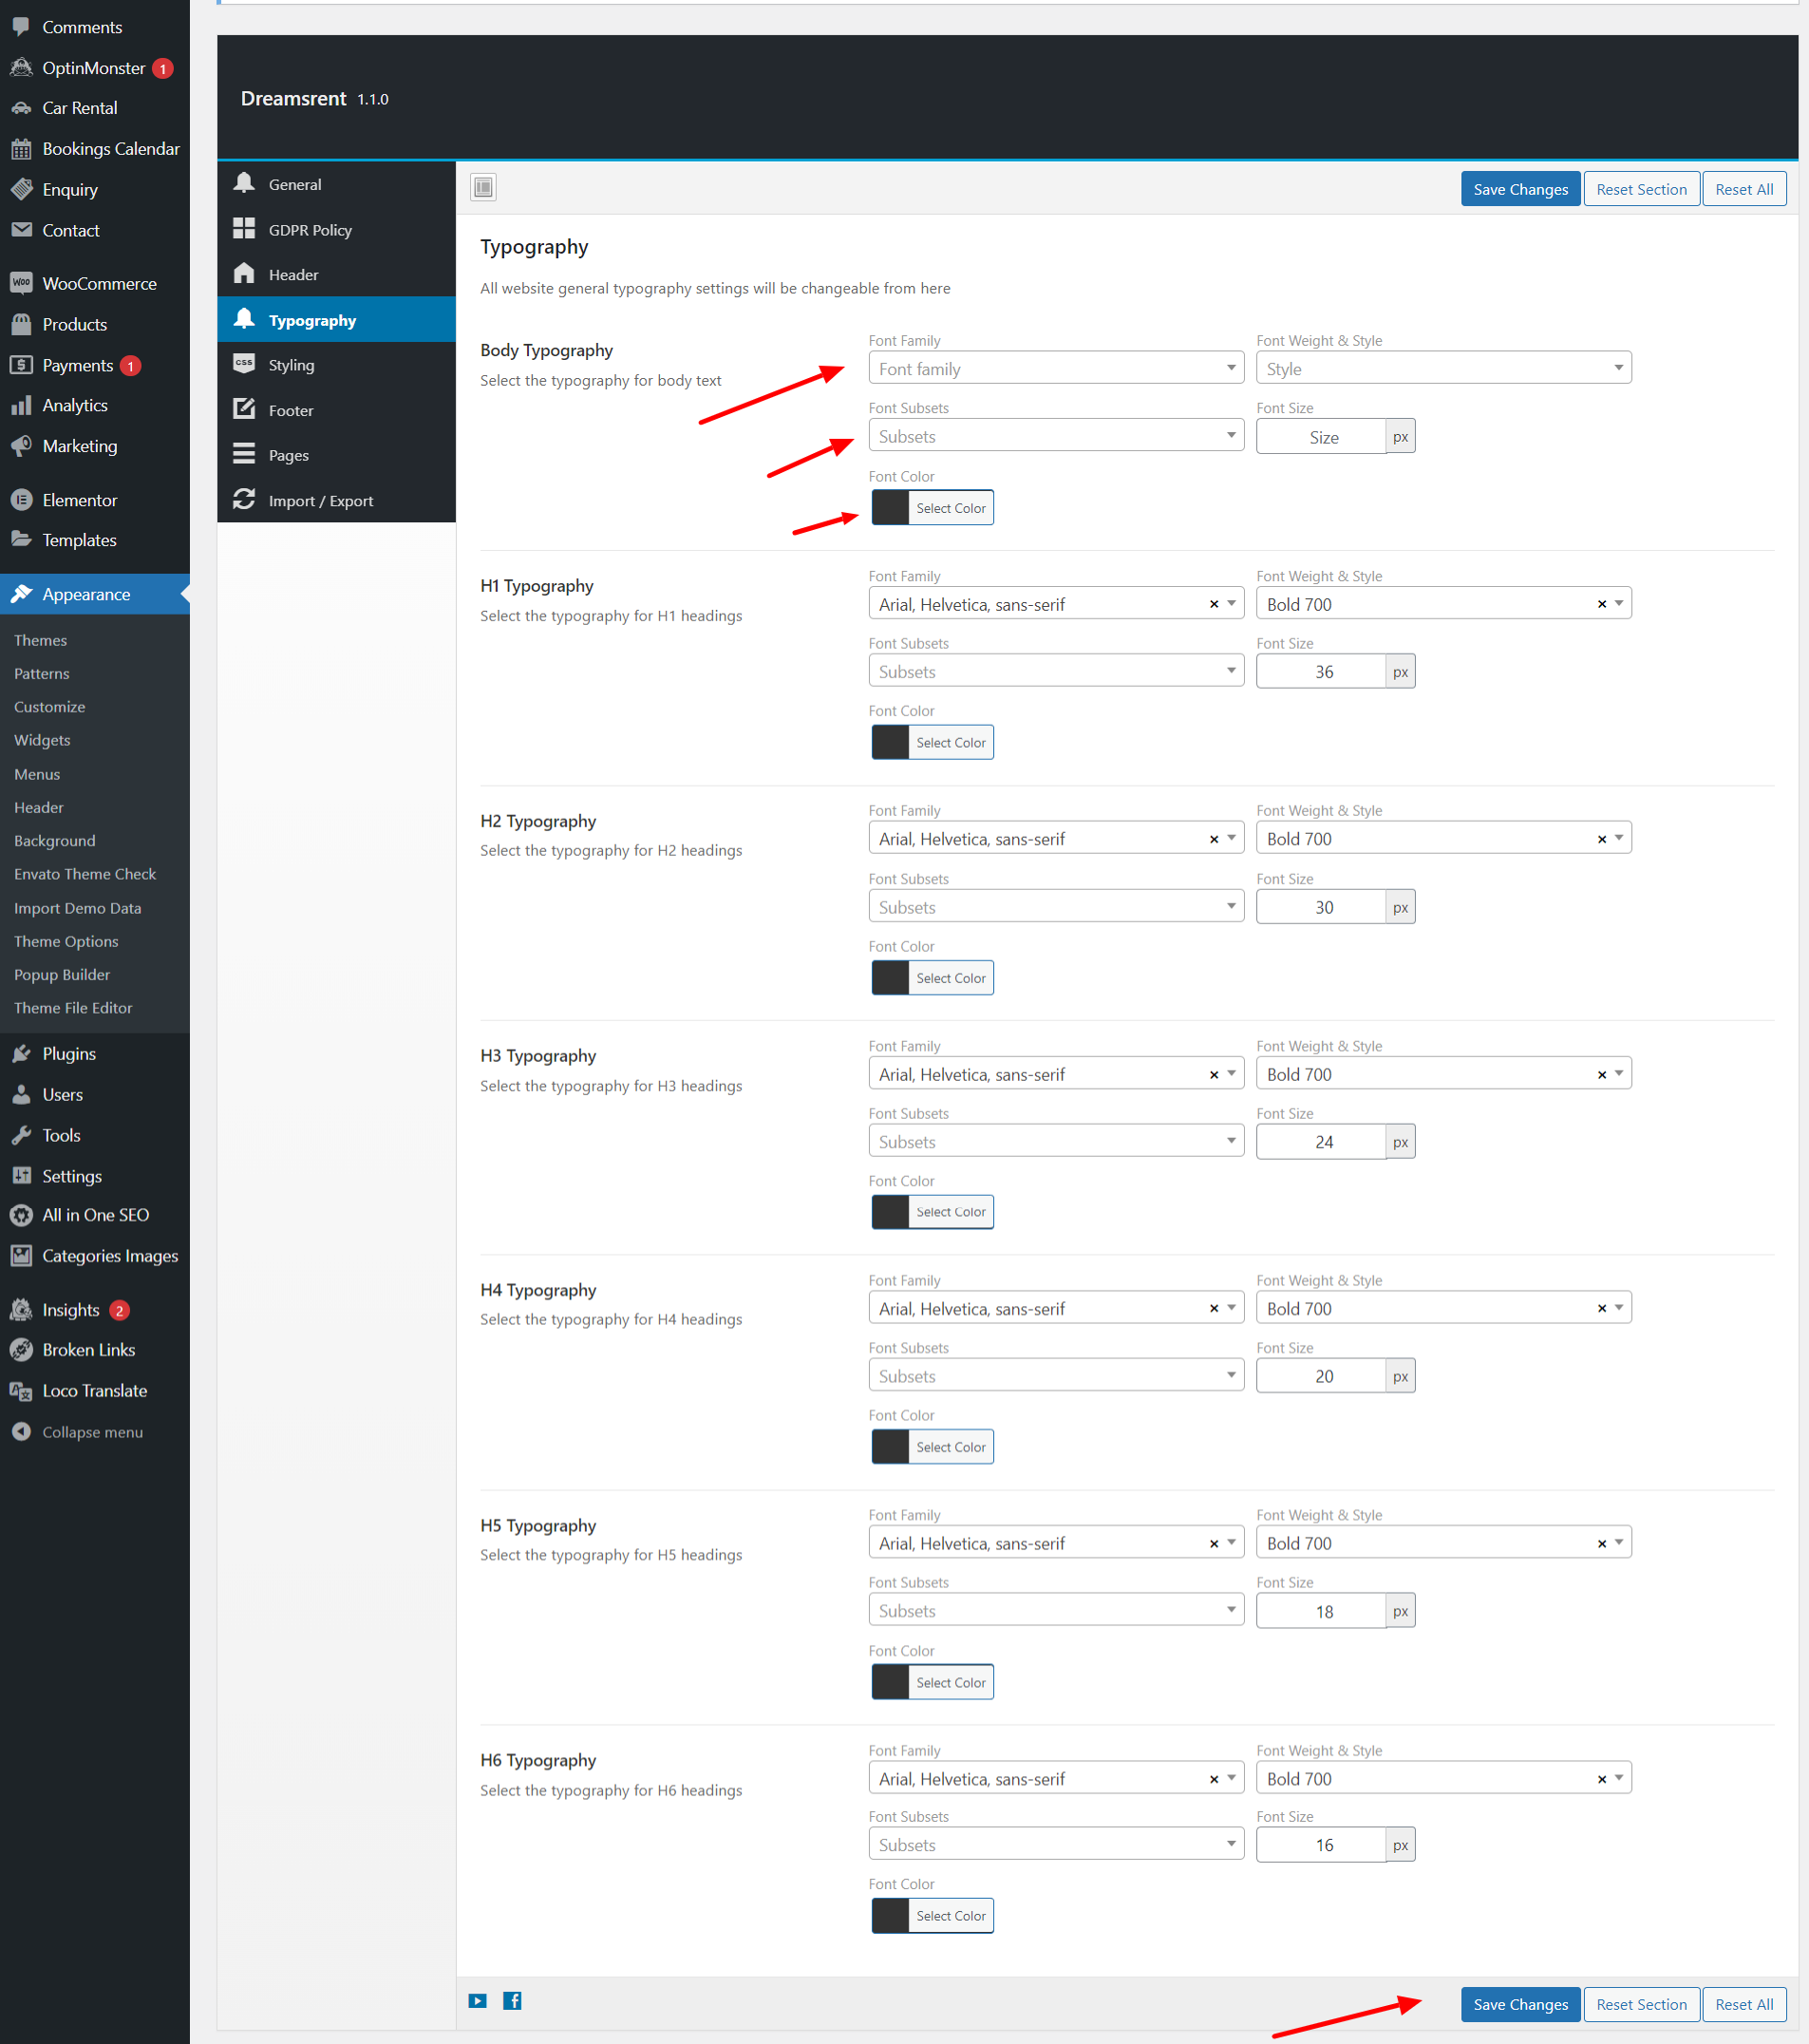
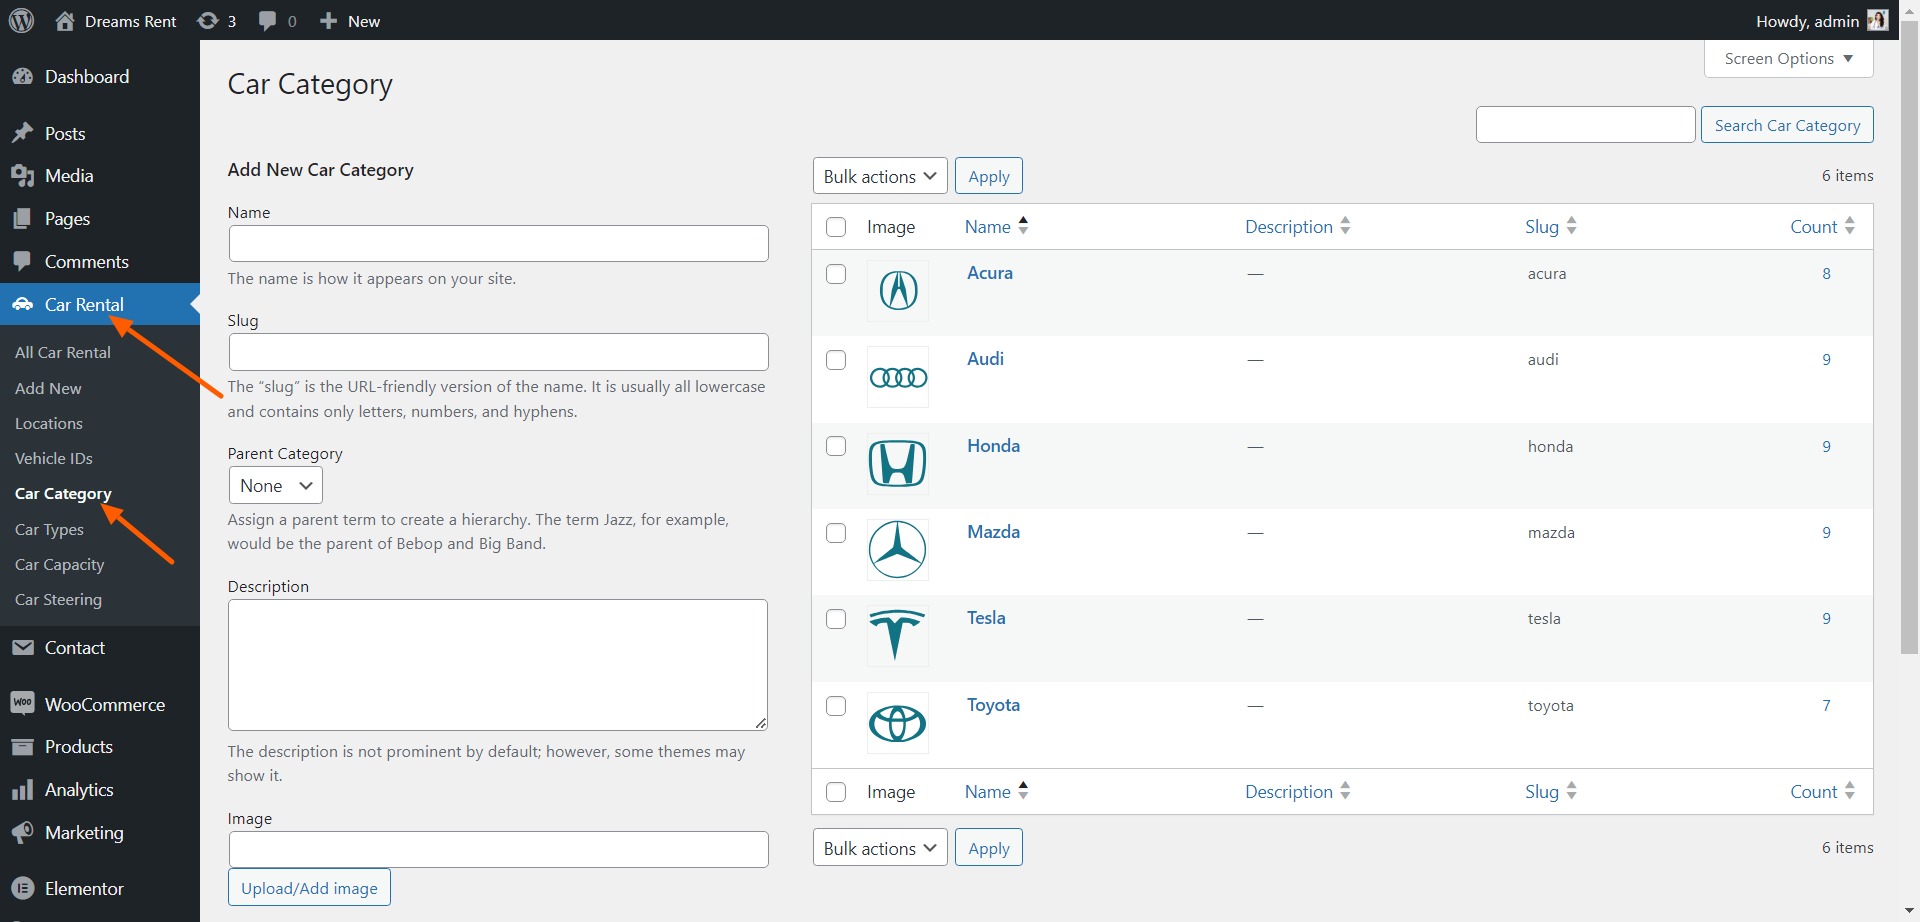
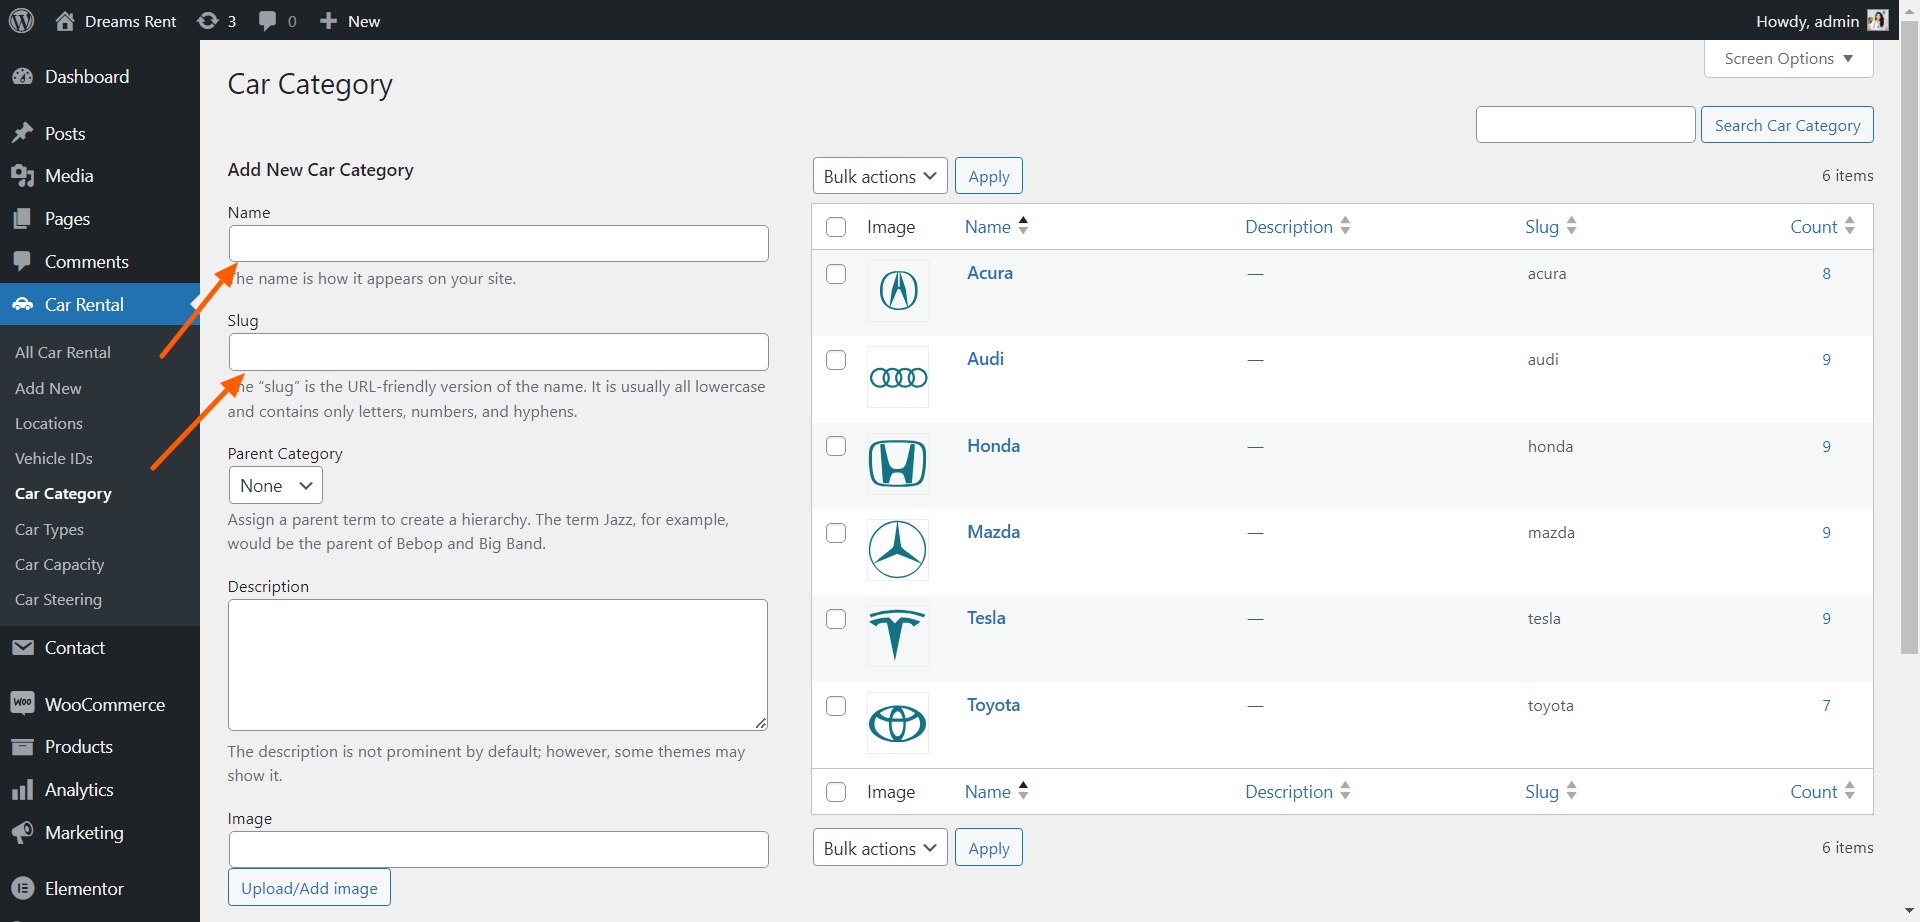
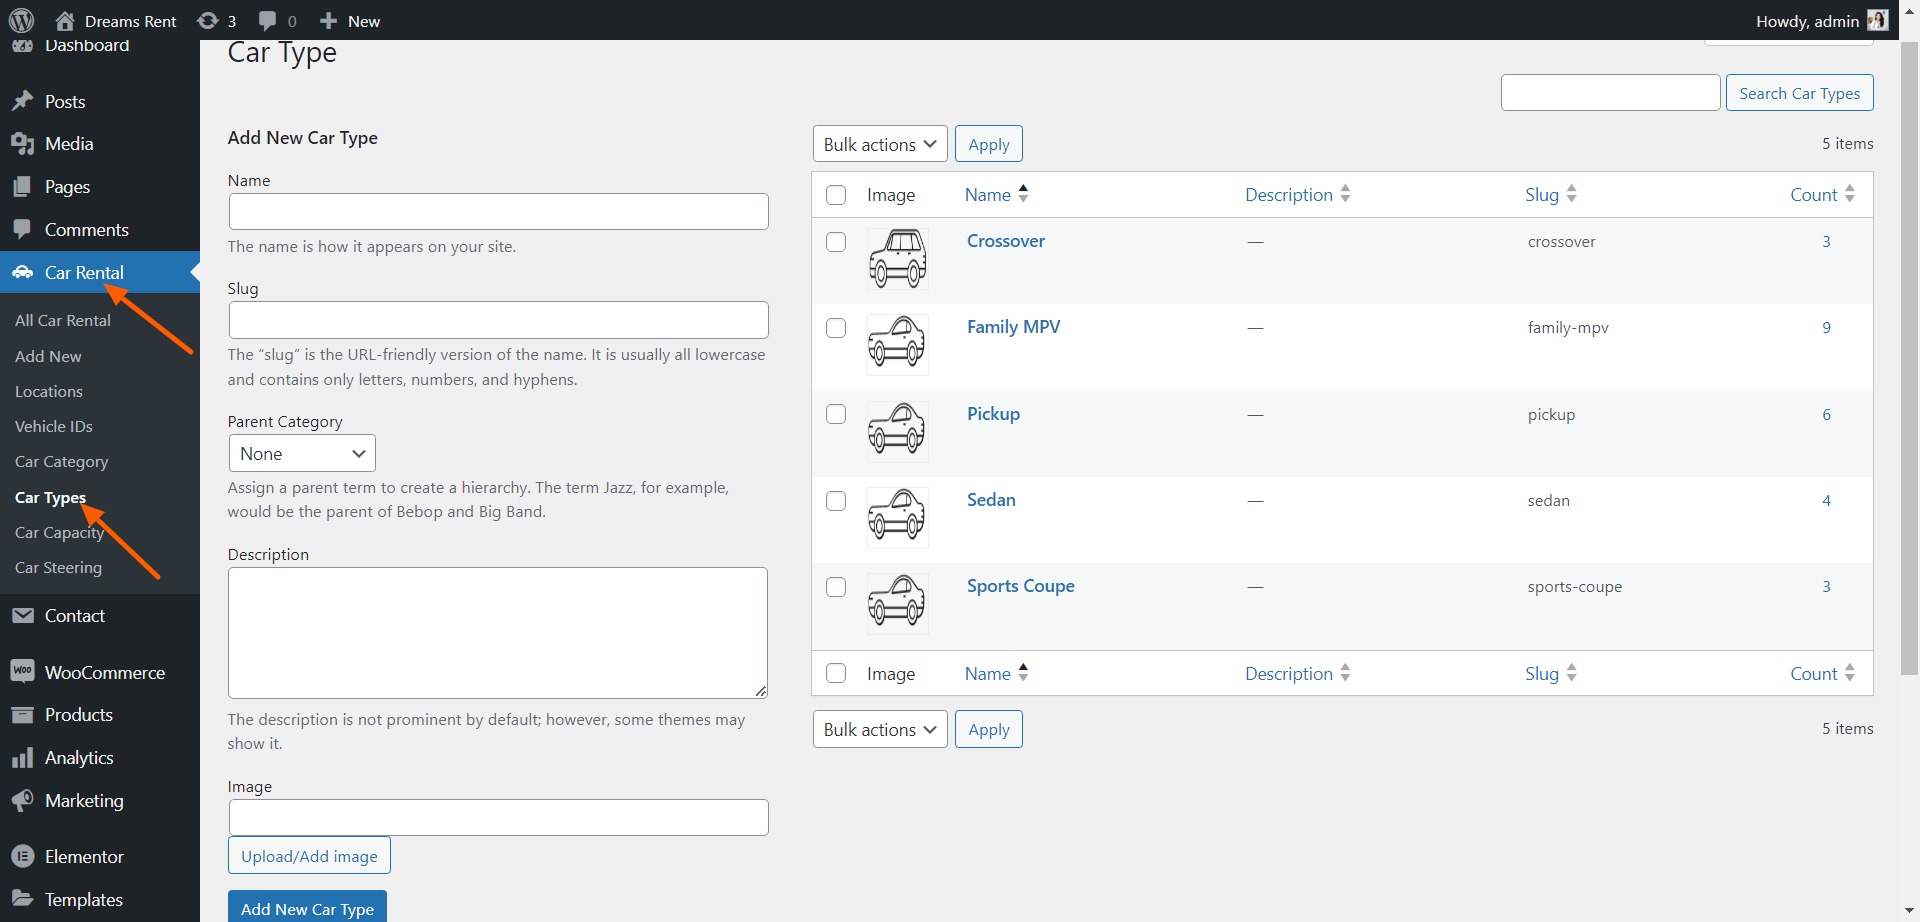
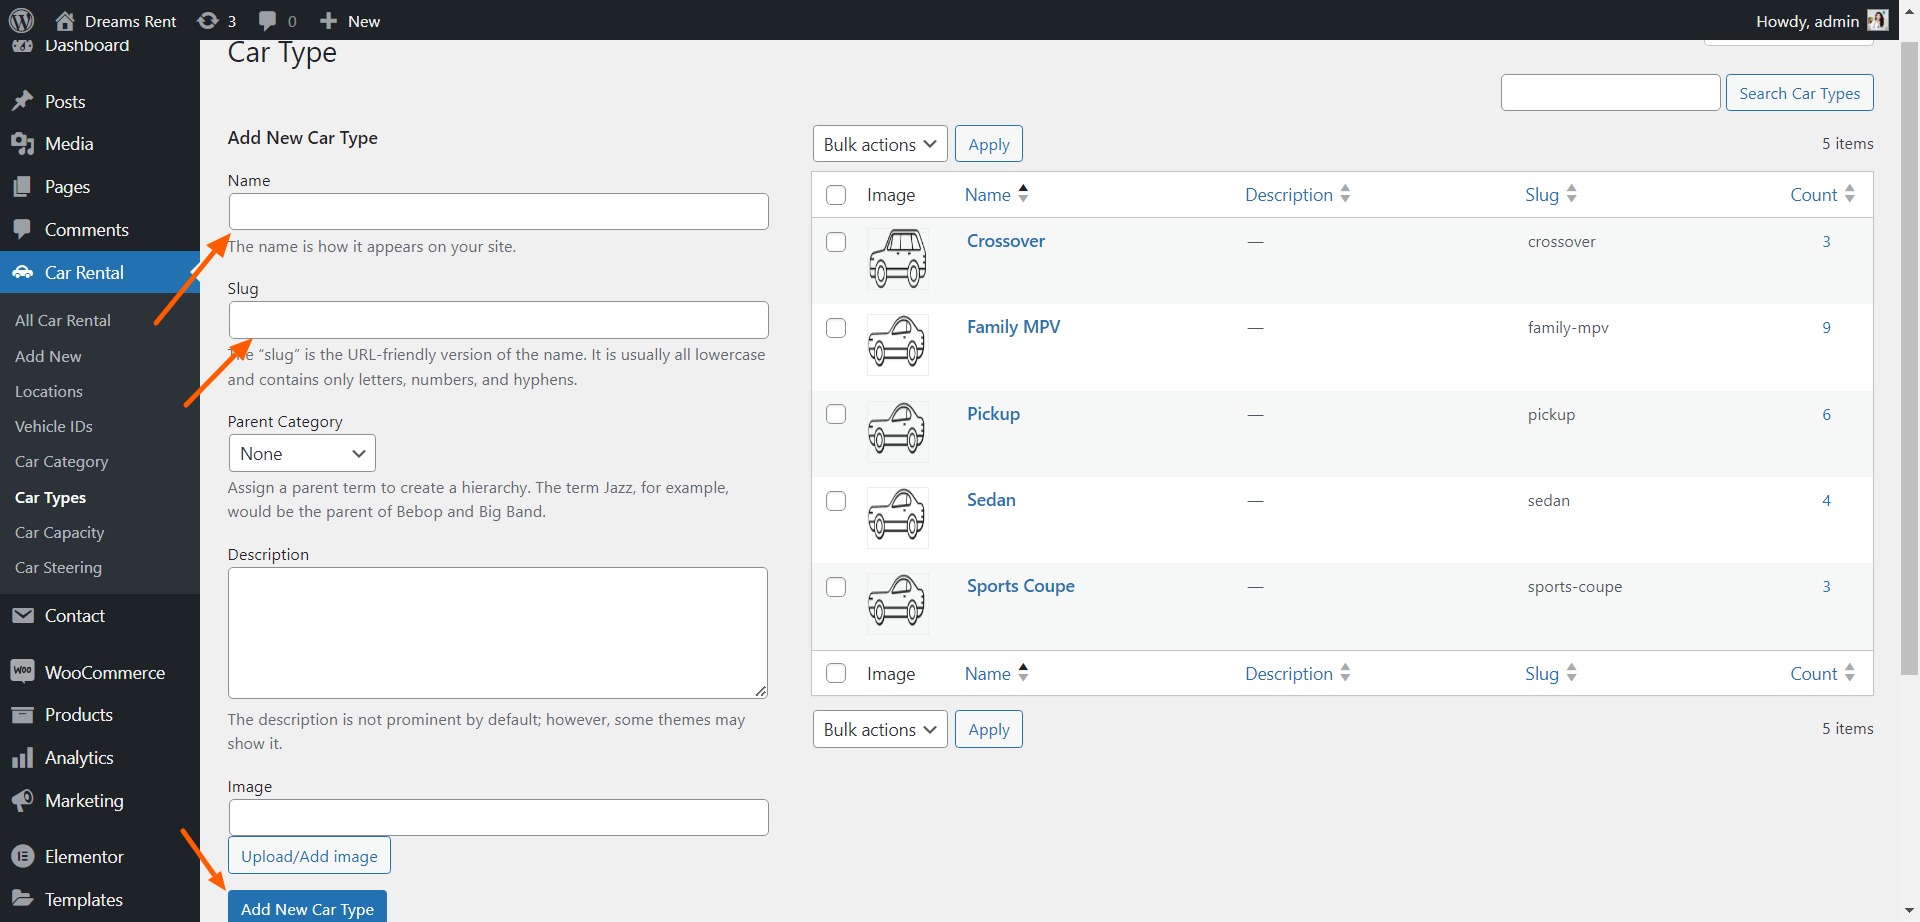
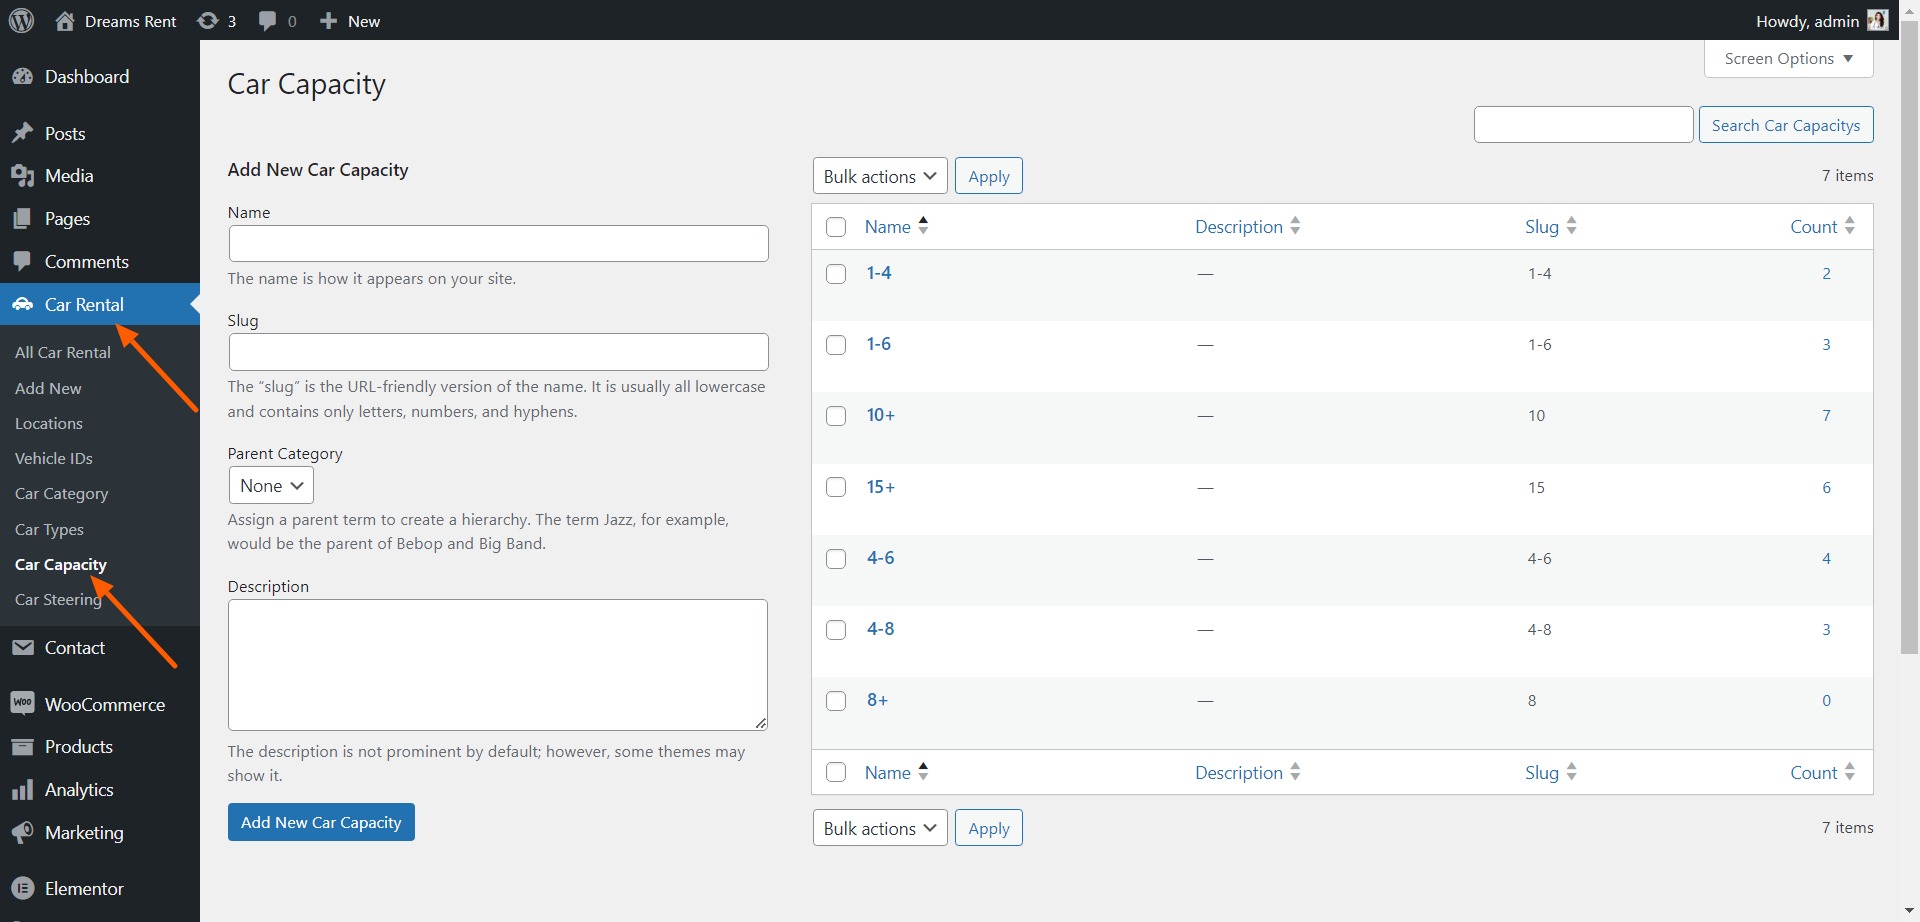
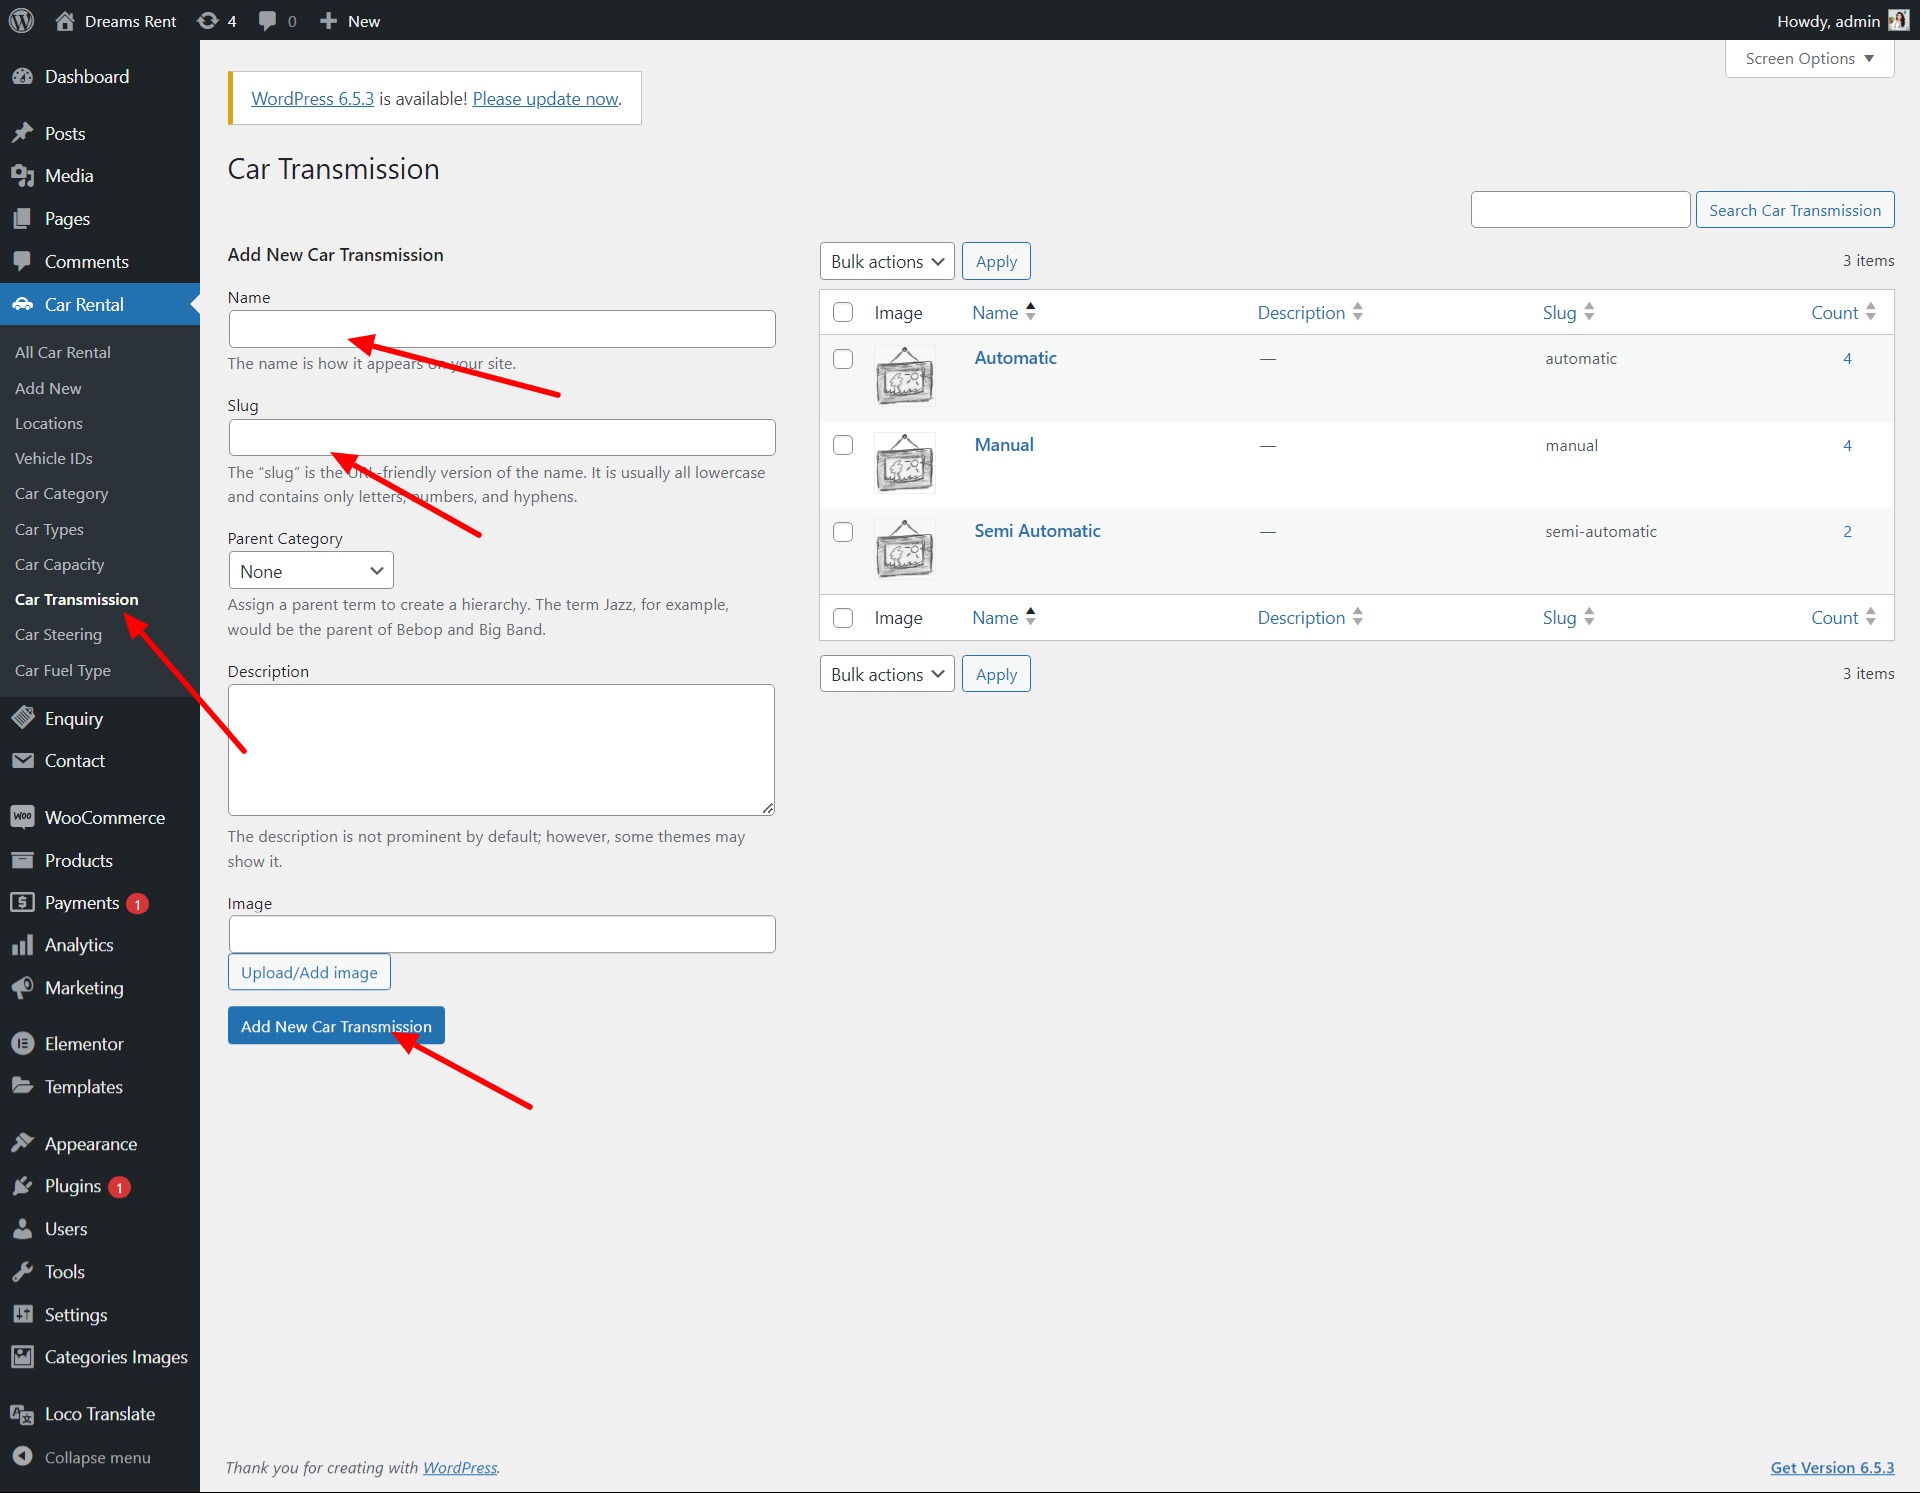
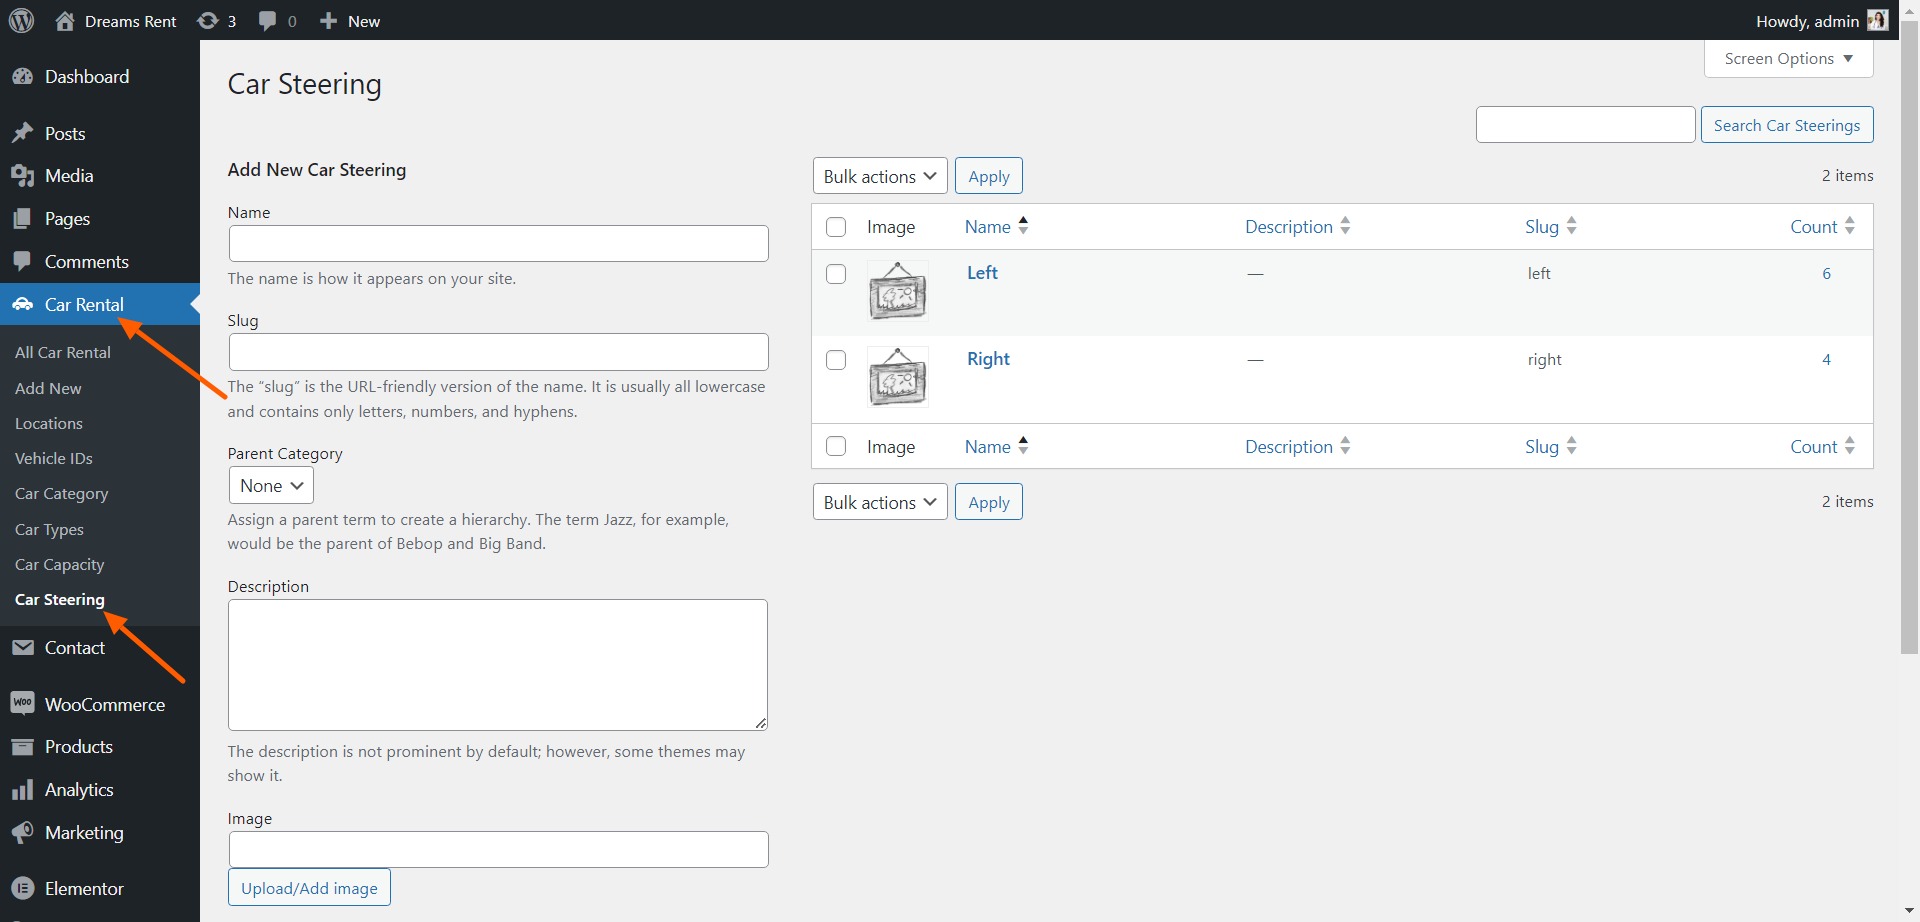
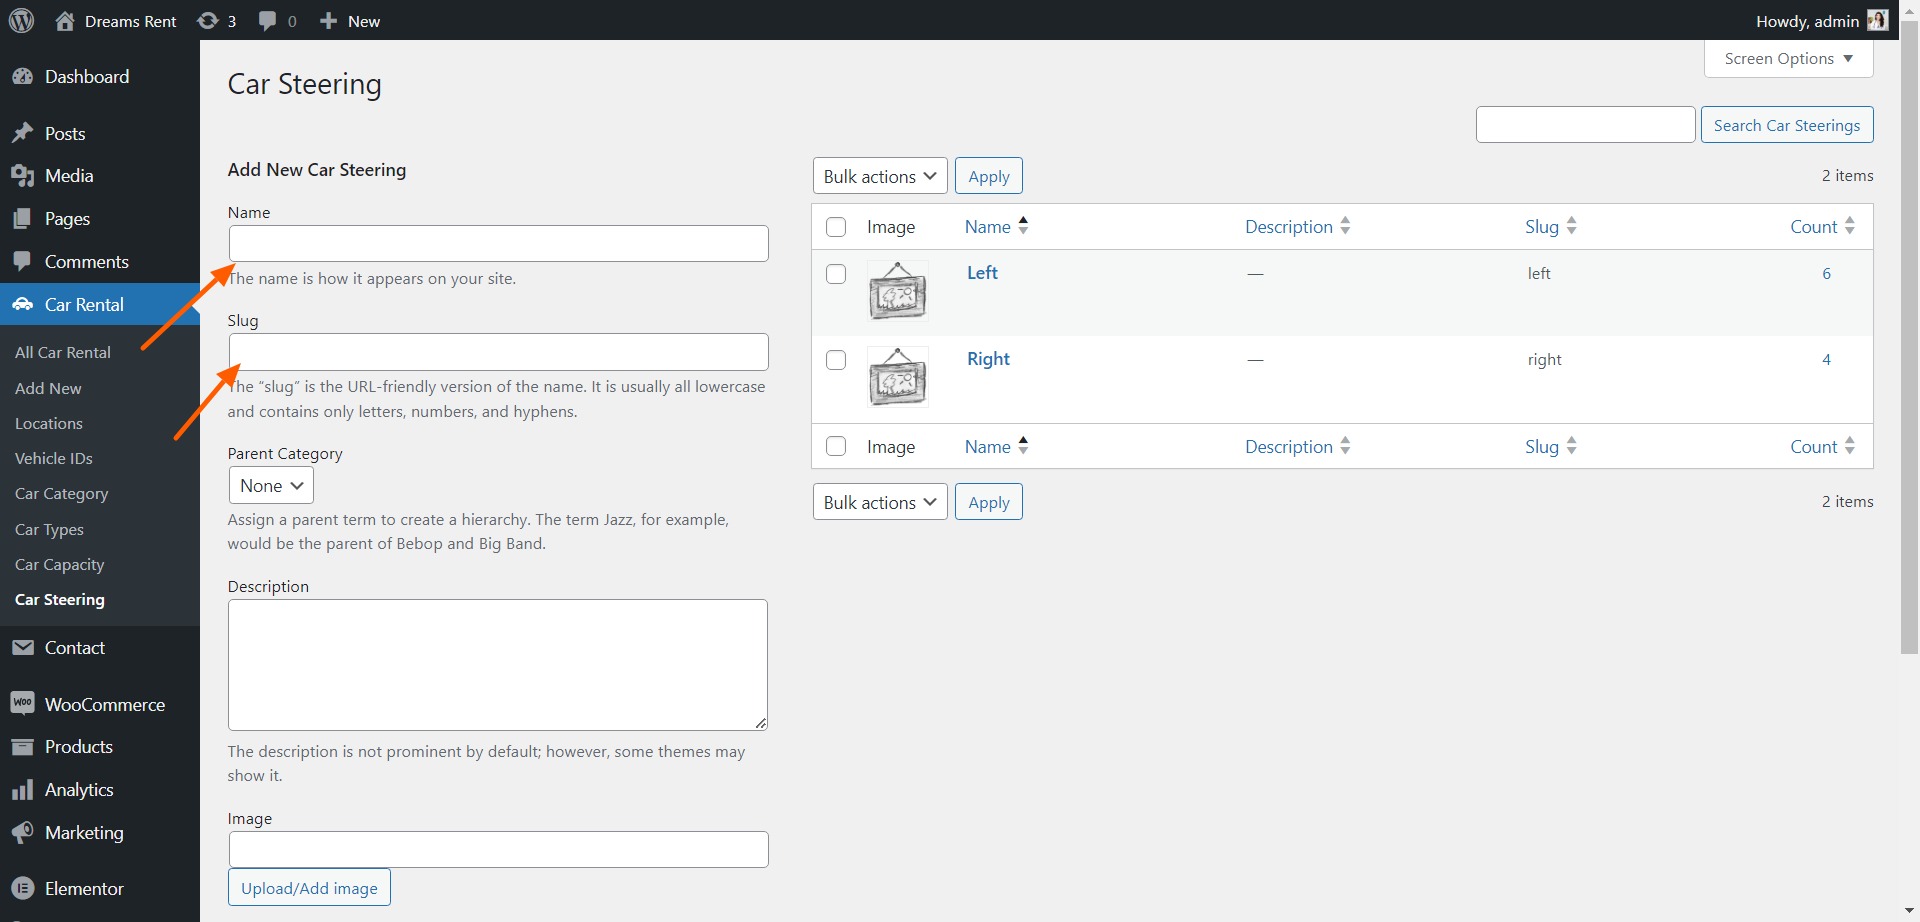
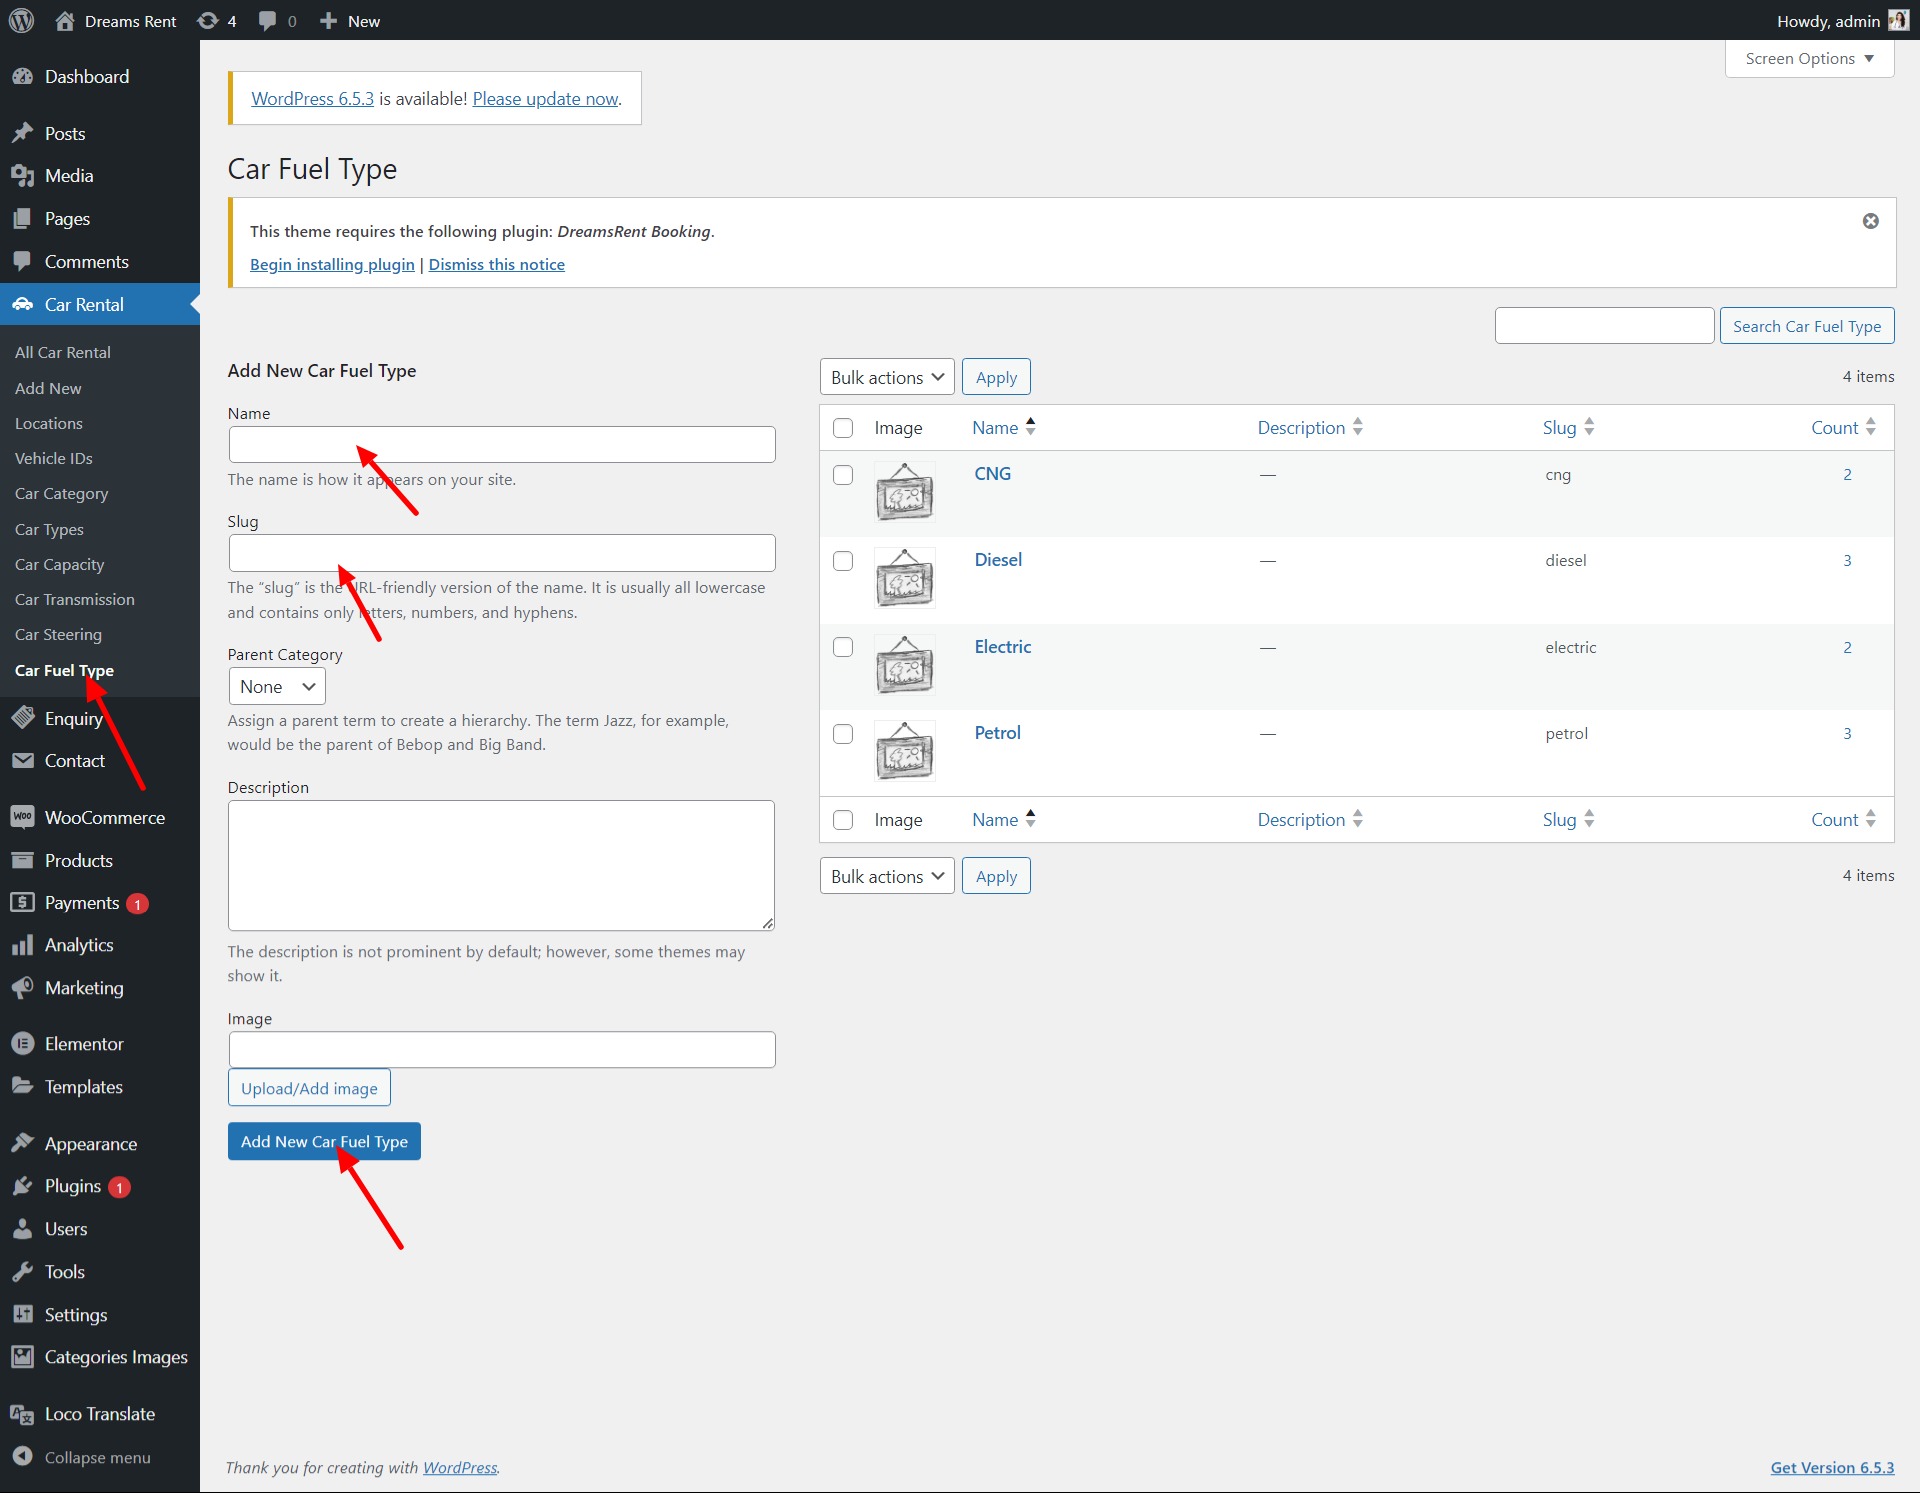
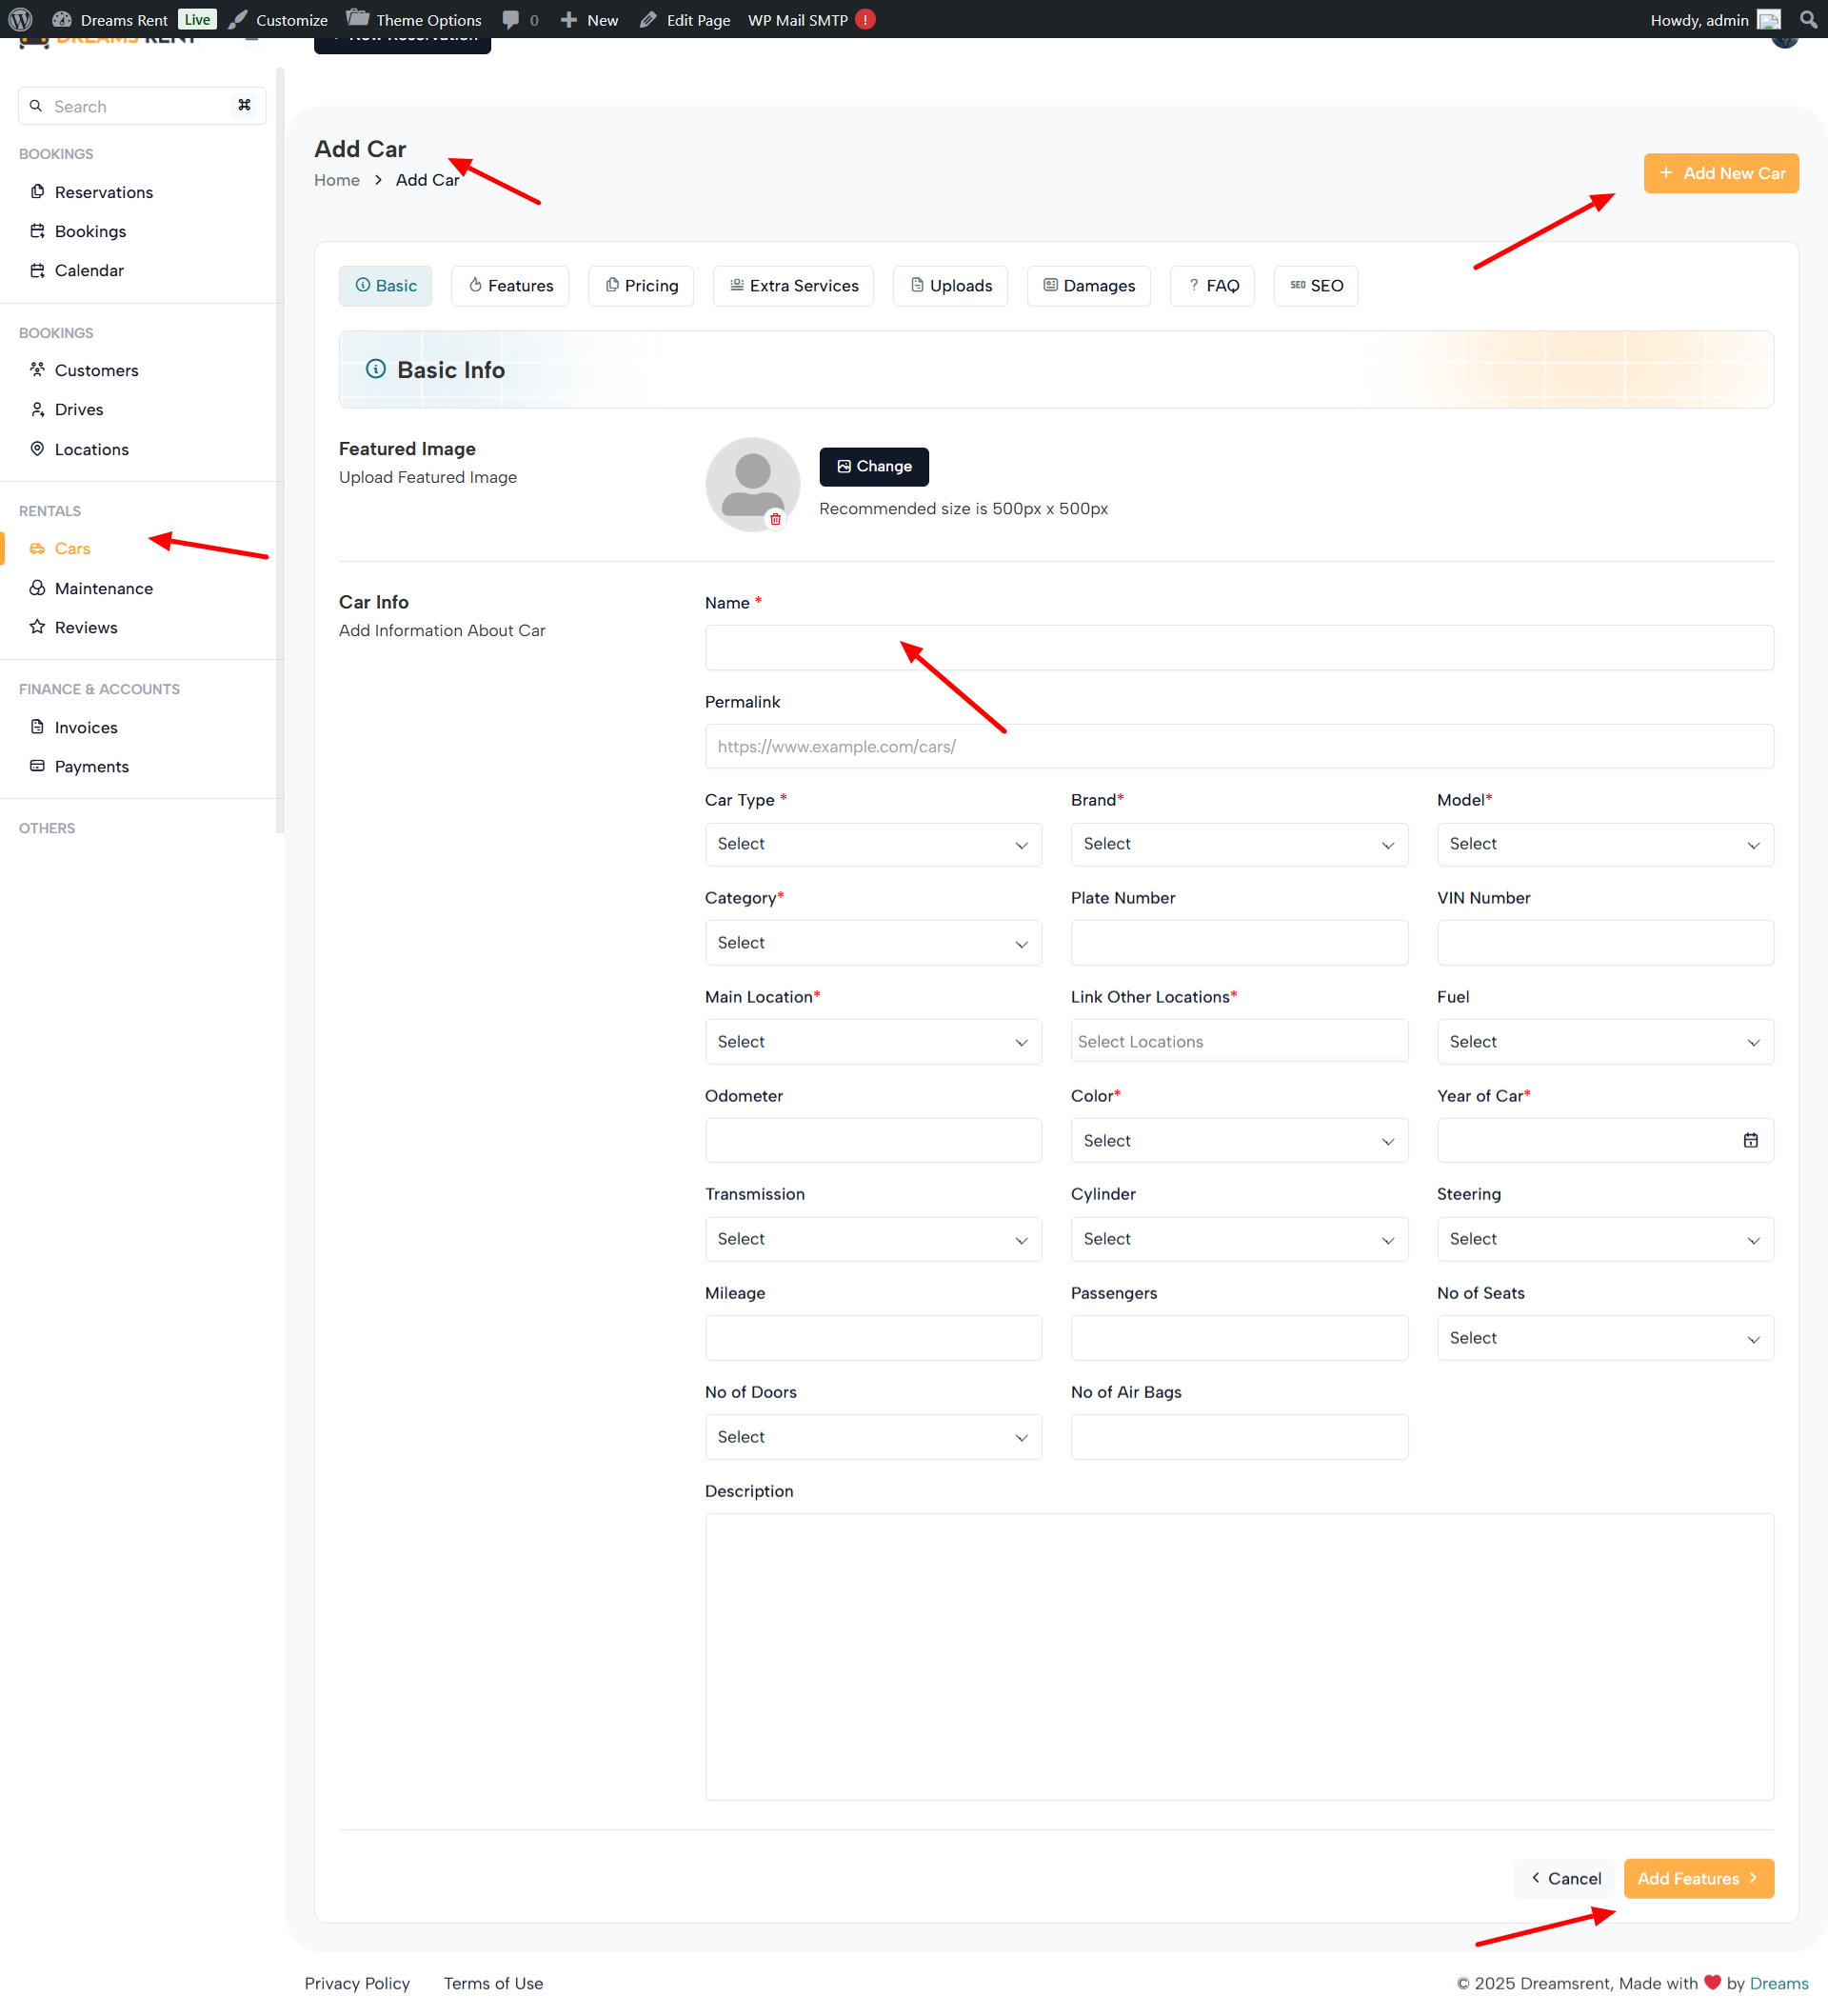
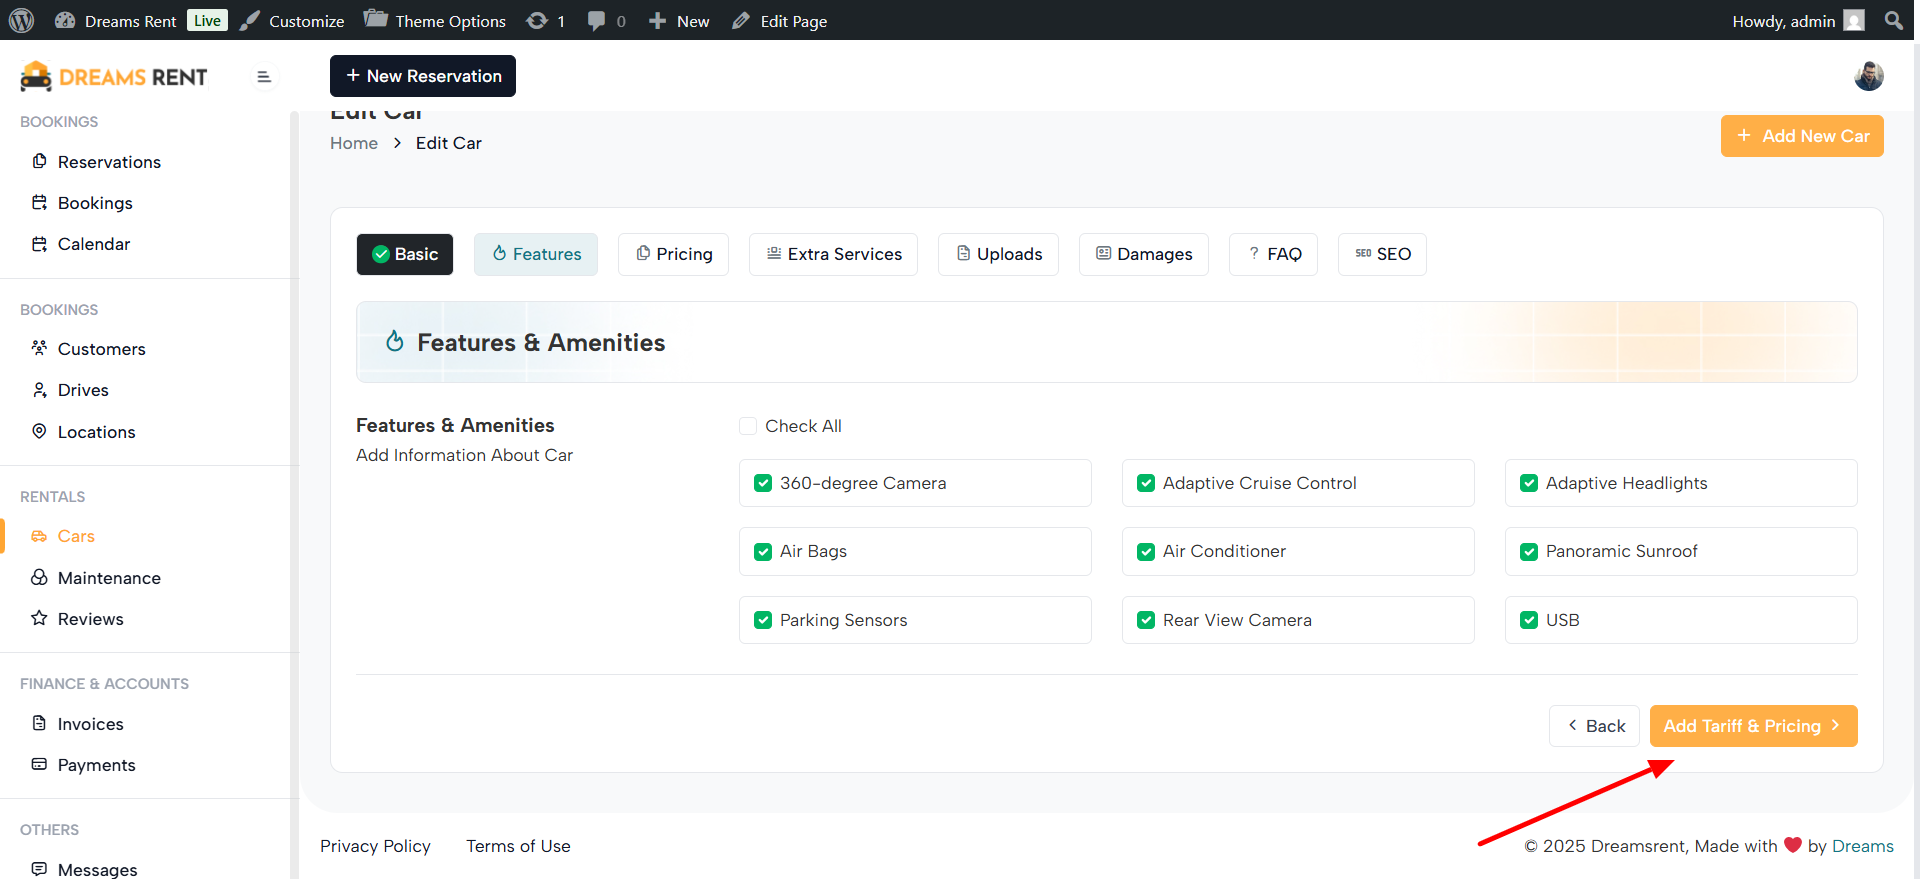
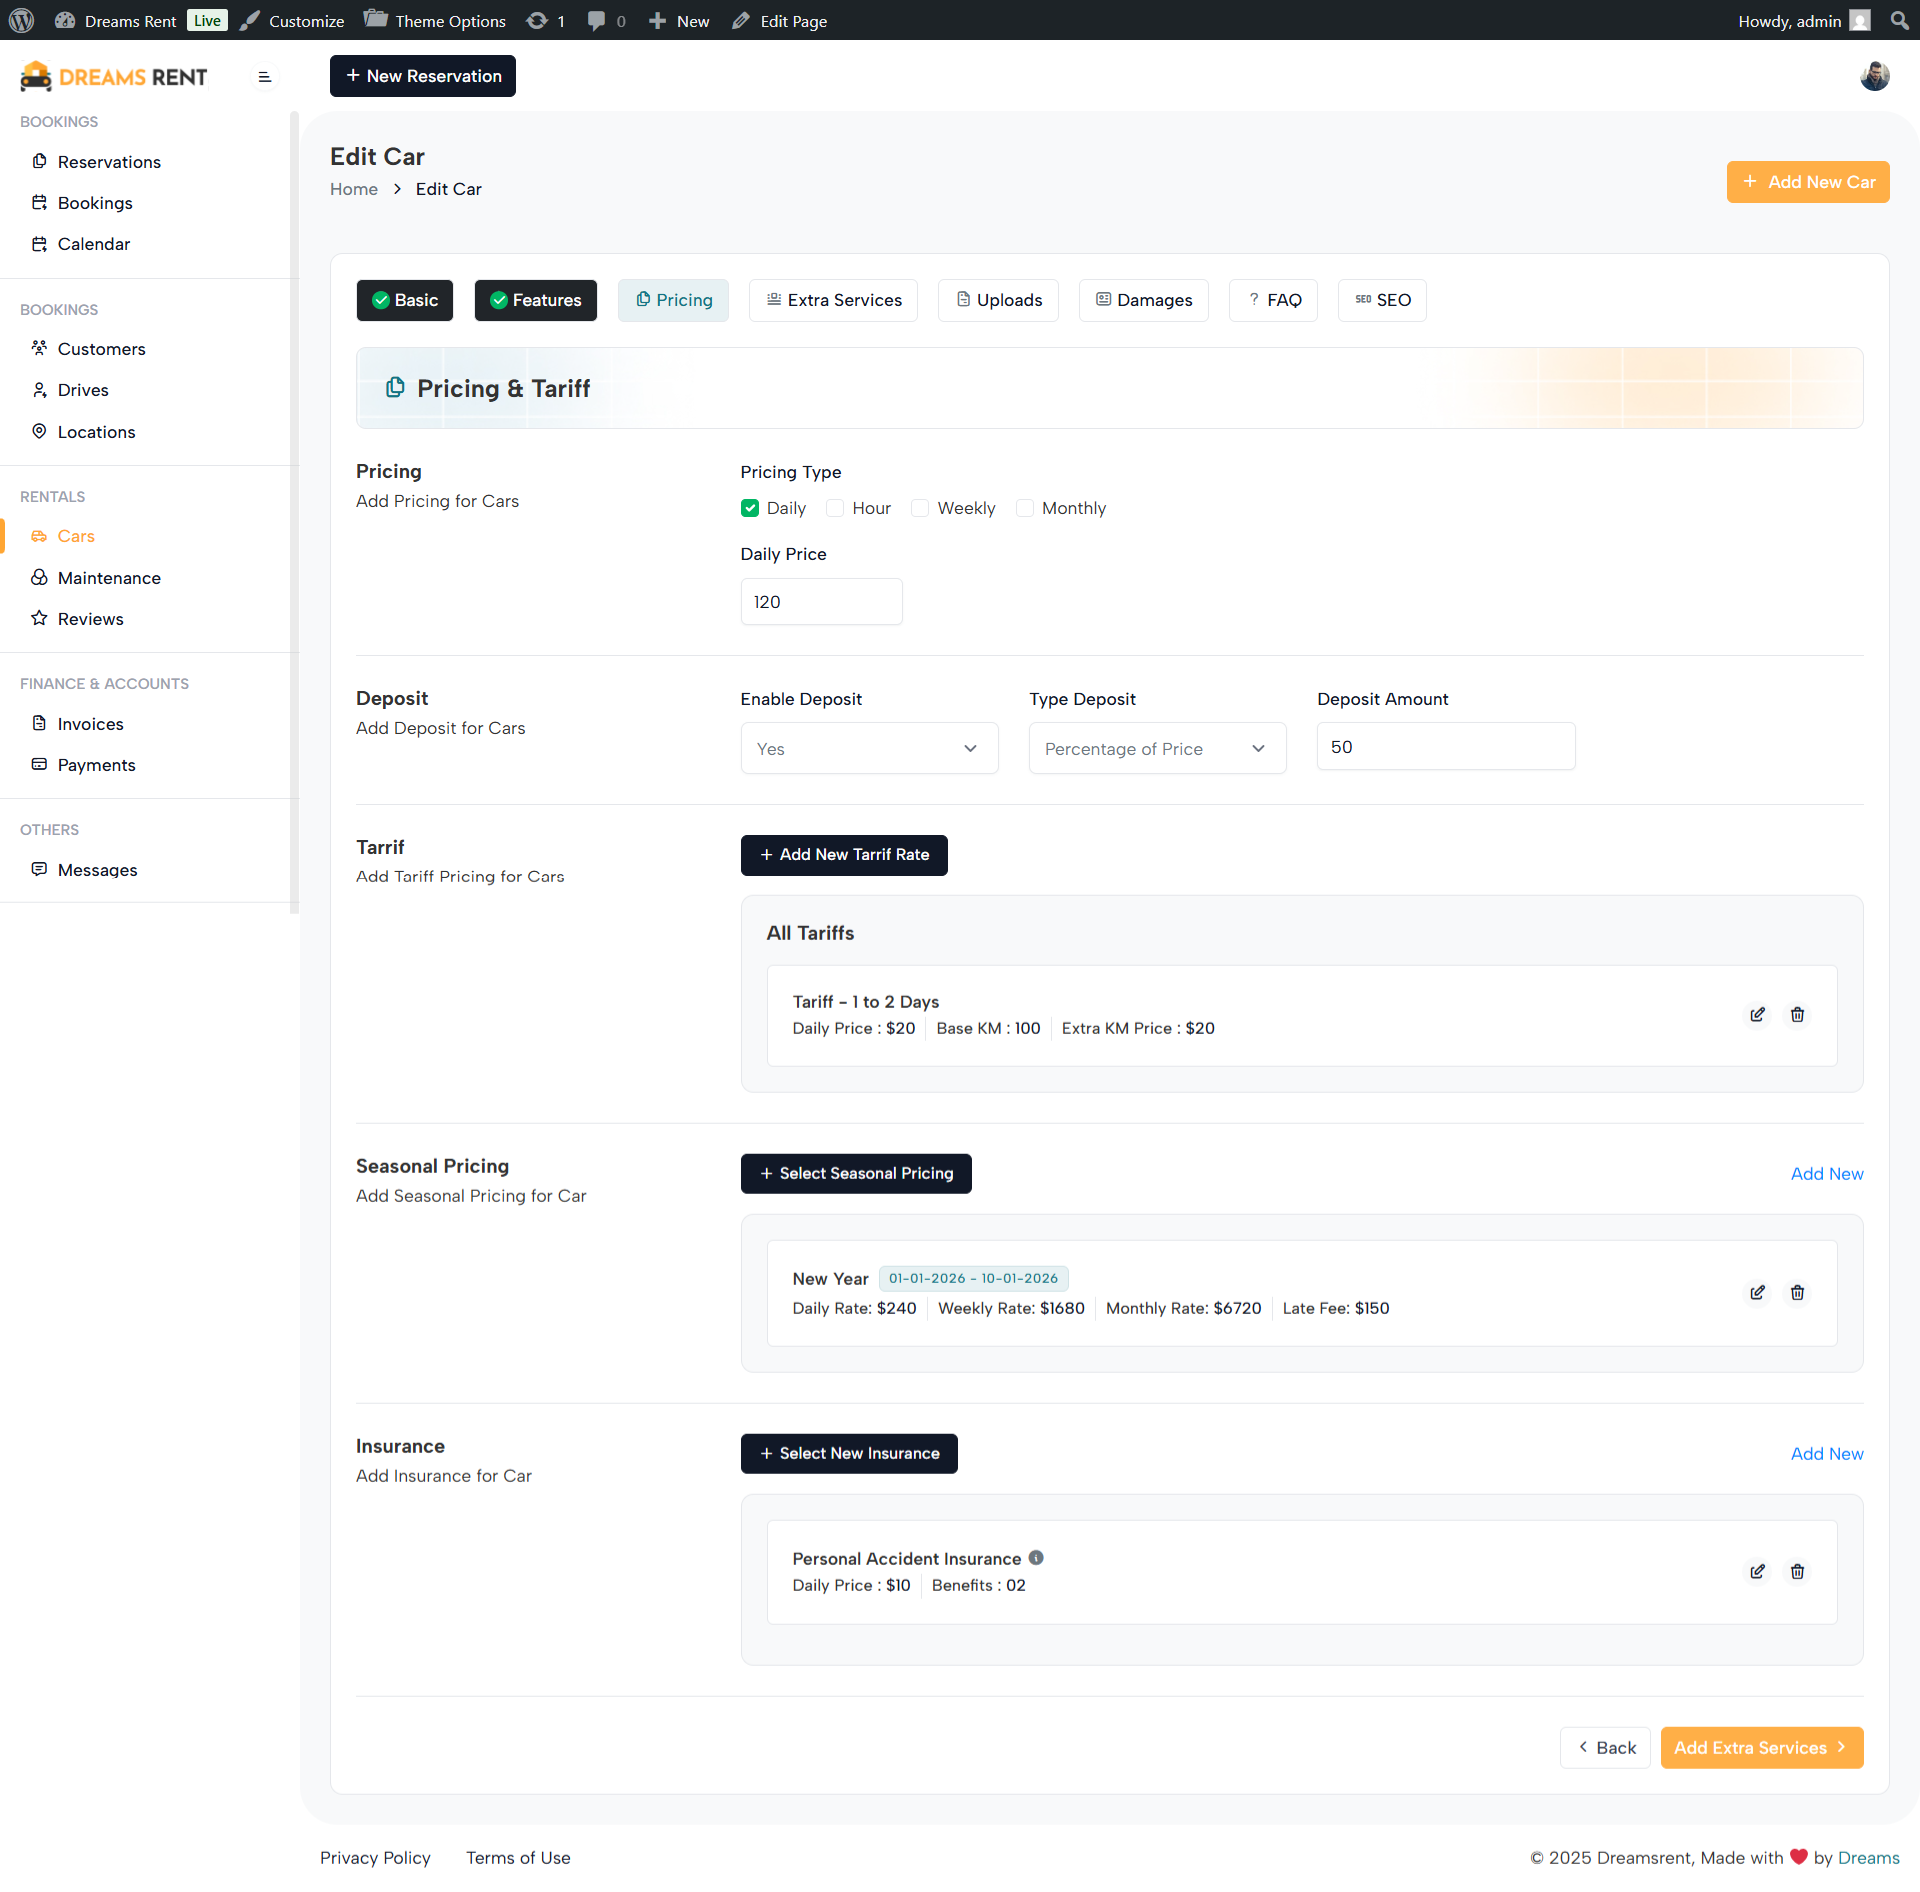
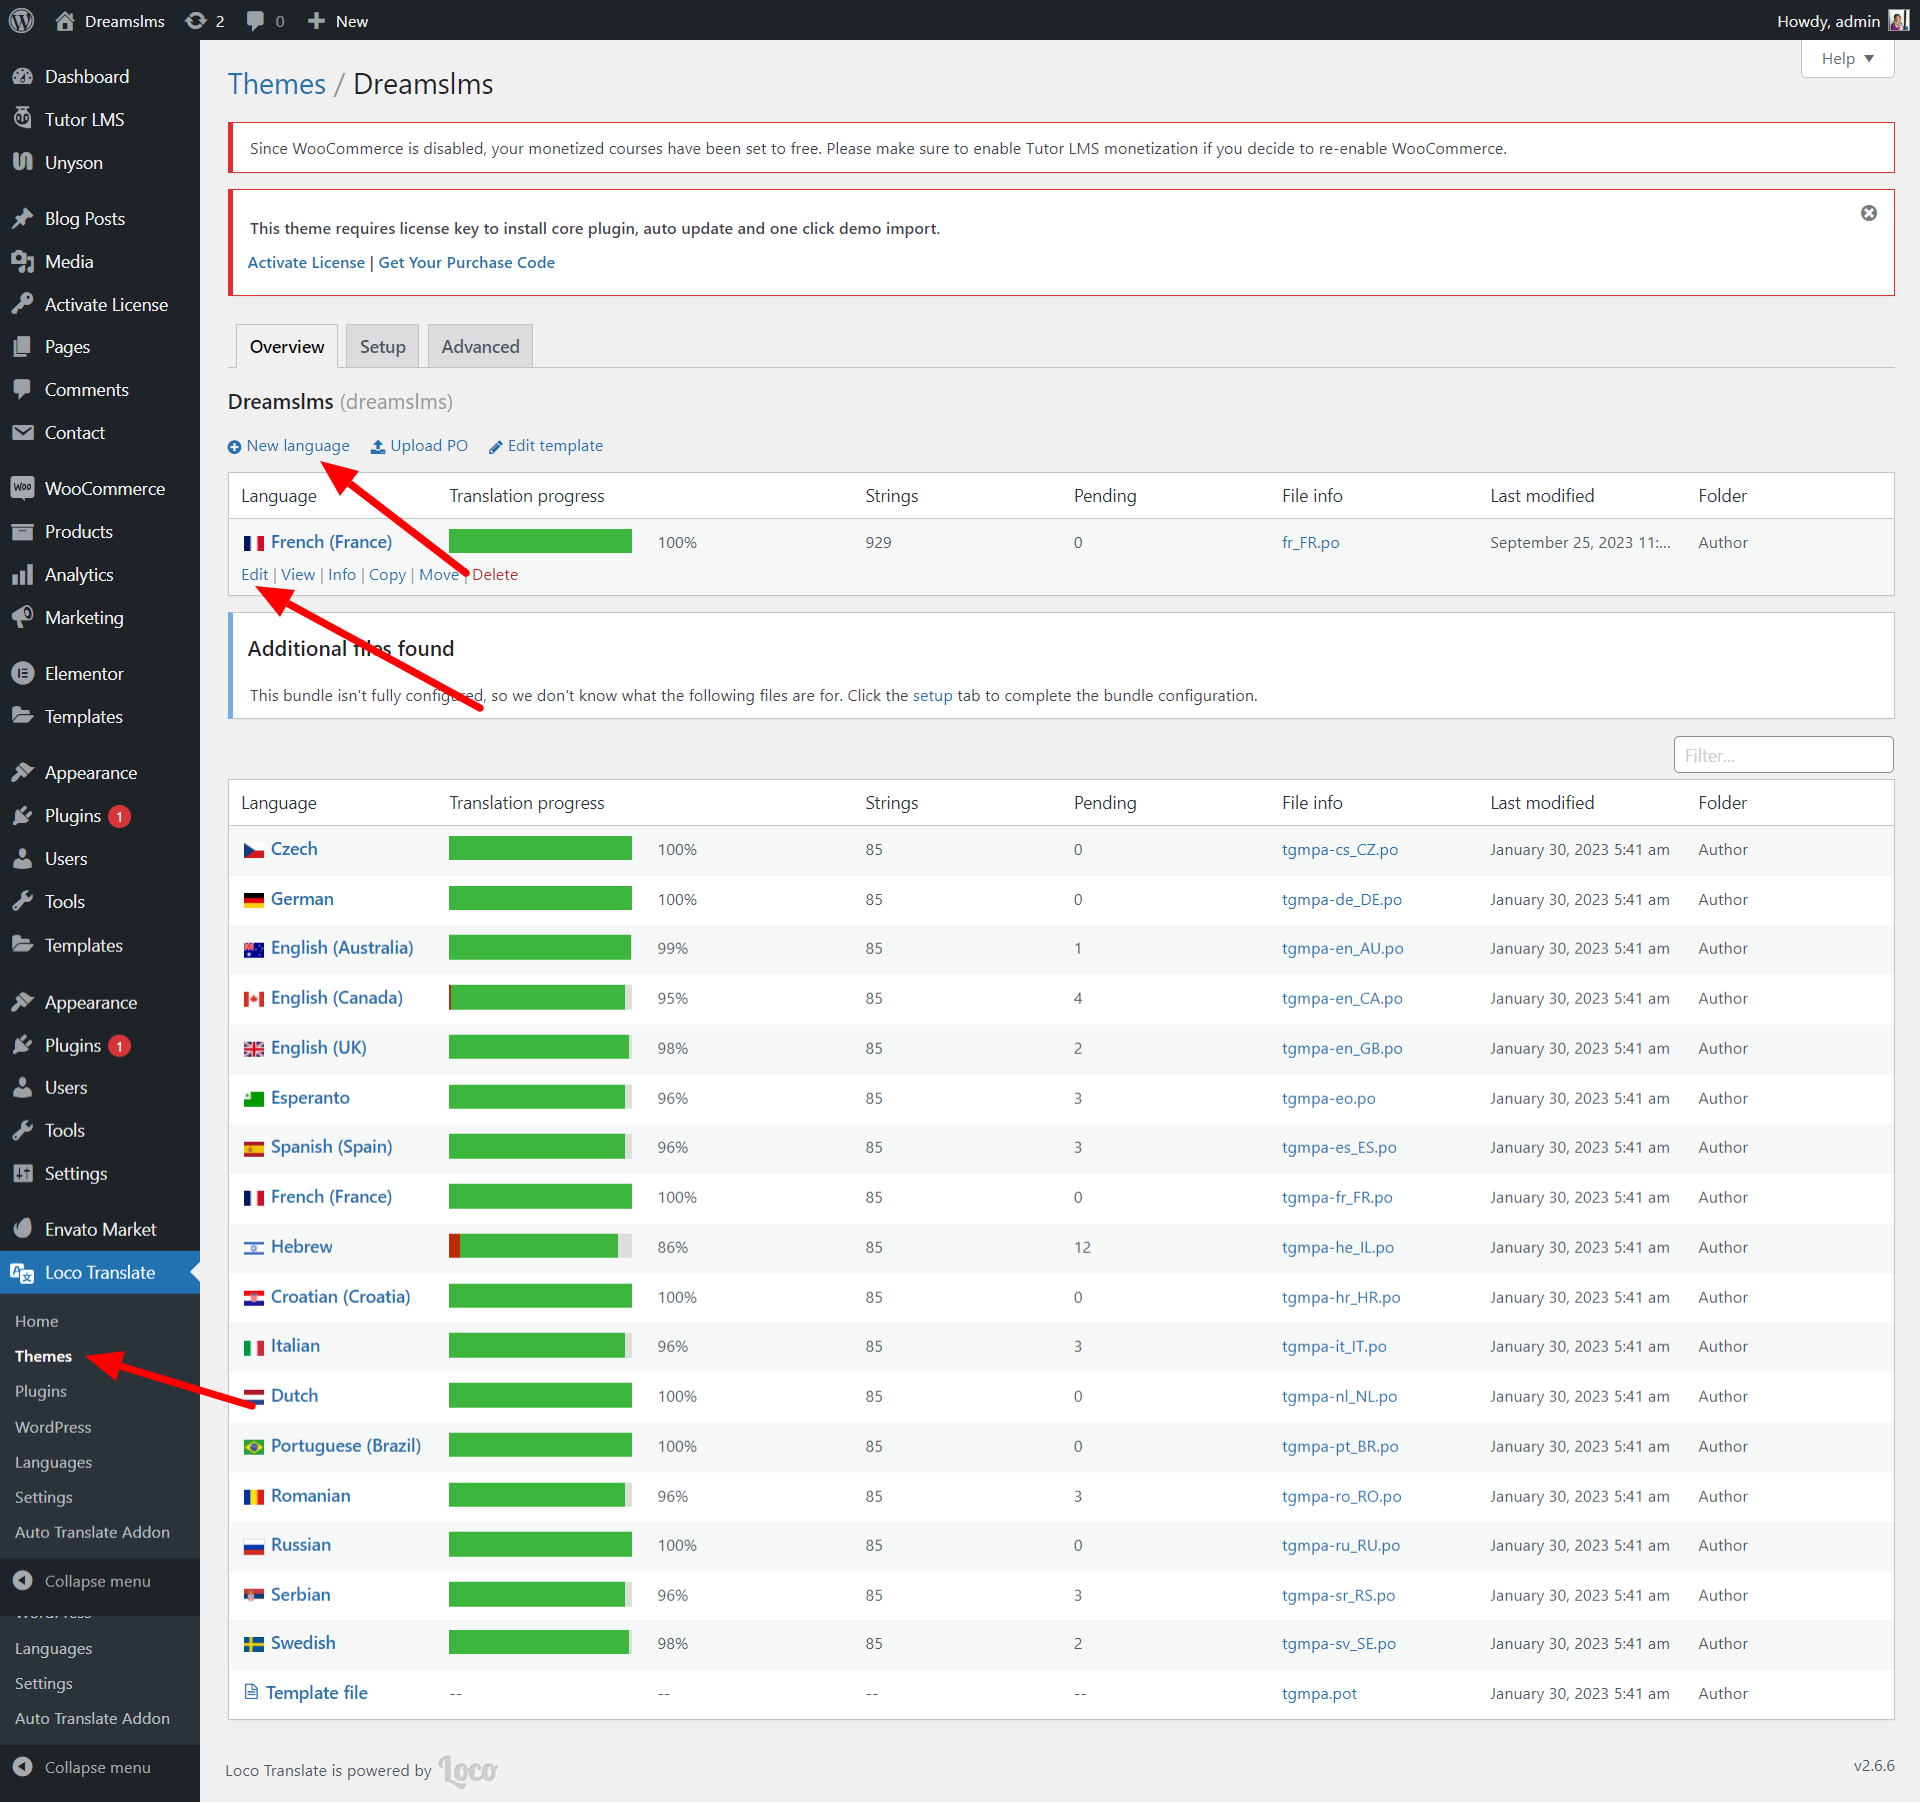
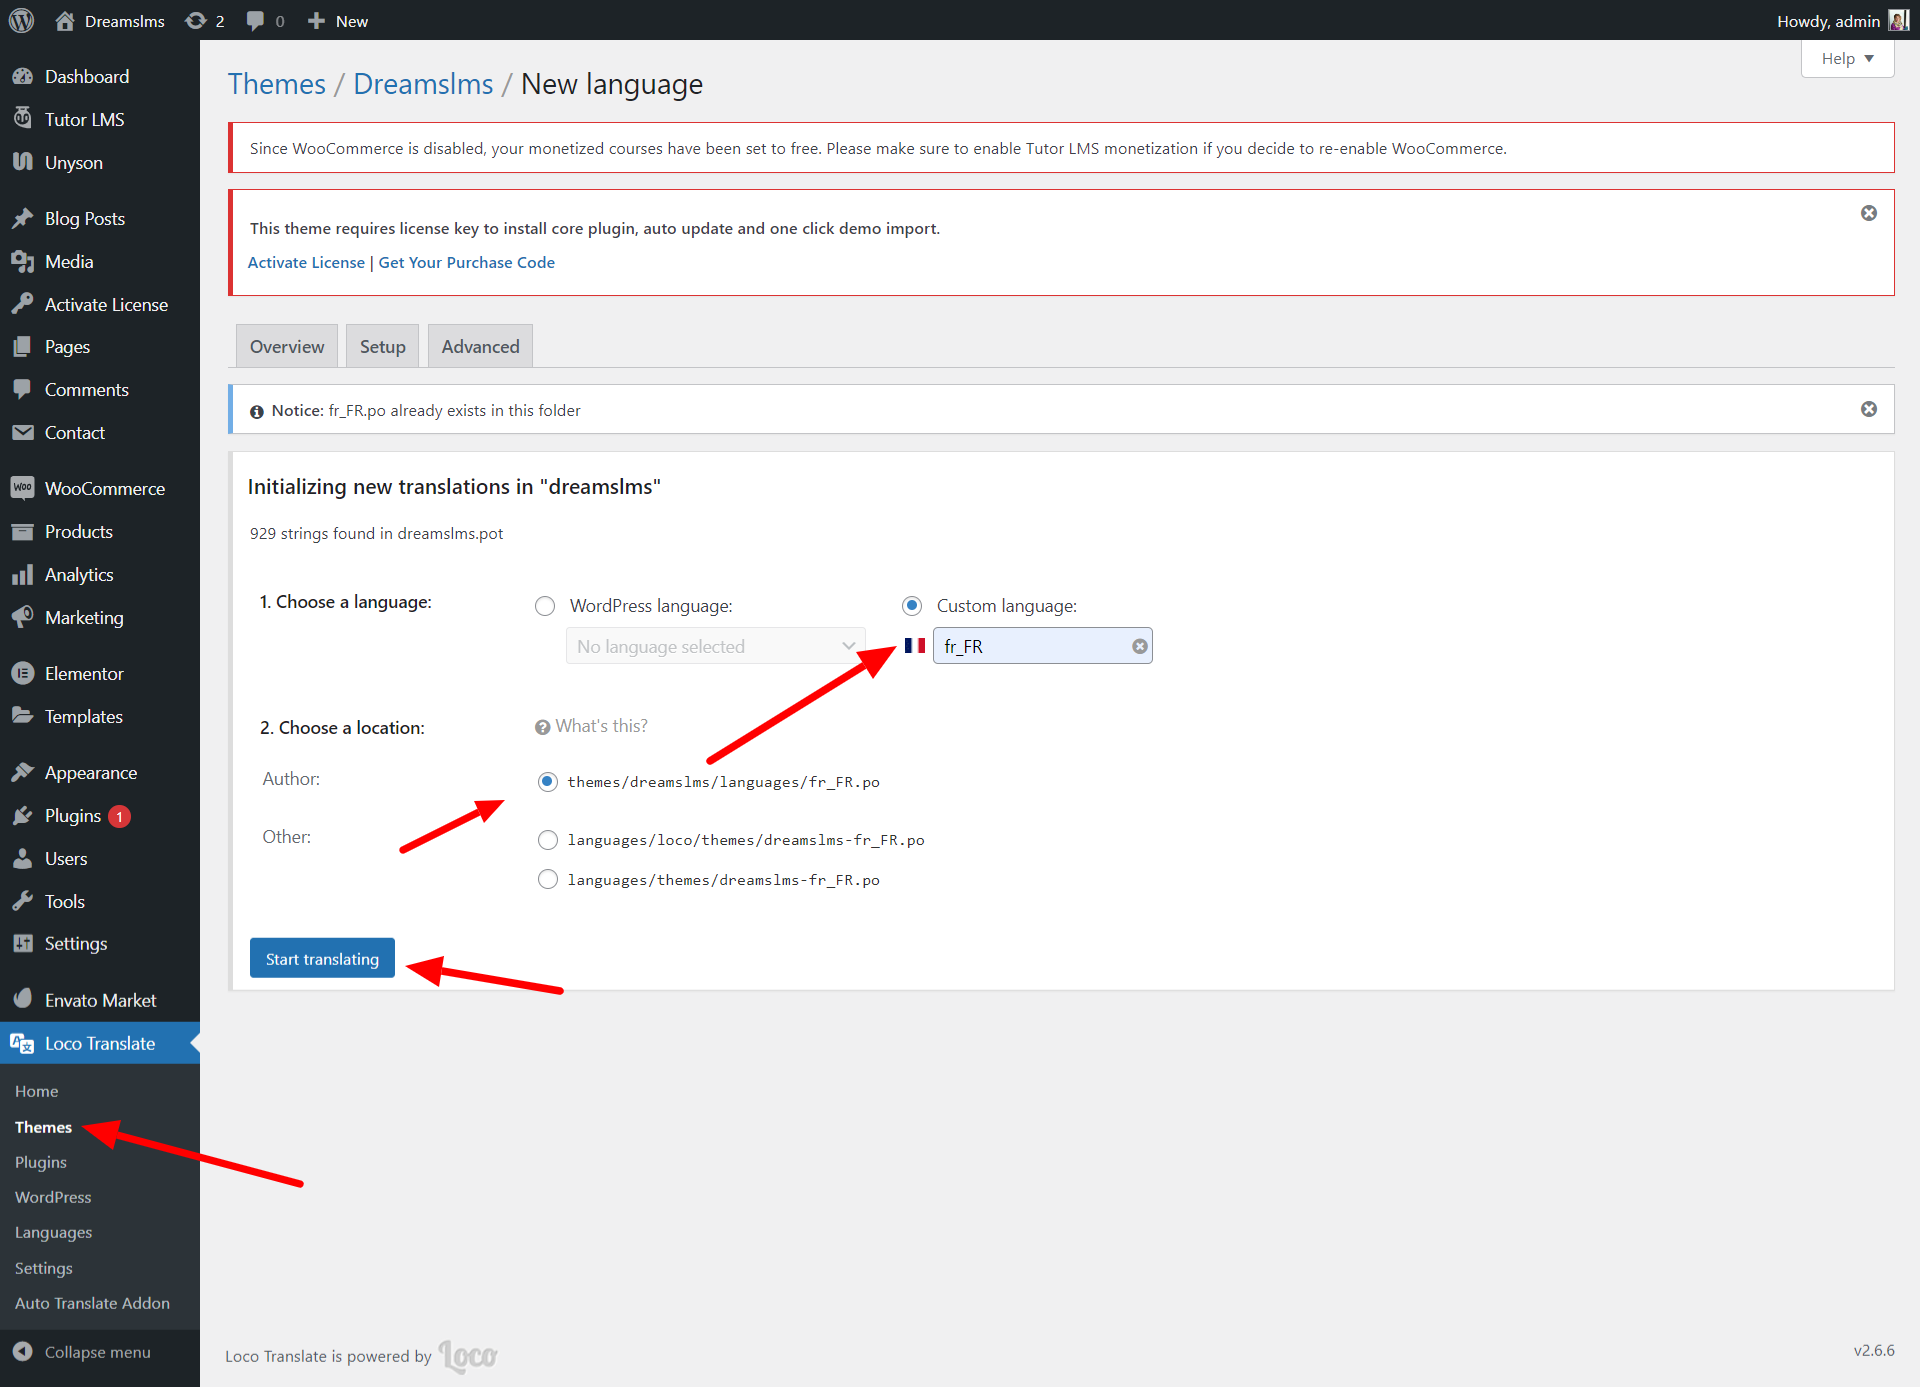
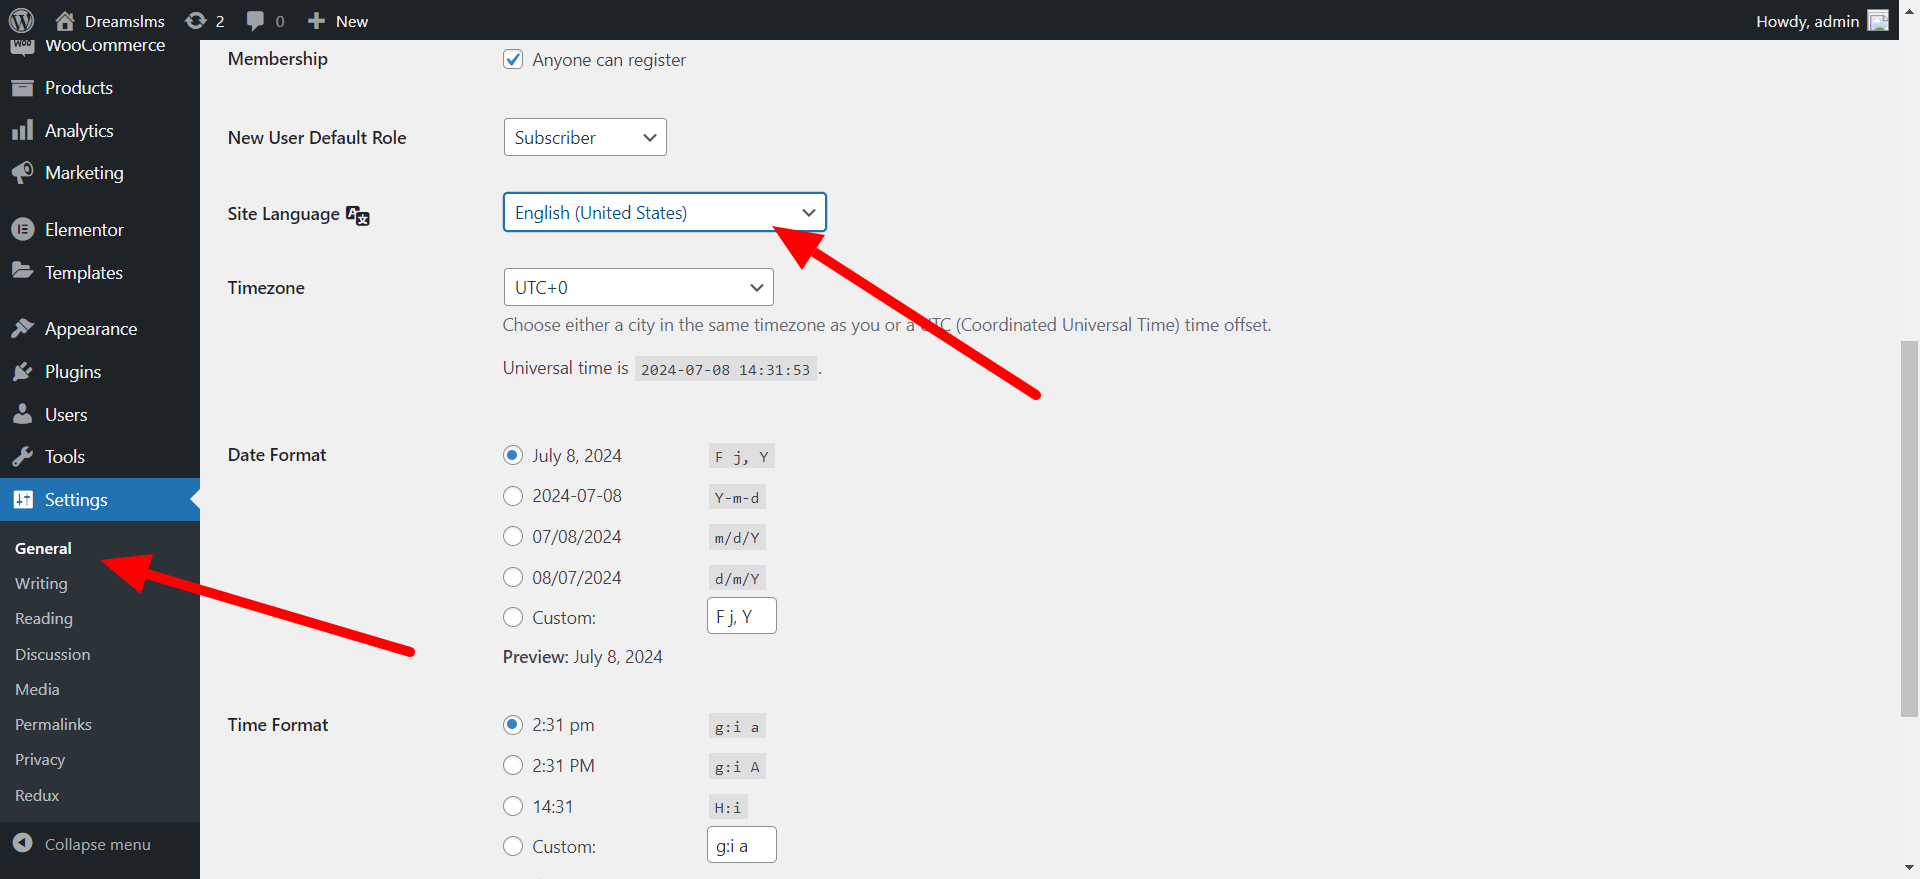
You can manage the wordpress language settings.
Step 1 : Please install Loco Translate Click here
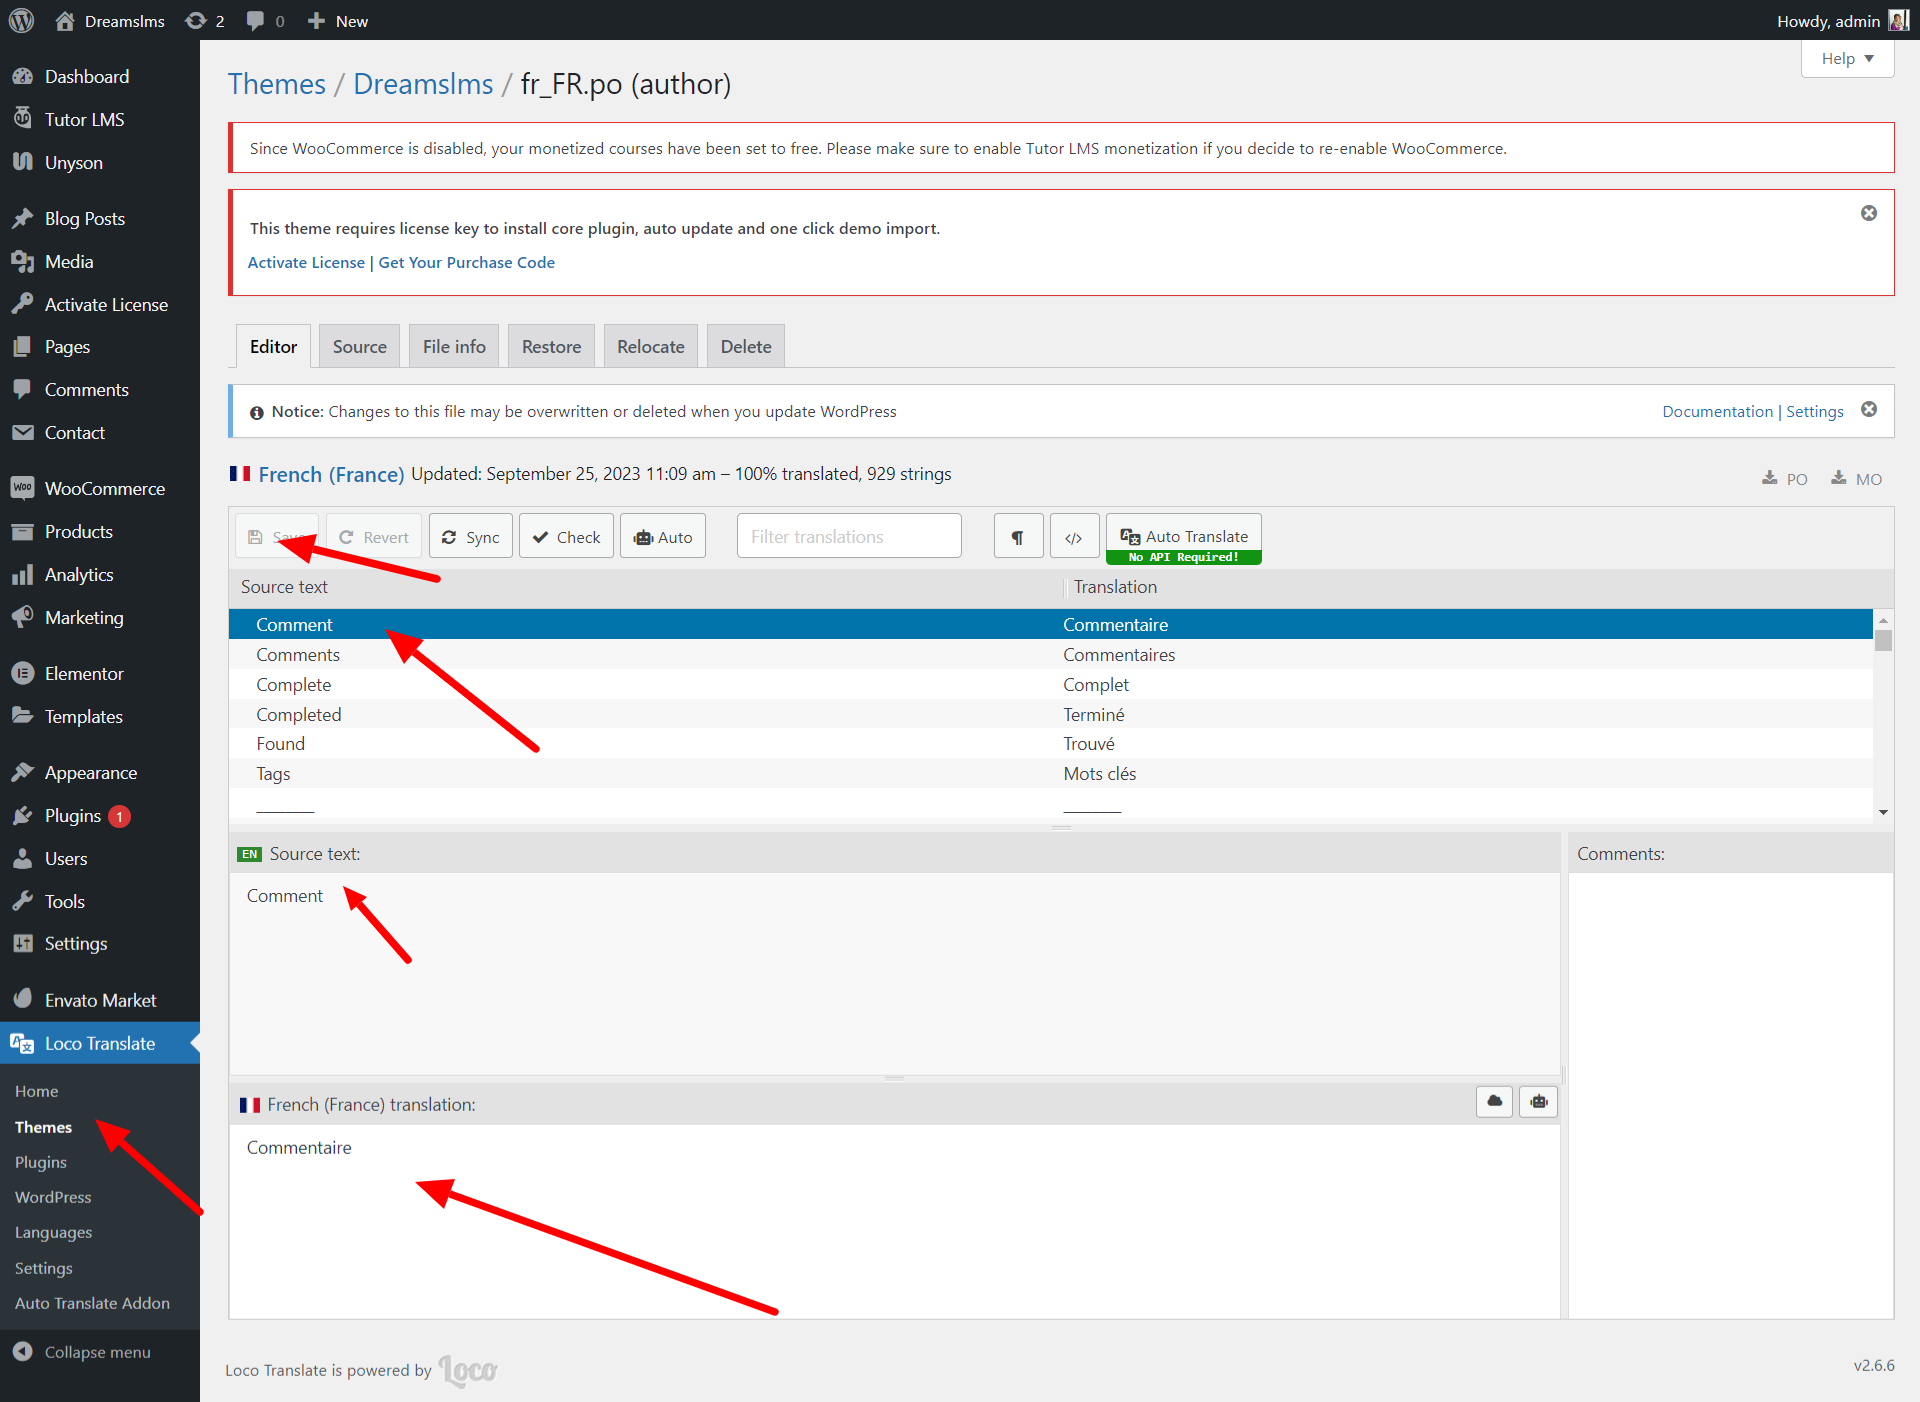
Step 2 : Translate your theme
Step 3 : Translate your theme required plugins same like theme
Note : Please refer the right side image for your reference
WooCommerce Version: This theme requires WooCommerce 8.0 or higher. All booking appointments are processed as WooCommerce cart items, allowing you to use any WooCommerce-compatible payment gateway.
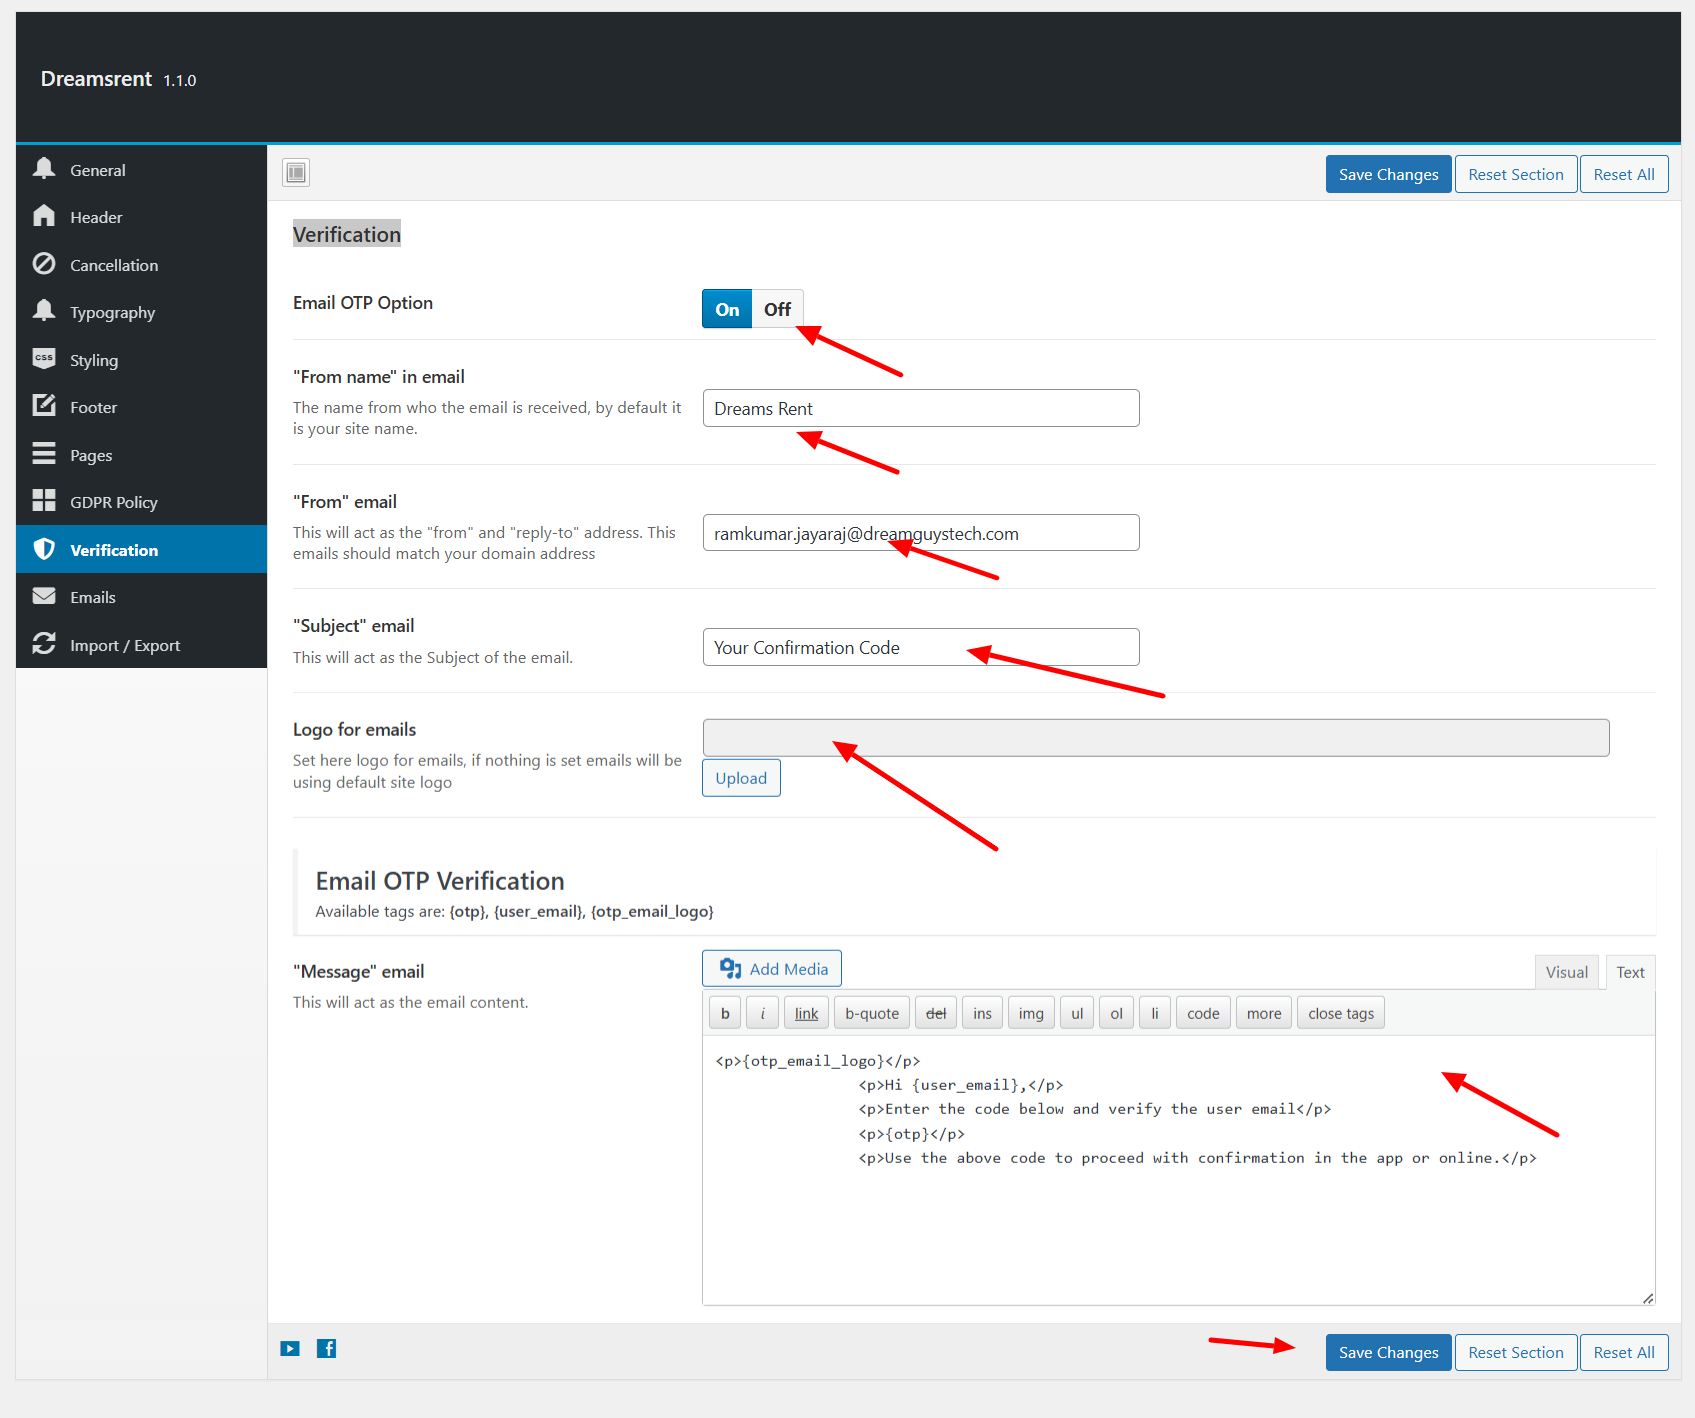
How the Integration Works: When a customer completes the booking flow and clicks Add to Cart, the appointment details are attached to a WooCommerce cart item. The customer then proceeds through the standard WooCommerce checkout. On payment confirmation, the booking status is automatically updated to Confirmed and notification emails are dispatched.
Appointment Booking Process:
- Customer selects a service, staff member, date, and time slot.
- Customer clicks the Add to Cart button to add the appointment to the WooCommerce cart.
- Customer completes checkout using any configured payment gateway.
- On successful payment, the booking is confirmed and both the customer and staff receive a notification email.
Payment gateways can be configured under WooCommerce → Settings → Payments. Commonly used gateways:
- PayPal Standard – general information on PayPal payment setup.
- Stripe – general information on Stripe payment setup.
- Razorpay – general information on Razorpay payment setup.
This theme is compatible with WooCommerce High-Performance Order Storage (HPOS). Ensure HPOS is enabled under WooCommerce → Settings → Advanced → Features for best performance.
1. Demo content import fails or times out
This is almost always a server resource limitation. Try the following:
- Add
define( 'WP_MEMORY_LIMIT', '512M' );to yourwp-config.phpbefore the line "That's all, stop editing!". - Ask your host to increase
max_execution_timeto 300 andupload_max_filesizeto 256M. - Ensure all 7 required plugins are installed and activated before running the import.
- Re-run the import from Appearance → Import Demo Data.
- If images are missing after import, go to Tools → Import → WordPress and re-run the WordPress importer choosing to download and import attachments.
2. Booking confirmation emails are not being sent
WordPress uses PHP's mail() function by default, which many hosts
block. To fix this:
- Install a free SMTP plugin such as WP Mail SMTP.
- Configure it with your email provider's SMTP credentials (Gmail, SendGrid, Mailgun, etc.).
- Use the plugin's Test Email feature to confirm delivery.
- Check your spam folder — some hosts deliver to spam before SMTP is configured.
3. Payment is not processing / WooCommerce errors
- Confirm WooCommerce is installed and active (version 8.0 or higher).
- Go to WooCommerce → Settings → Payments and ensure at least one payment gateway is enabled and configured.
- If using Stripe, ensure your API keys are entered and the gateway is set to Live mode (not Test) for real transactions.
- Check WooCommerce → Status → Logs for error messages related to payment failures.
4. Booking or Dashboard pages return a 404 error
This is almost always a permalink issue. Fix it by:
- Going to Settings → Permalinks in WordPress Admin.
- Without changing any settings, click Save Changes. This flushes the rewrite rules.
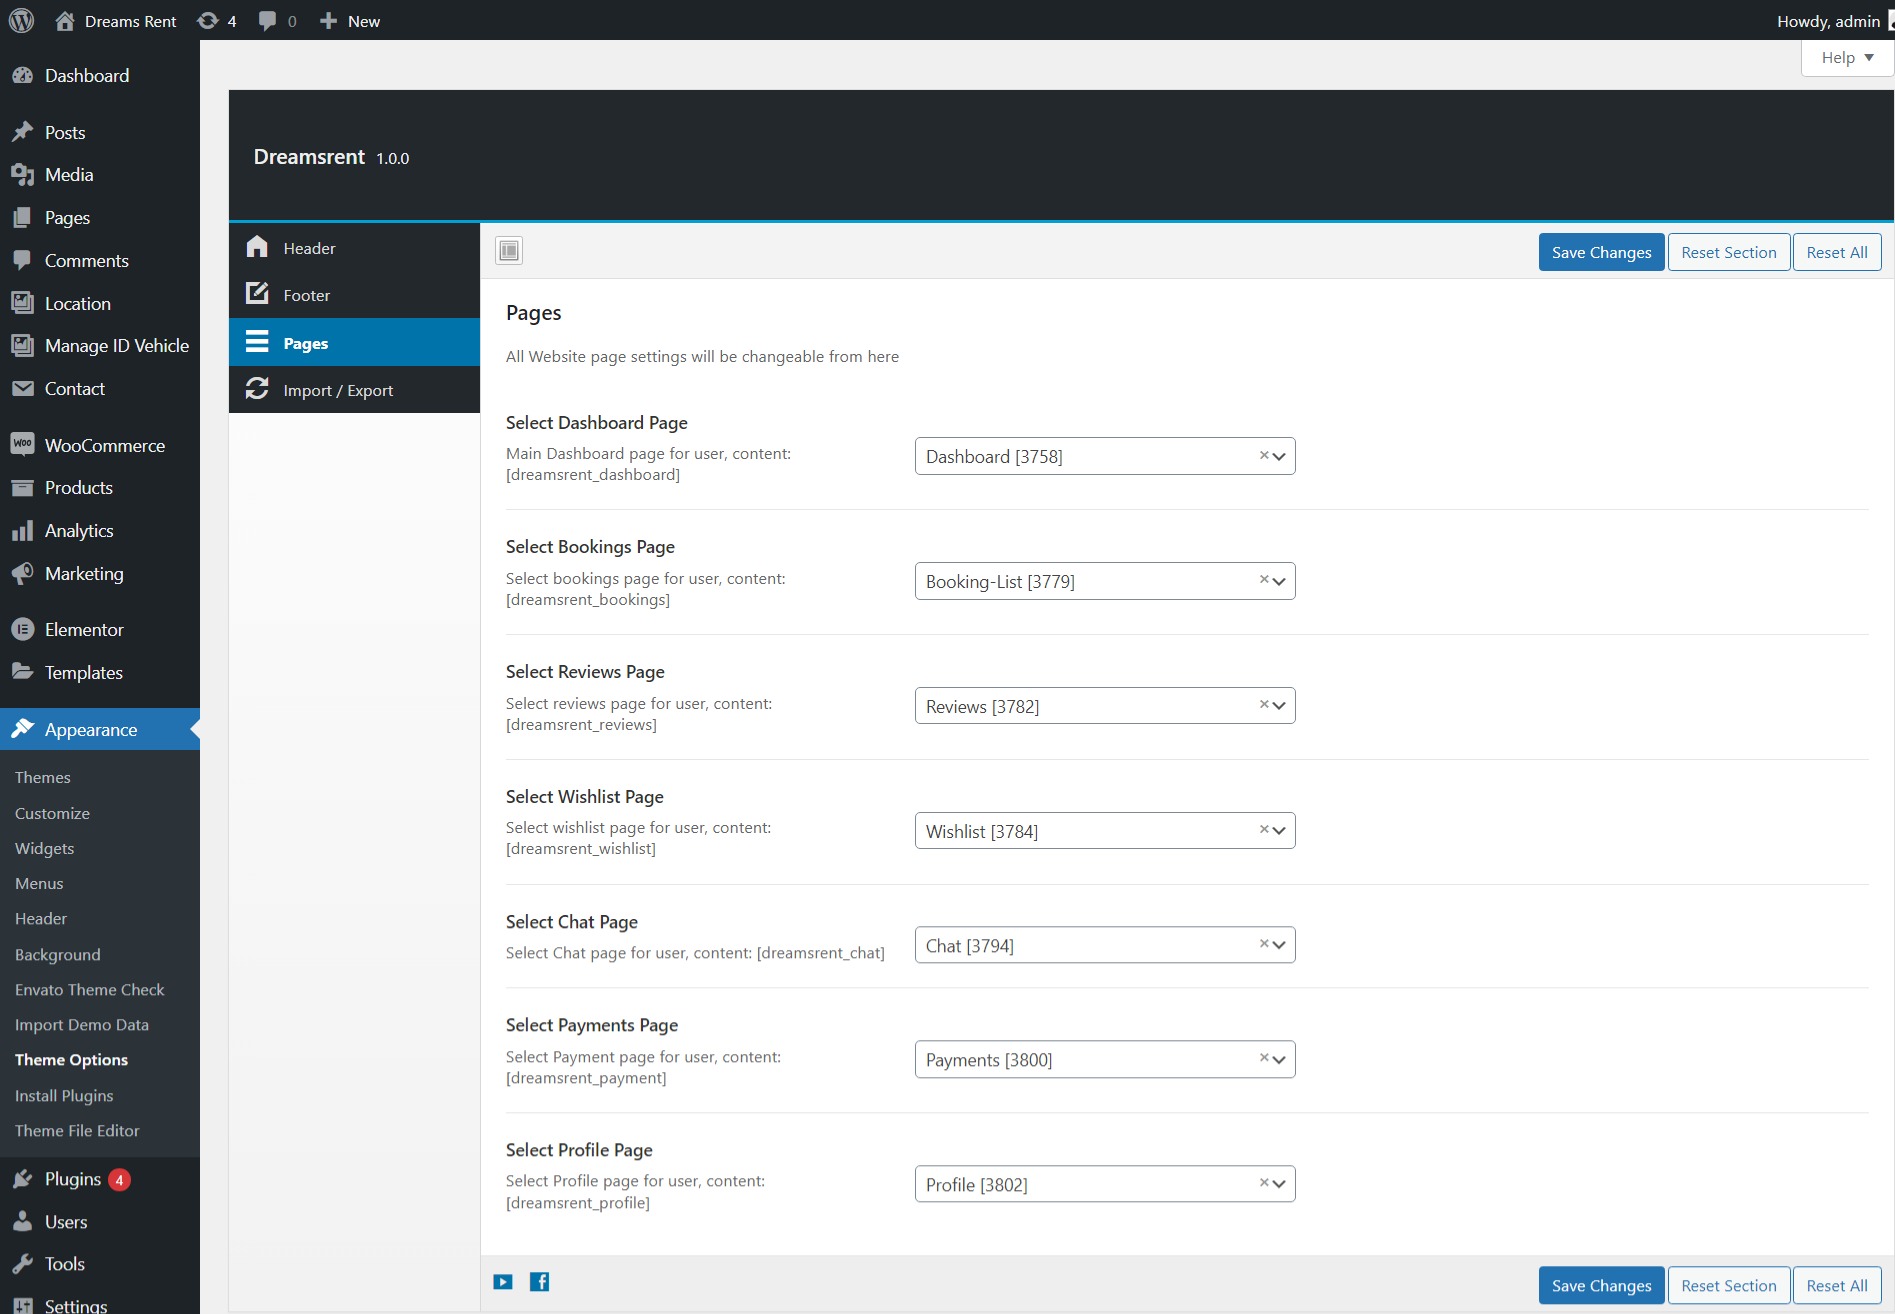
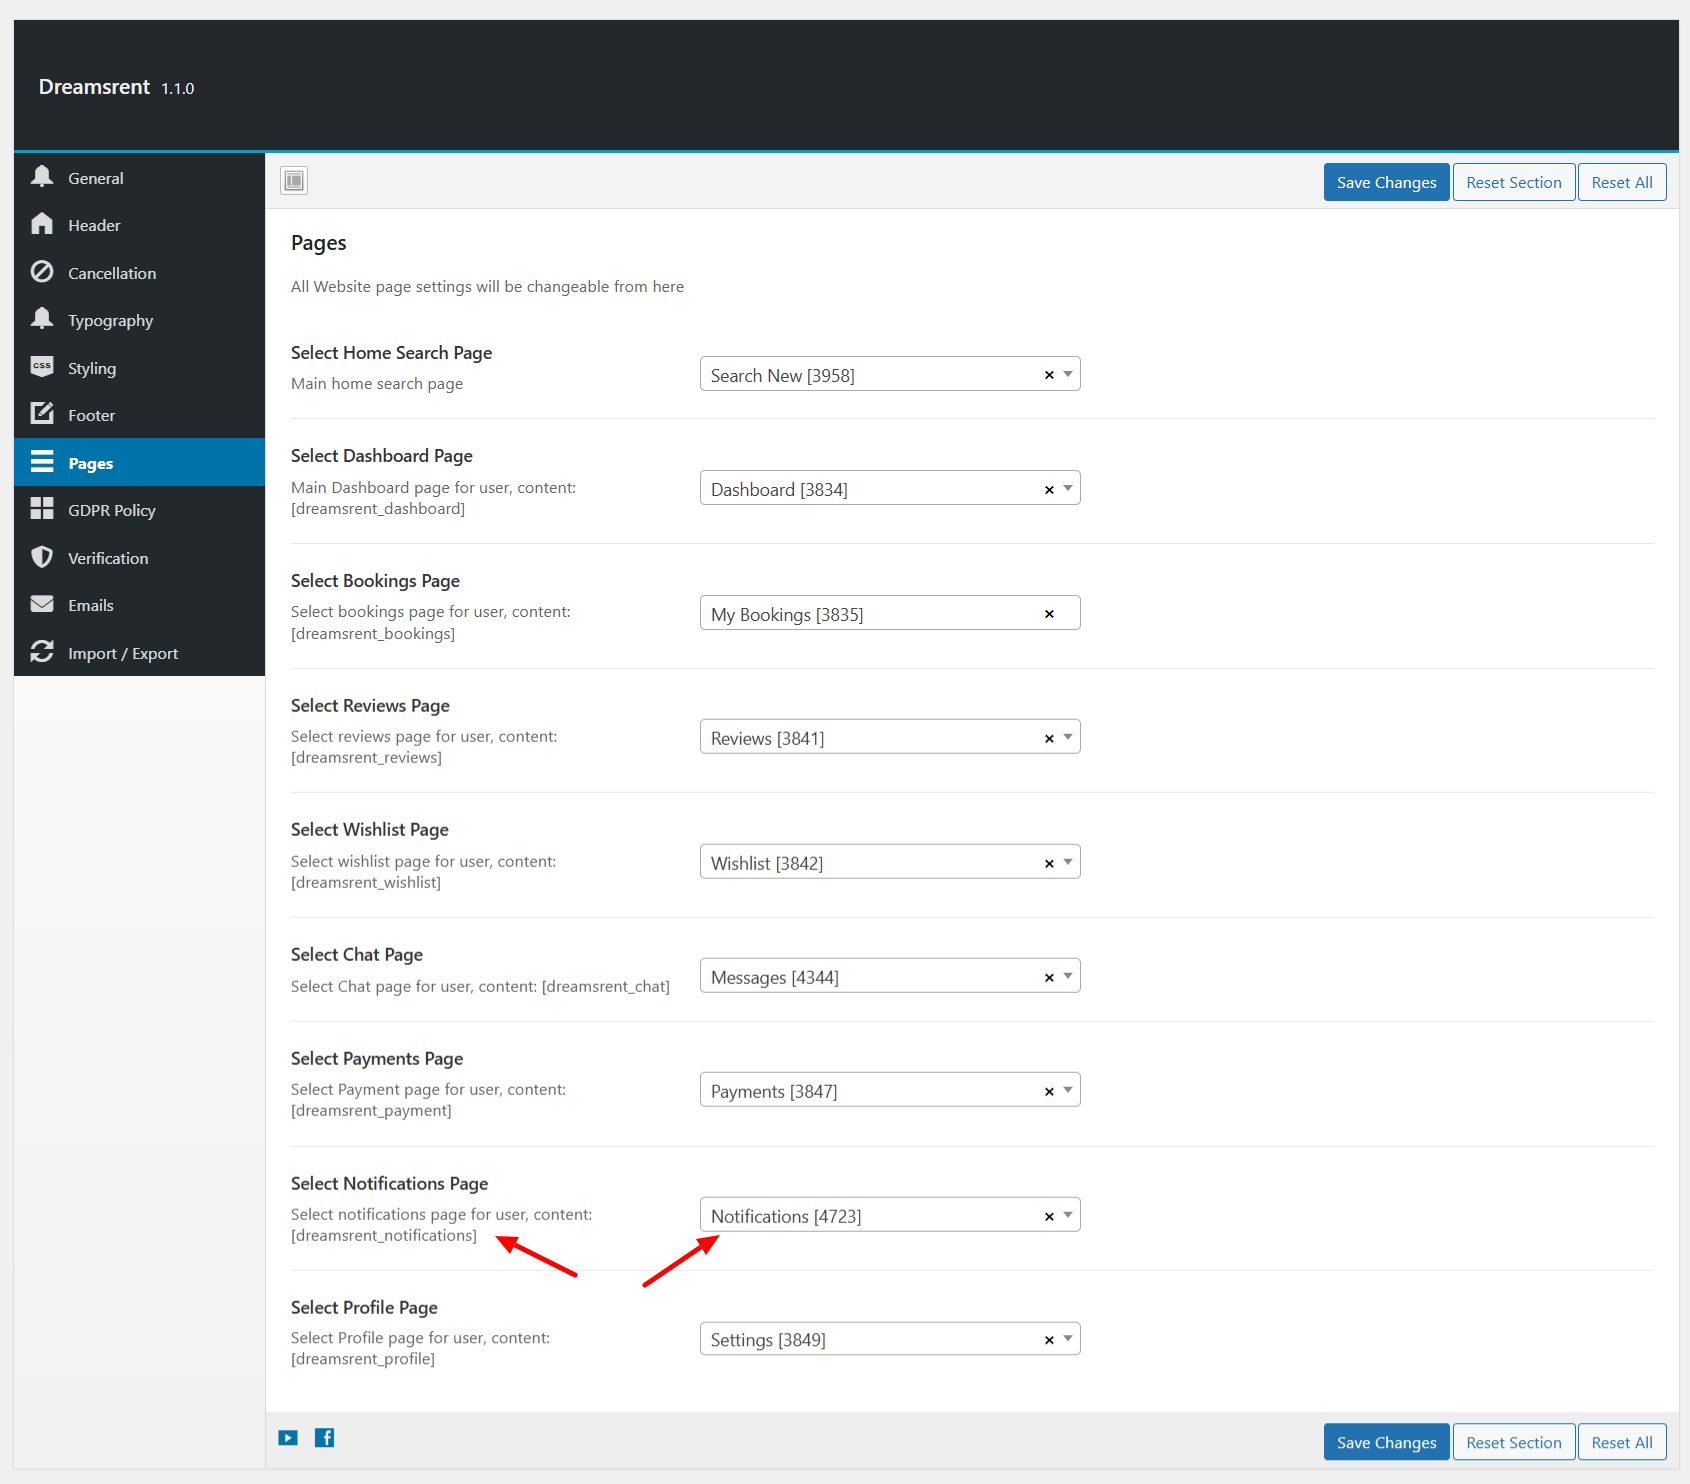
- If the issue persists, confirm the correct page is assigned under Appearance → Theme Options → Service.
5. PHP memory or white screen errors
- Add
define( 'WP_DEBUG', true );anddefine( 'WP_DEBUG_LOG', true );towp-config.phpto enable logging. Check the log atwp-content/debug.log. - Increase PHP memory: add
define( 'WP_MEMORY_LIMIT', '512M' );towp-config.php. - Deactivate all non-Dreams Rent plugins one by one to check for plugin conflicts.
- Switch temporarily to a default WordPress theme (e.g., Twenty Twenty-Four) to rule out theme-level conflicts.
6. Elementor icons not rendering correctly after demo import
Go to Elementor → Settings → Features Tab → Inline Font Icons and change the setting from DEFAULT to INACTIVE. This must be done after every demo import.
Dreams Rent is developed by Dreams Technologies and is available under both Envato Extended & Regular License options.
Regular License
Usage by either yourself or a single client is permitted for a single end product, provided that end users are not subject to any charges.
Extended License
For use by you or one client in a single end product for which end users may be charged.
What are the main differences between the Regular License and the Extended License?
If you operate as a freelancer or agency, you have the option to acquire the Extended License, which permits you to utilize the item across multiple projects on behalf of your clients.
| NAME | URL |
|---|---|
| Bootstrap | https://getbootstrap.com/docs/ |
| jQuery | https://jquery.com/ |
| Fontawesome | https://fontawesome.com/ |
| Select2 | https://github.com/select2/select2 |
| Date Timepicker | https://cdnjs.com/libraries/jquery-datetimepicker |
| Google Fonts | https://fonts.google.com/ |
| Fancy Box | http://fancybox.net/ |
| Moment JS | https://momentjs.com/ |
| theia-sticky-sidebar | https://github.com/WeCodePixels/theia-sticky-sidebar |
| Range-Slider | https://ionicframework.com/docs/api/range |
Need Support?
If this documentation does not address your questions, please feel free to contact us via email at support@dreamstechnologies.com
Reach the team at GMT+5:30. Typical reply within 12–24 hours on weekdays — rarely up to 48 hrs during holidays. Support is available to verified buyers for template-related issues.
Contact SupportImportant Note : We strive to offer top-notch support, but it's only available to verified buyers and for template-related issues such as bugs and errors. Custom changes and third-party module setups are not covered.
Do you need a customized application for your business?
If you need a customized application for your business depends on your specific requirements and goals, Please contact us. Customization can be the key to success, ensuring your project perfectly aligns with your unique goals and requirements.
Don't Miss Out on the Benefits of Customization!
Unlock the potential of your project. It's time to ensure your project isn't another cookie-cutter solution but truly unique and effective one.
Discover how customization can make a difference in your project's success. Let's create a solution that's as unique as your vision!
We'll tailor the application to meet your specific needs and preferences.
We will upload your website to the server and ensure it is live.

Thank You
Thank you once again for downloading Dreams Rent.
We hope you're enjoying your experience, and we kindly request that you take a
moment to share your valuable review and rating with us.